1. Introduktion
This manual provides essential instructions for the safe and efficient operation of your Renkforce PRO3 3D Printer, model RF-4318370. Please read this manual thoroughly before using the device to ensure proper setup, operation, and maintenance. Retain this manual for future reference.
2. Sikkerhedsinstruktioner
Overhold følgende sikkerhedsforanstaltninger for at forhindre personskade eller beskadigelse af printeren:
- Høj temperatur: The print nozzle and print bed reach high temperatures during operation. Avoid touching these components directly to prevent burns. Allow the printer to cool down before performing maintenance.
- Bevægelige dele: The printer contains moving parts that can cause injury. Keep hands, hair, and loose clothing away from the print head and other moving components during operation.
- Elektrisk sikkerhed: Connect the printer to a grounded power outlet. Do not operate the printer with damaged power cords or plugs. Disconnect power before cleaning or servicing.
- Ventilation: Brug printeren i et godt ventileret område, især når der udskrives med materialer, der kan afgive dampe.
- Børn og kæledyr: Hold printeren utilgængeligt for børn og kæledyr.
- Brandfarlige materialer: Do not place flammable materials near the printer during operation.
3. Pakkens indhold
Ved udpakning skal du kontrollere, at alle komponenter er til stede og ubeskadigede:
- Renkforce PRO3 3D Printer (1 unit)
- Strømkabel
- Filament Spool (starter)
- USB-kabel (til pc-forbindelse)
- Tools and Accessories (e.g., spatula, pliers, spare nozzle, SD card)
- Brugervejledning (dette dokument)
If any items are missing or damaged, contact your retailer immediately.
4. Produktet er slutview
Familiarize yourself with the main components of your Renkforce PRO3 3D Printer.

Figur 4.1: Front view of the Renkforce PRO3 3D Printer. This image displays the printer's overall design, including the enclosed print chamber, the print head mechanism, the build plate, and the integrated control panel located at the base of the unit. The filament guide tube is visible at the top.

Figur 4.2: Vinklet view of the Renkforce PRO3 3D Printer. This perspective shows the printer's black front frame and white side panels, offering a clearer view of the internal structure, including the linear rails, print head, and heated build plate. The control panel is also visible.
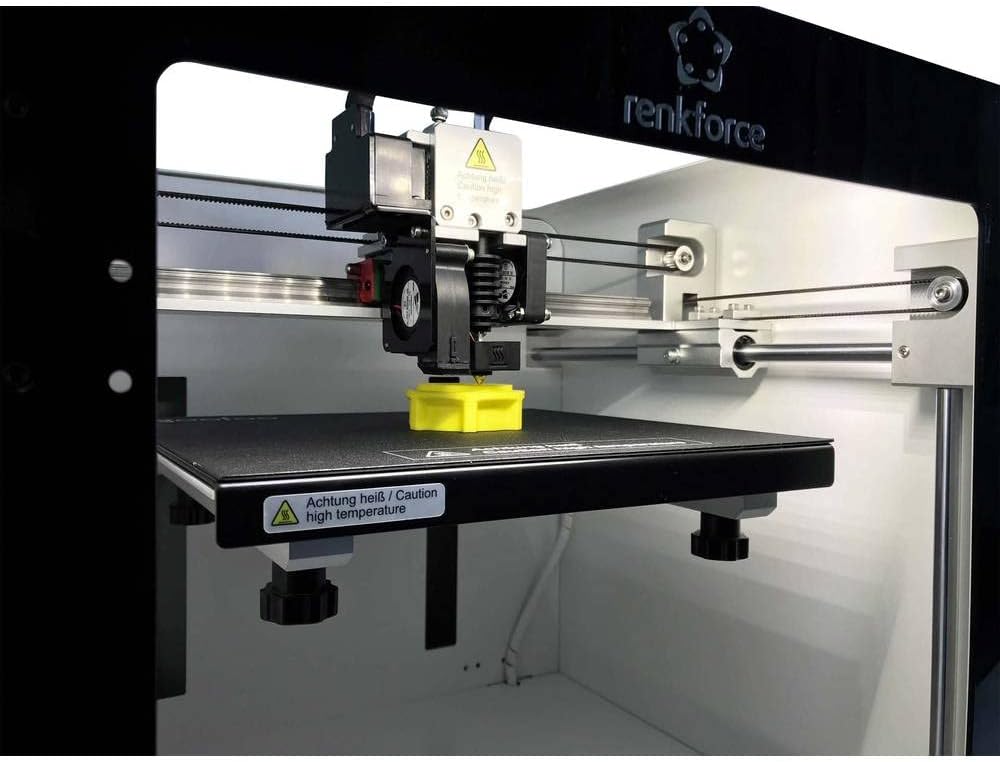
Figur 4.3: Close-up of the print head and build plate during operation. This image focuses on the extruder assembly, the heated build plate, and a small yellow 3D-printed object being created. A "Caution high temperature" warning label is visible on the build plate.
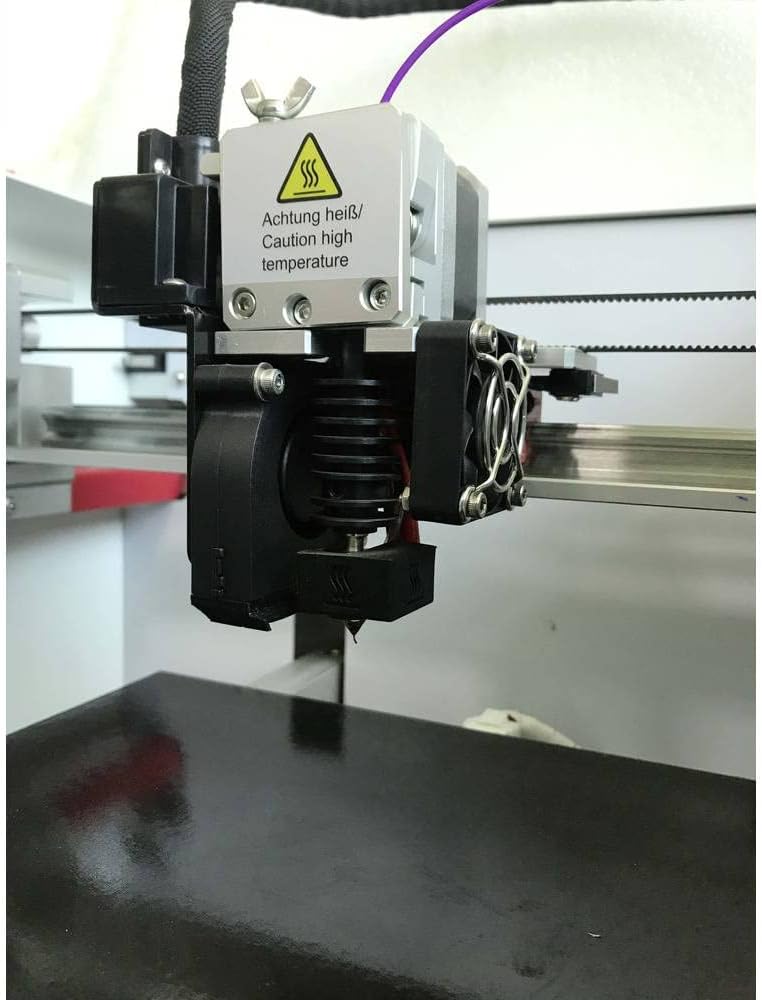
Figur 4.4: Detaljeret view of the extruder and hotend assembly. This close-up highlights the components responsible for melting and extruding filament, including the cooling fans, heat sink, and nozzle. A "Caution high temperature" warning is prominently displayed on the hotend.
5. Opsætning
Follow these steps to set up your Renkforce PRO3 3D Printer:
- Udpakning: Carefully remove the printer from its packaging. Remove all protective foam, tape, and ties.
- Placering: Placer printeren på en stabil, plan overflade i et godt ventileret område, væk fra direkte sollys og varmekilder.
- Strømtilslutning: Connect the power cable to the printer and then to a grounded electrical outlet. Do not power on yet.
- Filamentbelastning:
- Mount the filament spool onto the designated holder.
- Feed the filament through the guide tube and into the extruder mechanism.
- Follow the on-screen instructions or manual controls to preheat the nozzle and load the filament until it extrudes smoothly.
- Build Plate Leveling: Ensure the build plate is properly leveled. Refer to the printer's control panel menu for the auto-leveling function or manual leveling instructions. Proper leveling is crucial for successful prints.
- Software installation: Install the necessary 3D printing software (slicer) on your personal computer (compatible with Windows operating systems). This software converts 3D models into printable instructions (G-code).
6. Betjeningsvejledning
Once set up, you can begin your first print:
- Forbered 3D-model: Obtain or create a 3D model file (e.g., .STL, .OBJ).
- Slice the Model: Open the 3D model in your slicing software. Configure print settings such as layer height, infill, print speed, and support structures. The software will generate a G-code file.
- Overfør G-kode: Gem G-koden file to an SD card or transfer it directly to the printer via USB (if supported by your software and printer connection type, which is RF for this model).
- Start udskrivning: Insert the SD card into the printer. Navigate the printer's control panel to select the G-code file and start the print.
- Skærmudskrift: Observe the first few layers to ensure proper adhesion and extrusion. Monitor the print progress periodically.
- Fjern udskrift: Once the print is complete and the build plate has cooled, carefully remove the printed object using the provided spatula.
7. Vedligeholdelse
Regular maintenance ensures optimal performance and longevity of your printer:
- Rengør byggeplade: After each print, clean the build plate to remove any residue. Use isopropyl alcohol for best results.
- Rengøring af dyse: Periodically clean the nozzle to prevent clogs. A brass brush can be used for external cleaning, or a needle for internal clogs (when hot).
- Smør bevægelige dele: Apply a small amount of lubricant to the linear rods and lead screws every few months to ensure smooth movement.
- Tjek remme: Ensure the timing belts are properly tensioned. They should be taut but not overly tight.
- Firmwareopdateringer: Tjek producentens website for any available firmware updates to improve printer performance and add features.
8. Fejlfinding
Her er løsninger på almindelige problemer, du kan støde på:
| Problem | Mulig årsag | Løsning |
|---|---|---|
| Filament ekstruderer ikke | Tilstoppet dyse, forkert temperatur, sammenfiltret filament. | Clean the nozzle, verify print temperature settings, ensure filament spool unwinds freely. |
| Poor bed adhesion | Unleveled bed, dirty build plate, incorrect bed temperature. | Re-level the build plate, clean the surface with isopropyl alcohol, adjust bed temperature in slicer settings. |
| Lagskifte | Loose belts, print head hitting print, excessive print speed. | Check and tension belts, ensure no obstructions, reduce print speed. |
| Strengdannelse/Oozing | Incorrect retraction settings, too high nozzle temperature. | Adjust retraction distance and speed in slicer, slightly lower nozzle temperature. |
For further assistance, consult online resources or contact Renkforce customer support.
9. Specifikationer
Key technical specifications for the Renkforce PRO3 3D Printer (Model RF-4318370):
- Mærke: Renkforce
- Modelnummer: RF-4318370
- Farve: Sort/Hvid
- Kompatibelt operativsystem: Windows
- Forbindelse teknologi: RF (Radio Frequency, likely for wireless communication or specific interface)
- Kompatible enheder: Personlig computer
- Kompatible materialer: Polylactic Acid (PLA), ABS (Acrylonitrile Butadiene Styrene)
- Produktmål (L x B x H): 54 cm x 54 cm x 58 cm
- Varens vægt: 22.2 kilo
10. Garanti og support
Specific warranty information for the Renkforce PRO3 3D Printer is not available in this document. Please refer to the warranty card included with your product packaging or visit the official Renkforce webhjemmeside for detaljerede garantivilkår.
For technical support, troubleshooting beyond this manual, or spare parts inquiries, please contact Renkforce customer service through their official channels.


