1. Introduktion
This manual provides essential instructions for the safe operation, setup, maintenance, and troubleshooting of your CROWN CT31015 Spray Gun with Separate Motor. Please read this manual thoroughly before using the product to ensure proper function and to prevent injury or damage. Keep this manual for future reference.

Image 1.1: The CROWN CT31015 Spray Gun with its separate motor unit, hose, and spray gun assembly.
2. Sikkerhedsinstruktioner
Always observe the following safety precautions to reduce the risk of electric shock, fire, or serious injury.
- Sikkerhed på arbejdsområdet: Hold arbejdsområdet rent og godt oplyst. Rodede eller mørke områder indbyder til ulykker. Brug ikke elværktøj i eksplosive atmosfærer, f.eks. i nærheden af brandfarlige væsker, gasser eller støv.
- Elektrisk sikkerhed: Elværktøjsstik skal passe til stikkontakten. Modificer aldrig stikket på nogen måde. Misbrug ikke ledningen. Brug aldrig ledningen til at bære, trække eller tage stikket ud af elværktøjet. Hold ledningen væk fra varme, olie, skarpe kanter eller bevægelige dele.
- Personlig sikkerhed: Always wear appropriate personal protective equipment, including safety glasses, a respirator mask, and gloves. Avoid wearing loose clothing or jewelry. Secure long hair.
- Kemikaliesikkerhed: Always refer to the paint or material manufacturer's safety data sheet (SDS) for specific handling, ventilation, and disposal instructions. Ensure adequate ventilation to prevent inhalation of fumes.
- Brug og pleje af værktøj: Tving ikke elværktøjet. Brug det korrekte elværktøj til din anvendelse. Tag stikket ud af strømkilden, før du foretager justeringer, skifter tilbehør eller opbevarer elværktøj.
- Opretholdelse: Få dit elværktøj efterset af en kvalificeret reparatør, der kun bruger identiske reservedele. Dette vil sikre, at elværktøjets sikkerhed opretholdes.
3. Pakkens indhold
Verify that all items listed below are present and undamaged upon opening the package.
- Sprøjtepistol
- Brugervejledning (dette dokument)
- Luftslange
- Måletragt
- Rensestang
- Rengøringsbørste
- Nozzle: 2 pieces (sizes 2/2.5/3 mm, specific sizes may vary)
- Seal ring: 2 Pieces
- Special wrench for spray tip
- Hose holder: 2 pieces

Billede 3.1: View of the CROWN CT31015 spray gun and motor unit, showing the main components.
4. Tekniske specifikationer
| Feature | Specifikation |
|---|---|
| Model | CT31015 |
| Nominel effekt | 1200 W |
| Amperage (at 220-230 V) | 4.5 A |
| Flowhastighed | 1100 ml/min |
| Maximum Spraying Pressure | 0.1 - 0.3 bar |
| Maksimal viskositet | 150 DIN-er |
| Dyse diameter | 2 / 2.5 / 3 mm |
| Reservoirkapacitet | 900 ml |
| Vægt | 5.1 kg |
| Produktdimensioner | 31 x 39.2 x 52.2 cm |
| Strømkilde | Elektrisk med ledning |
5. Opsætning og klargøring
5.1. Montering
- Tilslut luftslange: Attach one end of the air hose securely to the air outlet on the motor unit and the other end to the air inlet on the spray gun handle. Ensure connections are tight to prevent air leaks.
- Attach Spray Gun to Holder: Place the spray gun into the designated hose holder on the motor unit when not in use or during preparation.
- Vælg dyse: Choose the appropriate nozzle (2mm, 2.5mm, or 3mm) based on the viscosity of the material to be sprayed. Use the special wrench to securely attach the selected nozzle to the spray gun.
- Fastgør reservoir: Screw the paint reservoir firmly onto the bottom of the spray gun assembly.

Image 5.1: The CROWN CT31015 spray gun fully assembled with the motor unit, hose, and paint reservoir.
5.2. Materiale forberedelse
- Fortynding: Most paints and coatings require dilution before spraying. Use the measuring funnel to determine the correct viscosity. Refer to the paint manufacturer's instructions for recommended dilution ratios.
- Filtrering: Always filter the paint or material through a fine mesh strainer or paint filter to remove any lumps or debris that could clog the nozzle.
- Filling Reservoir: Carefully pour the prepared material into the 900 ml reservoir. Do not overfill.
6. Betjeningsvejledning
6.1. Tænder
- Ensure the spray gun is properly assembled and the reservoir is filled.
- Plug the power cord into a suitable electrical outlet (220-230 V).
- Turn on the motor unit using the power switch. The motor will start, providing air pressure to the spray gun.
6.2. Sprøjteteknik
- Testspray: Before applying to your project, always perform a test spray on a piece of scrap material to check the spray pattern and material flow. Adjust as necessary.
- Afstand: Hold sprøjtepistolen cirka 15-25 cm fra overfladen.
- Bevægelse: Move the spray gun in smooth, even strokes, keeping it perpendicular to the surface. Overlap each pass by about 50% to ensure even coverage.
- Triggerkontrol: Press the trigger fully to start spraying and release it at the end of each stroke.
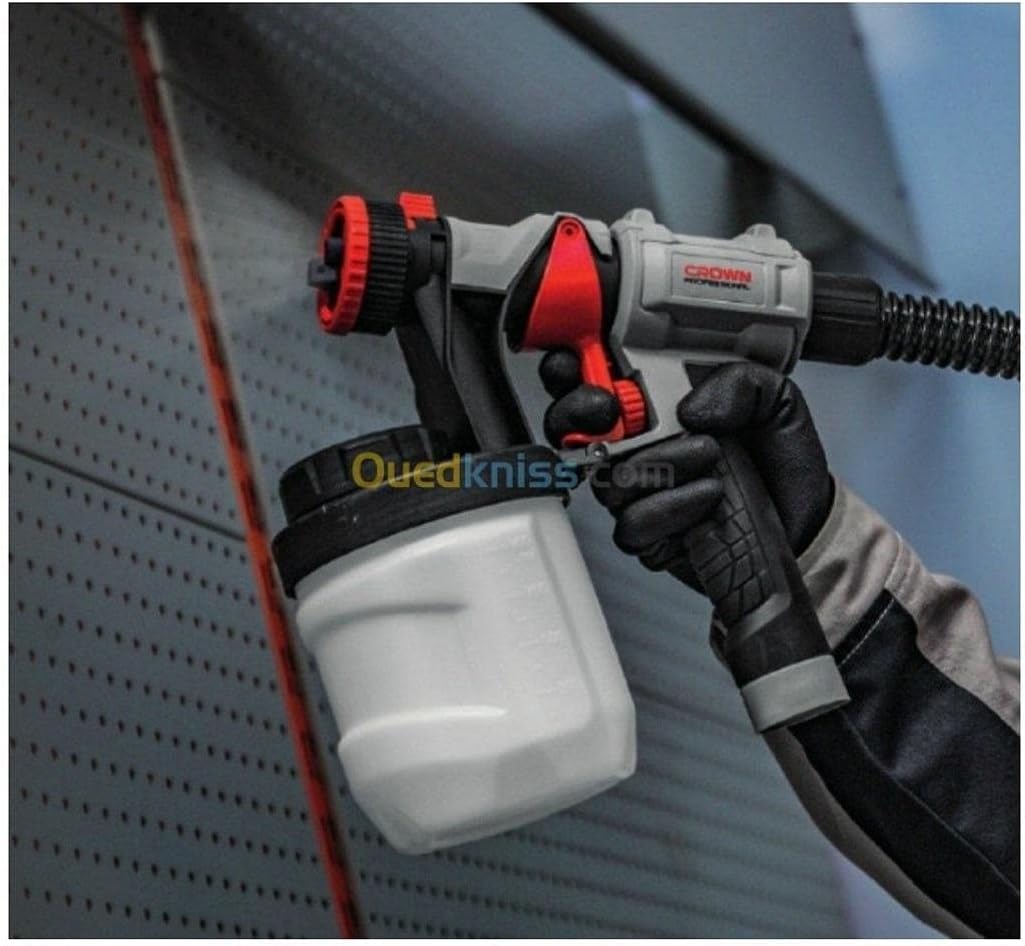
Image 6.1: An individual demonstrating the use of the CROWN CT31015 spray gun for applying paint to a surface.

Billede 6.2: En detaljeret view of the CROWN CT31015 spray gun, highlighting the nozzle and trigger mechanism.
7. Vedligeholdelse og rengøring
Proper cleaning after each use is crucial for maintaining the performance and longevity of your spray gun.
- Tom reservoir: Disconnect the power and empty any remaining material from the reservoir. Dispose of paint responsibly according to local regulations.
- Indledende skylning: Fill the reservoir with an appropriate cleaning solution (water for latex paints, mineral spirits for oil-based paints). Spray the cleaning solution through the gun until it runs clear.
- Skille ad: Carefully disassemble the spray gun components: reservoir, nozzle, air cap, and fluid needle.
- Grundig rengøring: Use the provided cleaning brush and cleaning rod to remove all paint residue from the disassembled parts. Pay close attention to the nozzle and air cap.
- Skyl og tør: Rinse all parts with clean water or appropriate solvent and allow them to dry completely before reassembly.
- Opbevaring: Store the clean, dry spray gun and motor unit in a safe, dry place, away from extreme temperatures.
8. Fejlfinding
Se dette afsnit for løsninger på almindelige driftsproblemer.
| Problem | Mulig årsag | Løsning |
|---|---|---|
| No Spray or Weak Spray | Clogged nozzle or air cap Insufficient material in reservoir Air leaks in hose connections Materiale for tykt | Rens dyse og lufthætte Refill reservoir Spænd alle slangeforbindelser Dilute material to recommended viscosity |
| Ujævnt sprøjtemønster | Delvist tilstoppet dyse Incorrect spray gun distance Inconsistent movement | Rengør dysen grundigt Maintain consistent distance (6-10 inches) Practice smooth, even strokes |
| Motor starter ikke | Ingen strømforsyning Faulty power cord/switch | Kontroller stikkontakten og tilslutningerne Kontakt kvalificeret servicepersonale |
| Overdreven overspray | Spray gun too far from surface Material too thin | Reduce distance to surface Adjust dilution or use a smaller nozzle |
9. Garanti og support
For warranty information, technical support, or to inquire about replacement parts, please contact Crown customer service or refer to the warranty card included with your product. Keep your purchase receipt as proof of purchase for warranty claims.
You may also visit the official Crown website for additional resources and contact details: www.crown-tools.com


