1. Introduktion
This manual provides essential information for the proper setup, operation, and maintenance of your KODAK Mini Shot 2 Retro 4PASS 2-in-1 Instant Digital Camera and Photo Printer. Please read it thoroughly before using the device to ensure optimal performance and longevity.
1.1 Nøglefunktioner
- Instant Camera + Photo Printer: The KODAK Mini Shot 2 Retro functions as both a digital camera and a built-in photo printer. You can capture images and choose to print them immediately or discard them.
- Smartphone tilslutning: Print 2.1x3.4 inch photos directly from your mobile device's gallery via Bluetooth. Compatible with Apple iPhone, iPad, and Android devices.
- 4PASS Technology: Utilizes 4PASS technology for high-quality, laminated photos that are protected against fingerprints and water, designed to last over 100 years.
- Two Photo Types: Offers options to print both bordered and borderless pictures. Bordered photos allow space for notes, while borderless photos provide a larger image area.
- KODAK Photo Printer Application: Download the dedicated app for additional features such as filters, frames, and editing tools to enhance your photos before printing.
2. Opsætning
2.1 Hvad er der i æsken
Bekræft at alle komponenter er til stede i din pakke:
- KODAK Mini Shot 2 Retro Camera
- Initial Photo Paper Cartridge (8 sheets)
- Additional Photo Paper Sheets (60 sheets)
- USB-C type ladekabel
- Håndledsrem
- Brugervejledning

Image: Contents of the KODAK Mini Shot 2 Retro package.
2.2 Opladning af enheden
Before first use, fully charge your KODAK Mini Shot 2 Retro using the provided USB-C cable. Connect the cable to the device's charging port and a compatible USB power source. The charging indicator light will show the charging status.
2.3 Ilægning af fotopapir
To load photo paper into your device:
- Open the paper cartridge compartment on the side of the camera.
- Insert a new KODAK 2.1"x3.4" Instant Print Cartridge into the compartment. Ensure it clicks into place.
- Luk dækslet forsvarligt.

Image: Instructions for inserting the photo paper cartridge.
3. Betjeningsvejledning
3.1 Taking Photos with the Camera
The KODAK Mini Shot 2 Retro allows you to capture digital images and preview them before printing.
- Tænd for kameraet ved hjælp af tænd/sluk-knappen.
- Indram dit skud ved hjælp af viewfinder or the small LCD screen on the back.
- Tryk på udløserknappen for at tage et billede.
- Review the image on the LCD screen. You can choose to print, delete, or retake the photo.

Image: Previewing a photo on the camera's screen before printing.
3.2 Printing Photos from the Camera
After capturing an image, you can print it directly from the camera:
- Efter vedrviewing your photo on the LCD screen, select the print option.
- The camera will use 4PASS technology to print the image in layers (Yellow, Magenta, Cyan, and a protective laminate).
- The printed photo will emerge from the side slot.

Image: The 4PASS printing process in action.
3.3 Printing Photos from a Smartphone
You can also print photos stored on your smartphone using the KODAK Photo Printer application.
- Download and install the KODAK Photo Printer app from your device's app store.
- Ensure Bluetooth is enabled on your smartphone and the KODAK Mini Shot 2 Retro.
- Open the app and connect to your camera via Bluetooth.
- Select a photo from your phone's gallery within the app.
- Use the app's editing features (filters, frames, etc.) if desired.
- Initiate printing from the app. The photo will be sent to the camera and printed.
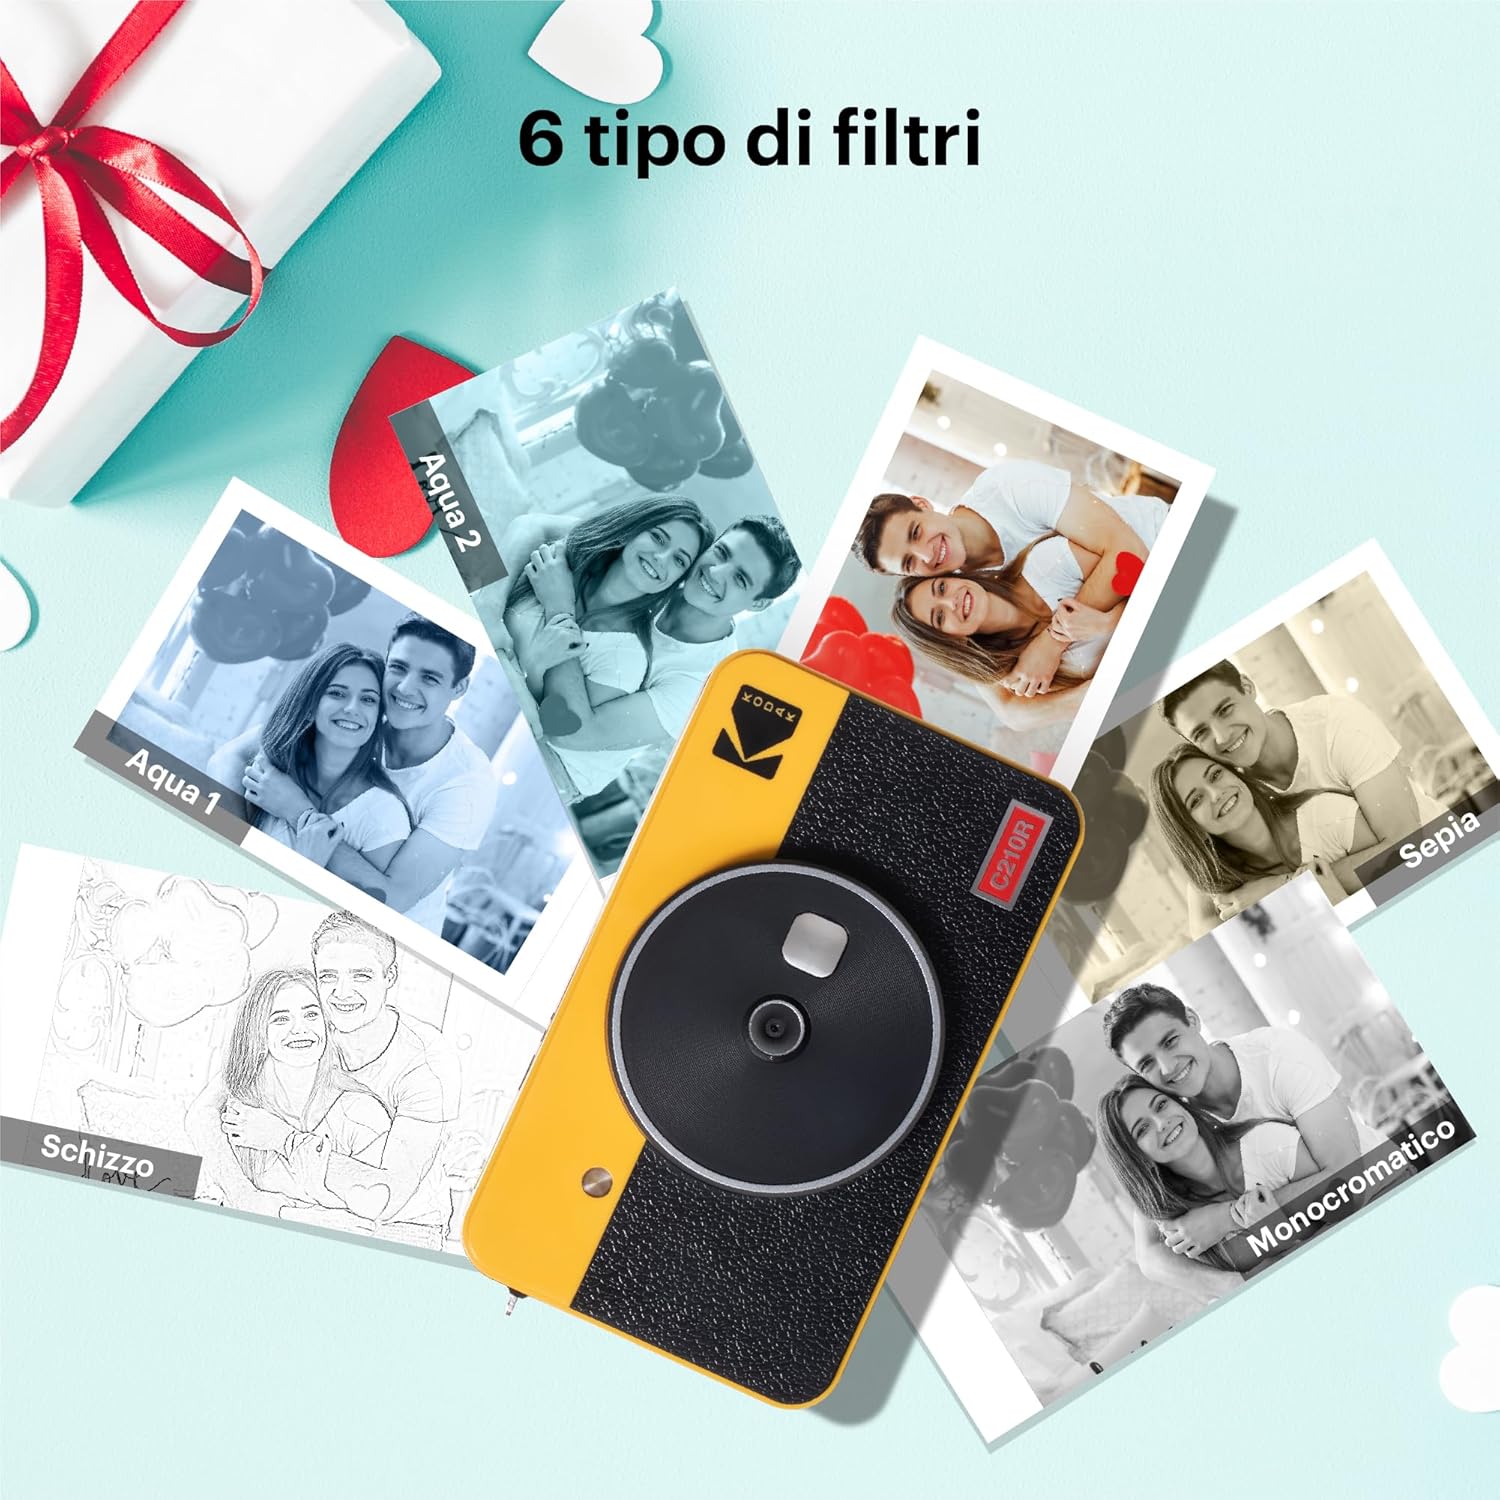
Image: Printing a photo from a smartphone using the KODAK Photo Printer app.
3.4 Photo Types: Bordered and Borderless
The camera supports two types of photo prints:
- Bordered: Prints with a white border around the image, ideal for writing notes or dates.
- Borderless: Prints the image to the edge of the paper, providing a larger visual area.

Billede: Eksamples of bordered and borderless prints.
3.5 Officielle produktvideoer
Video: En overview of the KODAK Mini Shot 2 Retro camera and its features, including instant printing and smartphone connectivity.
Video: A demonstration of the KODAK Mini Shot 2 Retro camera and printer in use, highlighting its instant photo capabilities.
4. Vedligeholdelse
4.1 Rengøring af enheden
To maintain optimal performance, keep your camera and printer clean. Use a soft, dry cloth to wipe the exterior. Avoid using liquid cleaners or solvents, as they may damage the device.
4.2 Opbevaring
Store the KODAK Mini Shot 2 Retro in a cool, dry place away from direct sunlight and extreme temperatures. When not in use for extended periods, ensure the device is fully charged before storage and periodically recharge it to preserve battery life.
5. Fejlfinding
If you encounter issues with your KODAK Mini Shot 2 Retro, refer to the following common solutions:
- Enheden tænder ikke: Sørg for, at batteriet er opladet. Tilslut enheden til en strømkilde med USB-C-kablet.
- Billeder udskrives ikke: Check if the paper cartridge is correctly inserted and contains enough photo paper. Ensure the device is not low on battery.
- Dårlig udskriftskvalitet: Verify that you are using genuine KODAK 4PASS photo paper. Ensure the lens is clean and free of smudges.
- Cannot connect to smartphone: Make sure Bluetooth is enabled on both devices and that the KODAK Photo Printer app is open and attempting to connect. Restart both devices if necessary.
- App not functioning correctly: Ensure your KODAK Photo Printer app is updated to the latest version. Try restarting the app or reinstalling it.
For further assistance, consult the KODAK Photo Printer application or the official KODAK support webwebsted.
6. Specifikationer
| Feature | Detalje |
|---|---|
| Modelnavn | Kodak Mini Shot 2 Retro |
| Varemodelnummer | CAR-C210RY |
| Mærke | KODAK |
| Fabrikant | Prinics Co., Ltd. |
| Produktdimensioner | 6.42 x 6.06 x 4.57 tommer |
| Varens vægt | 1.54 pund (700 gram) |
| Batterier | 1 Lithium Metal batteri påkrævet (inkluderet) |
| Speciel funktion | Indbygget Flash |
| Filmformattype | Instant (2.1 x 3.4 inches) |
| Kompatible enheder | Smartphone |
| Maks lukkerhastighed | 1s |
7. Garanti og support
For detailed warranty information, please refer to the documentation included with your product or visit the official KODAK Photo Printer website. For technical support, troubleshooting, and frequently asked questions, utilize the KODAK Photo Printer application or contact KODAK customer service directly.


