1. Introduktion
This manual provides detailed instructions for the installation and operation of your MPC Plug N Play Remote Start System. This system allows you to remotely start your vehicle using your existing factory key fobs, providing convenience and comfort. Please read all instructions carefully before beginning installation or operation.
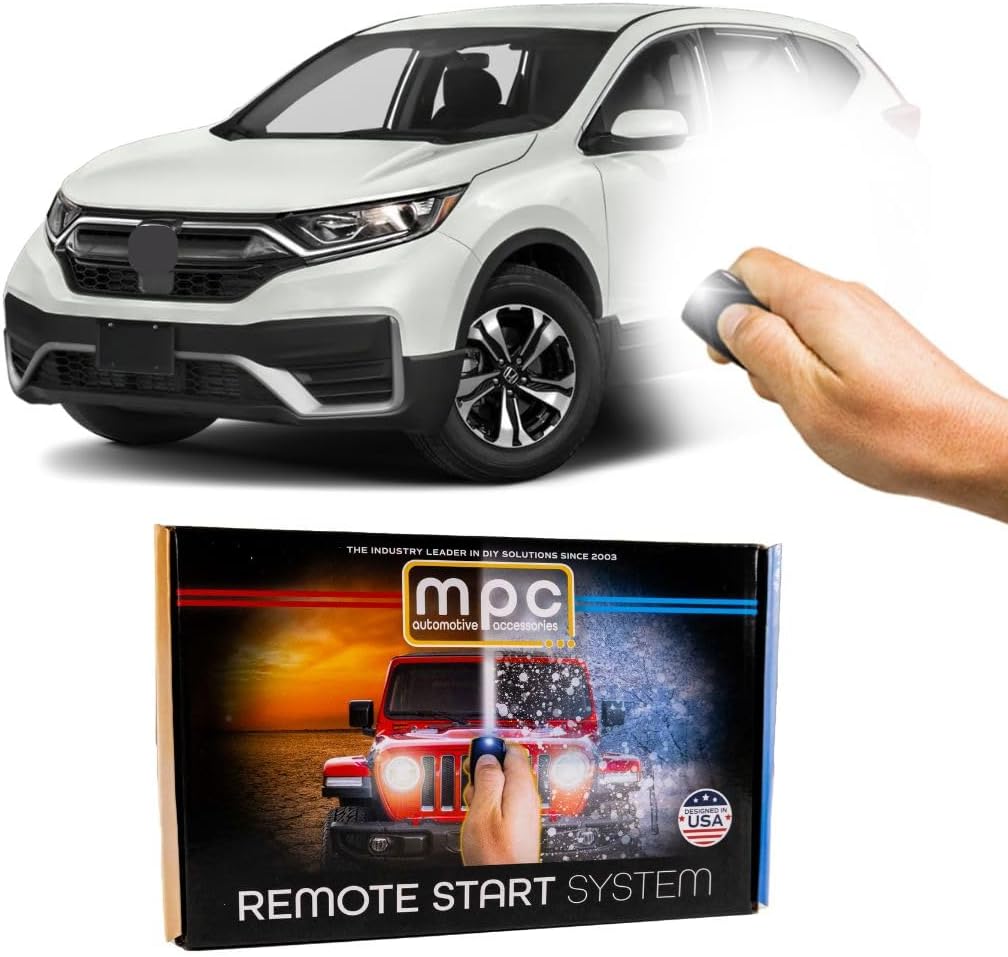
The MPC Plug N Play Remote Start System, designed for Honda CR-V models, allows for convenient remote engine starting.
2. Køretøjskompatibilitet
This MPC Remote Start System (Model B-4905-252) is specifically designed for:
- Køretøj: 2017-2022 Honda CR-V
- Antændelsestype: Push-to-Start (vehicles with an engine start/stop button)
- Smitte: KUN automatgearkasse
- Motortype: Gas Engine (Not for Hybrid models)
Important: This system is not compatible with vehicles that use a traditional key-start ignition or hybrid powertrains.

This remote start system is exclusively compatible with vehicles equipped with a push-to-start ignition and a gas engine. It is not suitable for hybrid models or vehicles with traditional key-start ignitions.
3. Hvad er inkluderet
Your MPC Plug N Play Remote Start System package includes:
- All-in-one remote starter data interface module
- Vehicle-specific T-Harness for plug-in connections
- Flash Link Updater tool (requires Windows PC with USB port for key programming)
- Zip ties for securing the module and wiring
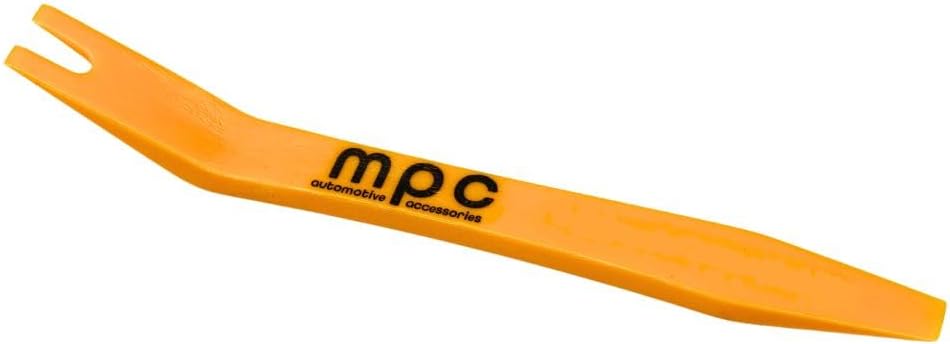
- Plastic pry tool for interior panel removal
The system is designed to utilize your existing factory key fobs for remote start functionality.
4. Opsætning og installation
The MPC Plug N Play system features a T-Harness for simplified installation, significantly reducing the need for extensive wiring. Basic knowledge of car electronics is recommended. A Windows PC with a USB port is required to complete the setup and key programming using the Flash Link Updater tool.
Generelle installationstrin:
- Klargør køretøjet: Sørg for, at køretøjet er slukket, og at parkeringsbremsen er aktiveret.
- Adgang til ratstamme: Carefully remove the steering column covers to access the vehicle's wiring harnesses. A plastic pry tool (included) can assist in this process.
- Find stik: Identify the specific vehicle connectors behind the steering column that the T-Harness will interface with.
- Connect T-sele: Disconnect the factory connectors and insert the T-Harness in-line. Ensure all connections are secure.
- Program Module: Use the Flash Link Updater tool and a Windows PC to program the remote start module according to the specific instructions provided with your kit.
- Secure Module and Wiring: Route the T-Harness and module neatly, securing them with the provided zip ties to prevent interference with vehicle operation.
- Saml igen: Reinstall the steering column covers and any other panels removed during installation.
Installationsværktøjer:

Plast Pry Tool
Lynlåsebånd
Installationsvideoguide:
For a visual guide on the installation process, please refer to the video below. While the video may feature a different Honda model, the general steps and connector locations are similar for compatible Honda vehicles.
This video provides a detailed guide for installing the remote start system in compatible Honda and Acura vehicles. The process shown is representative of the installation for your Honda CR-V.
5. Betjeningsvejledning
This remote start system is designed to work seamlessly with your vehicle's existing factory key fobs. No additional remotes are required.
Sådan fjernstarter du dit køretøj:
- Sørg for, at dit køretøj er låst.
- Press the "Lock" button on your factory key fob three (3) times in quick succession.
- The vehicle's engine will start, and the parking lights will illuminate to indicate successful remote start.
To Turn Off Remote Start:
- Press the "Lock" button on your factory key fob three (3) times again.
- Alternatively, unlock the vehicle and open a door, or insert the key and turn the ignition to the ON position.

The system integrates with your vehicle's existing factory key fobs, eliminating the need for additional remotes.
6. Vedligeholdelse
The MPC Remote Start System is designed for long-term reliability and typically requires no routine maintenance. Ensure all connections remain secure and free from moisture or physical damage. If you notice any unusual behavior, refer to the troubleshooting section or contact technical support.
7. Fejlfinding
If you encounter issues with your remote start system, consider the following:
- Systemet starter ikke: Verify that your vehicle's battery is charged and that all doors, hood, and trunk are securely closed. Ensure the parking brake is engaged.
- Remote Fob Not Responding: Check the battery in your factory key fob. Ensure you are within range of the vehicle.
- Installationsproblemer: Double-check all T-Harness connections for proper seating. Confirm the module was programmed correctly using the Flash Link Updater tool.
- Køretøjskompatibilitet: Reconfirm that your vehicle meets all compatibility requirements (Push-to-Start, Gas Engine, Automatic Transmission).
For persistent issues, please contact MPC Technical Support for assistance.
8. Specifikationer
- Varens vægt: 3 pund
- Produktdimensioner: 8 x 5 x 2 tommer
- Varemodelnummer: B-4905-252
- Fabrikant: MPC-produkter
- Kompatibilitet: 2017-2022 Honda CR-V (Push-to-Start, Gas Engine, Automatic Transmission)
9. Garantioplysninger
MPC fjernstartere og alarmer har en begrænset livstidsgaranti fra producenten. Fysisk skade eller skade på grund af forkert installation vil ugyldiggøre producentens garanti.
- Første år: Kontakt MPC ved garantispørgsmål. Produktet skal returneres for kundens regning i forbindelse med garantiservice.
- Efter første år: Garantiproblemer skal håndteres direkte gennem producenten. Der kræves en kvittering fra det oprindelige køb.
The product is warranted to the original purchaser, when properly installed and under normal conditions of use, to be free from defects in workmanship and materials for a period of one year from the provided date of purchase. This warranty does not cover abuse, operation inconsistent with the product's design, or damage resulting from exposure to the elements. If a defect is considered "under warranty," MyPushcart (MPC) will, at its option, repair or replace the product free of charge. MyPushcart is not liable for any installation charges, loss, or damage incurred in the replacement or repair of any warranted product.
10. Teknisk support
MPC offers premier technical support based in Tucson, AZ, United States. Several different methods of support are available. QR code instructions are included with your product to ensure access to the most up-to-date information and support resources.
For assistance, please refer to the contact information provided with your product packaging or visit the official MPC webwebsted.

MPC provides expert technical support to assist with any questions or issues.


