1. Introduktion
This manual provides detailed instructions for the installation, operation, and maintenance of your Emtek 220304 Modern Rectangular Flush Door Pull. Designed for sliding doors, this flush pull offers a sleek, integrated look and reliable functionality. Please read these instructions carefully before installation and retain them for future reference.
Produktmodel: Emtek 220304
Tiltænkt brug: This product is designed for use as a flush pull handle on sliding doors, providing a recessed grip for opening and closing.
2. Pakkens indhold
Kontroller, at alle komponenter er til stede, før installationen påbegyndes:
- 1 x Emtek 220304 Modern Rectangular Flush Door Pull
- Mounting Screws (quantity may vary based on specific model)
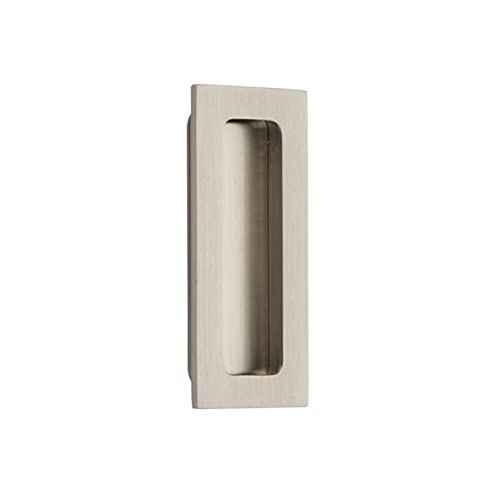
Image 1: Emtek 220304 Modern Rectangular Flush Door Pull. This image displays the Emtek 220304 Modern Rectangular Flush Door Pull. It features a sleek, rectangular design with a recessed handle, ideal for sliding doors. The finish appears to be satin nickel, providing a contemporary look.
3. Specifikationer
| Feature | Detalje |
|---|---|
| Modelnummer | 220304US15 |
| Design | Modern Rectangular Flush Pull |
| Materiale | Massiv messing |
| Slutte | Satin Nickel (US15) |
| Dimensioner (samlet) | Approximately 1-3/4" x 4" (44.45mm x 101.6mm) |
| Varens vægt | 0.18 kilogram (ca. 6.4 ounces) |
| Håndorientering | Ambidekstrøs |
| Inkluderede komponenter | Flush Pull, Mounting Screws |
4. Installationsvejledning
Professional installation is recommended. Ensure you have the necessary tools before starting (e.g., screwdriver, measuring tape, pencil, drill, appropriate drill bits).
- Forbered døren: Identify the desired location for the flush pull on your sliding door. Mark the outline of the flush pull accurately on the door surface.
- Rout the Mortise: Using a router or chisel, carefully create a mortise (recessed area) in the door panel that matches the dimensions of the flush pull. The depth of the mortise should allow the pull to sit flush with the door surface.
- Bor pilothuller: Once the mortise is prepared, position the flush pull within the recess. Mark the locations for the mounting screws. Remove the pull and drill pilot holes for the screws, ensuring they are the correct size to prevent wood splitting.
- Secure the Flush Pull: Place the flush pull back into the mortise. Align the screw holes and secure the pull using the provided mounting screws. Do not overtighten the screws, as this can damage the door or the pull.
- Test drift: After installation, test the sliding door to ensure the flush pull does not interfere with its movement and provides a comfortable grip.
Note: Specific door types and thicknesses may require adjustments to these general instructions. Always refer to any door manufacturer guidelines for routing and drilling.
5. Betjening
The Emtek 220304 Flush Door Pull is designed for simple and intuitive operation. To open or close your sliding door, place your fingers into the recessed area of the pull and apply gentle force in the desired direction of movement.
6. Pleje og vedligeholdelse
To maintain the finish and functionality of your Emtek flush door pull, follow these guidelines:
- Rensning: Rengør overfladen regelmæssigt med en blød, damp klud. Til genstridige pletter kan en mild sæbeopløsning bruges, efterfulgt af aftørring med en ren, tør klud.
- Undgå barske kemikalier: Do not use abrasive cleaners, solvents, or chemical-based polishes, as these can damage the finish.
- Inspektion: Periodically check the mounting screws for tightness. If they become loose, gently tighten them to ensure the pull remains securely attached.
7. Fejlfinding
If you encounter issues with your flush door pull, consider the following common solutions:
- Pull feels loose: Check the mounting screws and tighten them if necessary. Ensure the mortise was cut to the correct dimensions.
- Døren glider ikke jævnt: This is typically related to the door's track or rollers, not the flush pull itself. Inspect the door's sliding mechanism for obstructions or damage.
- Finish discoloration: Ensure you are using only mild cleaning agents and avoiding harsh chemicals. Environmental factors can also affect finishes over time.
If problems persist, contact Emtek customer support or a qualified professional.
8. Garanti og support
Emtek products are manufactured to high standards and are backed by a limited warranty. For specific warranty details, please refer to the warranty card included with your purchase or visit the official Emtek webwebsted.
For technical assistance, replacement parts, or further inquiries, please contact Emtek Customer Support:
- Webwebsted: www.emtek.com
- Kontaktoplysninger: Refer to the "Contact Us" section on the Emtek webwebsted for telefonnumre og e-mailsupport.


