Indledning
This manual provides detailed instructions for the installation, operation, and maintenance of your Eogifee Universal 53T Ceiling Fan Remote Control Kit. This kit is designed to provide convenient control over your ceiling fan's speed and light functions. Please read this manual thoroughly before installation and use to ensure proper functionality and safety.
The kit includes a remote control transmitter and a receiver unit, compatible with most regular ceiling fans, including those from Hampton Bay, Harbor Breeze, and Hunter.
Vigtige sikkerhedsoplysninger
- Elektrisk fare: Installation should only be performed by a qualified electrician or a person with experience in electrical wiring. Always turn off power at the circuit breaker before beginning installation.
- Sørg for, at alle ledningsforbindelser er sikre og overholder lokale el-forskrifter.
- Do not use this product with wall-mounted fans or exhaust-type fans. It is designed for downrod style ceiling fans.
- This remote control kit is compatible with incandescent light bulbs and dimmable LED/CFL lamps. Other LED/CFL lamps only support ON/OFF function.
- Hold fjernbetjeningen væk fra vand og for høj luftfugtighed.
Pakkens indhold
Kontroller, at alle komponenter er til stede, før du fortsætter installationen:
- Fjernbetjeningssender
- Modtagerenhed
- Wall Mount Holder for Remote Control
- Wire Nuts (typically 5-6 pieces)
- Brugervejledning (dette dokument)

Image: Eogifee Universal Ceiling Fan Remote Control Kit showing the remote transmitter, receiver unit, and wire nuts.
Specifikationer
| Feature | Detalje |
|---|---|
| Modelnummer | 750466180678 |
| Produktdimensioner | 12.7 x 7.62 x 3.81 cm (modtager) |
| Varens vægt | 190 gram |
| Forbindelsesteknologi | Radiofrekvens (RF) |
| Antal knapper | 5 (HI, MED, LOW, OFF, Light ON/OFF) |
| Maksimal rækkevidde | 10 meter |
| Kompatible enheder | Ceiling Fans (downrod style) |
| Light Compatibility | Incandescent, Dimmable LED/CFL (ON/OFF only for non-dimmable LED/CFL) |

Image: Compatibility chart illustrating suitable fan types (downrod style) and light bulb types (incandescent, dimmable LED/CFL) for the remote control kit.

Image: Diagram showing the compact dimensions of the Eogifee receiver unit, measuring approximately 3.88 inches in length, 2.05 inches in width, and 0.95 inches in depth.
Opsætning og installation
1. Strømafbrydelse
Before starting any electrical work, ensure the power supply to the ceiling fan is completely turned off at the circuit breaker. Verify power is off using a voltage tester.
2. Accessing Fan Wiring
Carefully lower the ceiling fan canopy to expose the wiring connections. Note the existing wiring configuration, especially the connections to the fan motor and light kit.
3. Setting Dip Switches (Frequency Matching)
Both the remote control transmitter and the receiver unit have a set of DIP switches. These switches must be set to the exact same pattern for the remote and receiver to communicate. If replacing an existing remote, match the new remote's DIP switches to the pattern of your old remote or the existing receiver.
If installing a new system or if you have multiple ceiling fans in your house, set a unique DIP switch pattern for each fan to prevent interference. Ensure the pattern is different from any neighboring fan's remote to avoid unintended operation.
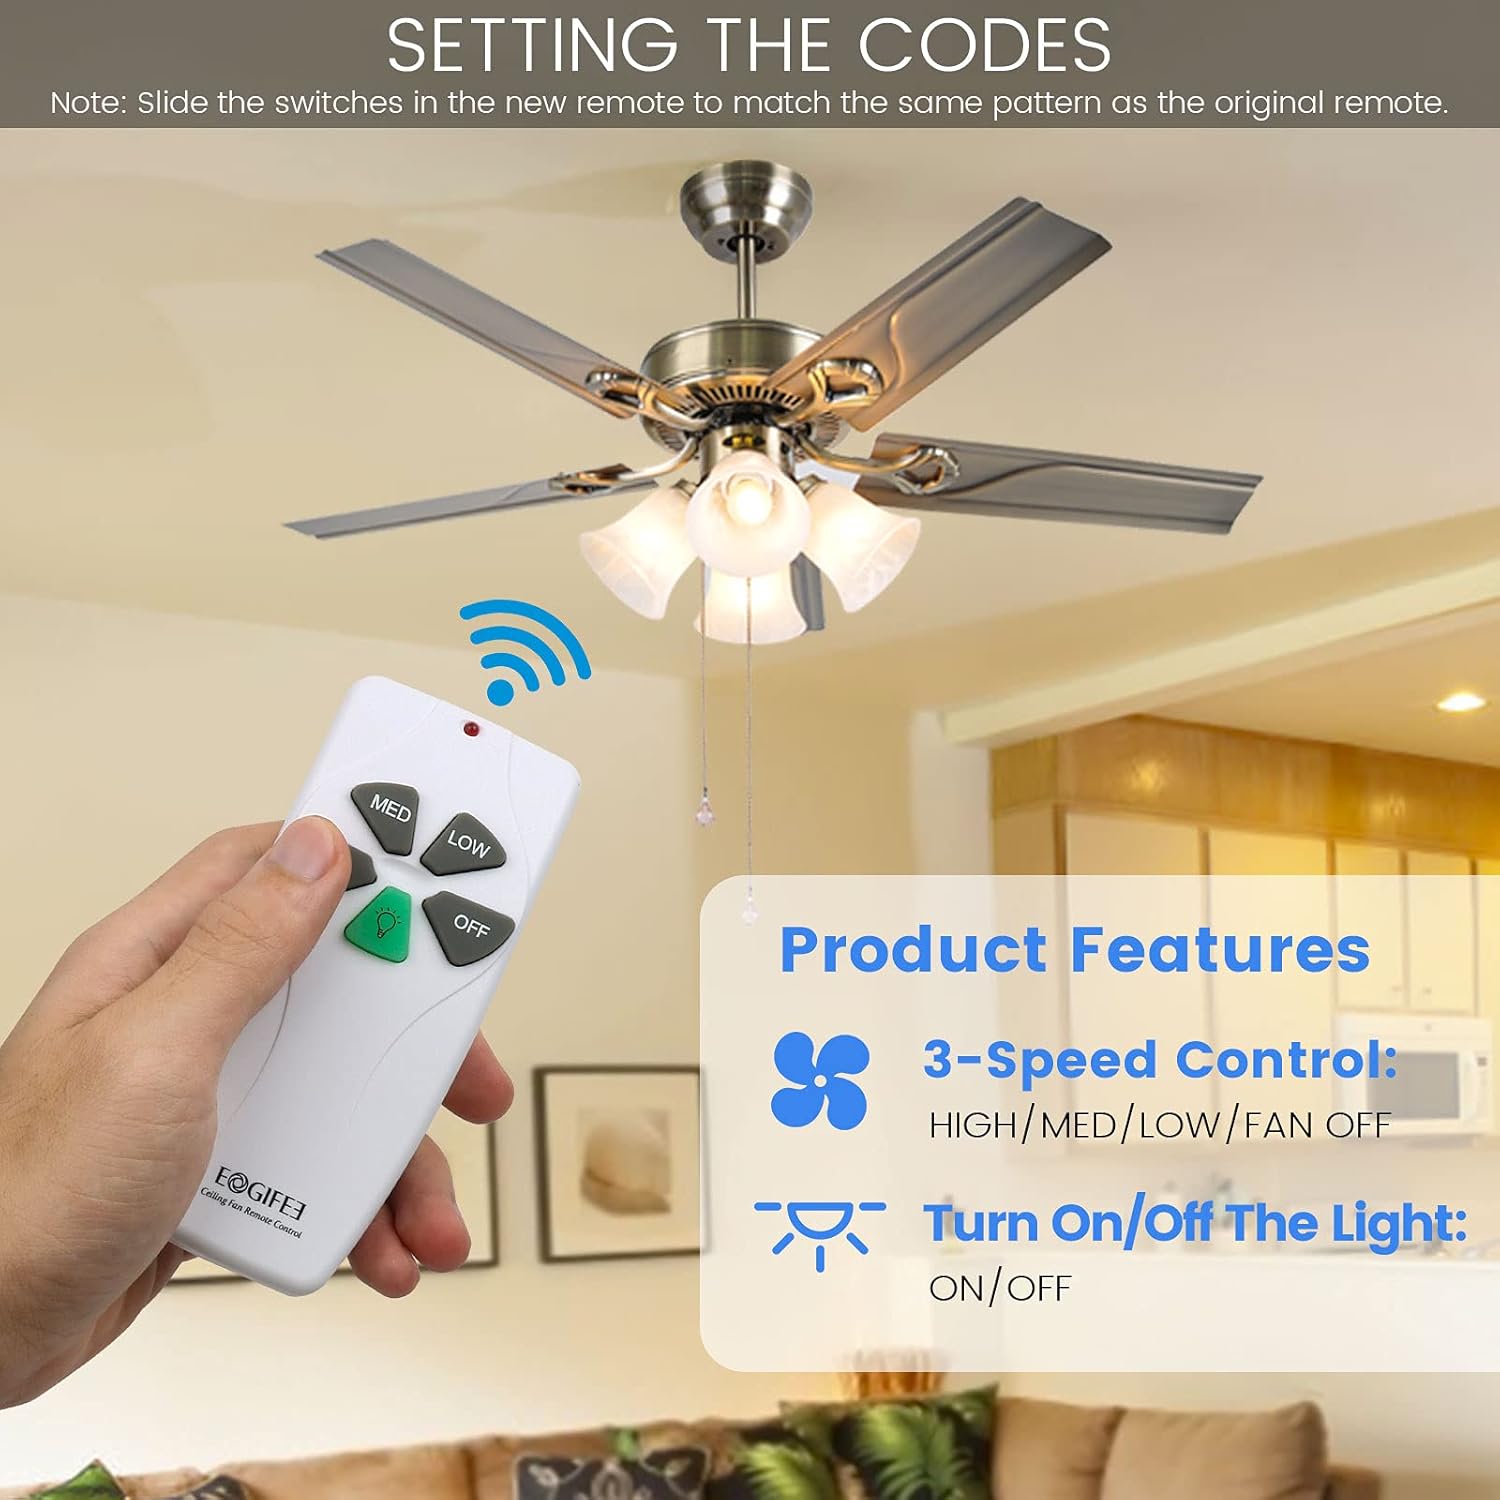
Image: Illustration demonstrating how to set the DIP switches on both the remote control and the receiver unit to match for proper communication.

Image: Diagram showing the importance of setting different DIP switch patterns for multiple ceiling fans in close proximity to prevent cross-interference.
4. Tilslutning af modtageren
Connect the receiver unit into the ceiling fan's wiring. The receiver is typically installed inside the fan's canopy. Follow the wiring diagram below:
- Black Wire (AC IN L): Connect to the live (hot) wire from the ceiling junction box.
- White Wire (AC IN N): Connect to the neutral wire from the ceiling junction box.
- Blue Wire (TO LIGHT): Connect to the light kit's live wire.
- Black Wire (TO FAN): Connect to the fan motor's live wire.
- White Wire (COMMON): Connect to the neutral wire of both the fan motor and the light kit.
Use the provided wire nuts to secure all connections. Ensure each connection is tight and insulated.

Image: Detailed wiring diagram showing how to connect the Eogifee receiver unit to the household wiring and the ceiling fan's motor and light kit using color-coded wires and wire nuts.
How to Use Wire Nuts
- Strip approximately 1/2 inch of insulation from the ends of the wires to be connected.
- Twist the bare ends of the wires together clockwise.
- Place a wire nut over the twisted wires and twist clockwise until secure. Ensure no bare wire is exposed.

Image: Step-by-step visual guide on properly using wire nuts to secure electrical connections, showing stripping, twisting, and capping wires.
5. Securing the Receiver and Canopy
Carefully tuck the wired receiver into the ceiling fan canopy. Ensure it fits without pinching any wires. Reattach the canopy to the ceiling fan mounting bracket.
6. Install Battery in Remote
Open the battery compartment on the back of the remote control transmitter and insert a 9-volt battery (not included), observing the correct polarity.
7. Power Restoration
Restore power to the ceiling fan at the circuit breaker.
Betjeningsvejledning
The Eogifee remote control provides intuitive operation for your ceiling fan and light.
Image: The Eogifee remote control, highlighting its five distinct buttons for fan speed and light control.
- Hej: Press to set the fan speed to High.
- MED: Press to set the fan speed to Medium.
- LAV: Press to set the fan speed to Low.
- OFF: Press to turn the fan off.
- Grønt lys knap: Press to turn the fan light ON or OFF. This button does not control dimming.
Image: A hand holding the Eogifee remote control, demonstrating its use to operate a ceiling fan with light, showing the fan speed and light on/off functions.
Opretholdelse
- Udskiftning af batteri: Replace the 9-volt battery in the remote control when its range decreases or if the remote becomes unresponsive.
- Rensning: Tør fjernbetjeningen og modtageren af med en blød, tør klud. Brug ikke slibende rengøringsmidler eller opløsningsmidler.
- Miljøforhold: Avoid exposing the remote and receiver to extreme temperatures, direct sunlight, or high humidity.
Fejlfinding
| Problem | Mulig årsag | Løsning |
|---|---|---|
| Fan or light does not respond to remote. |
|
|
| Fjernbetjeningens rækkevidde er dårlig. |
|
|
| Fan operates unexpectedly (e.g., turns on by itself). |
|
|
Garanti og support
For warranty information or technical support, please refer to the product packaging or contact the seller directly. Keep your purchase receipt as proof of purchase.
Kontaktoplysninger: Please refer to your purchase platform or product packaging for the most current customer service contact details.
