1. Introduktion
The TELRAD Reflex Finder is a specialized sighting device designed for precise aiming in stage lighting, concert spotlights, and various terrestrial applications. Unlike its astronomy-focused counterparts, this version features a bright white LED illumination, making the reticle pattern clearly visible even in broad daylight. Its primary function is to assist users in quickly and accurately pointing a spotlight or other device by aligning the projected reticle with the target.
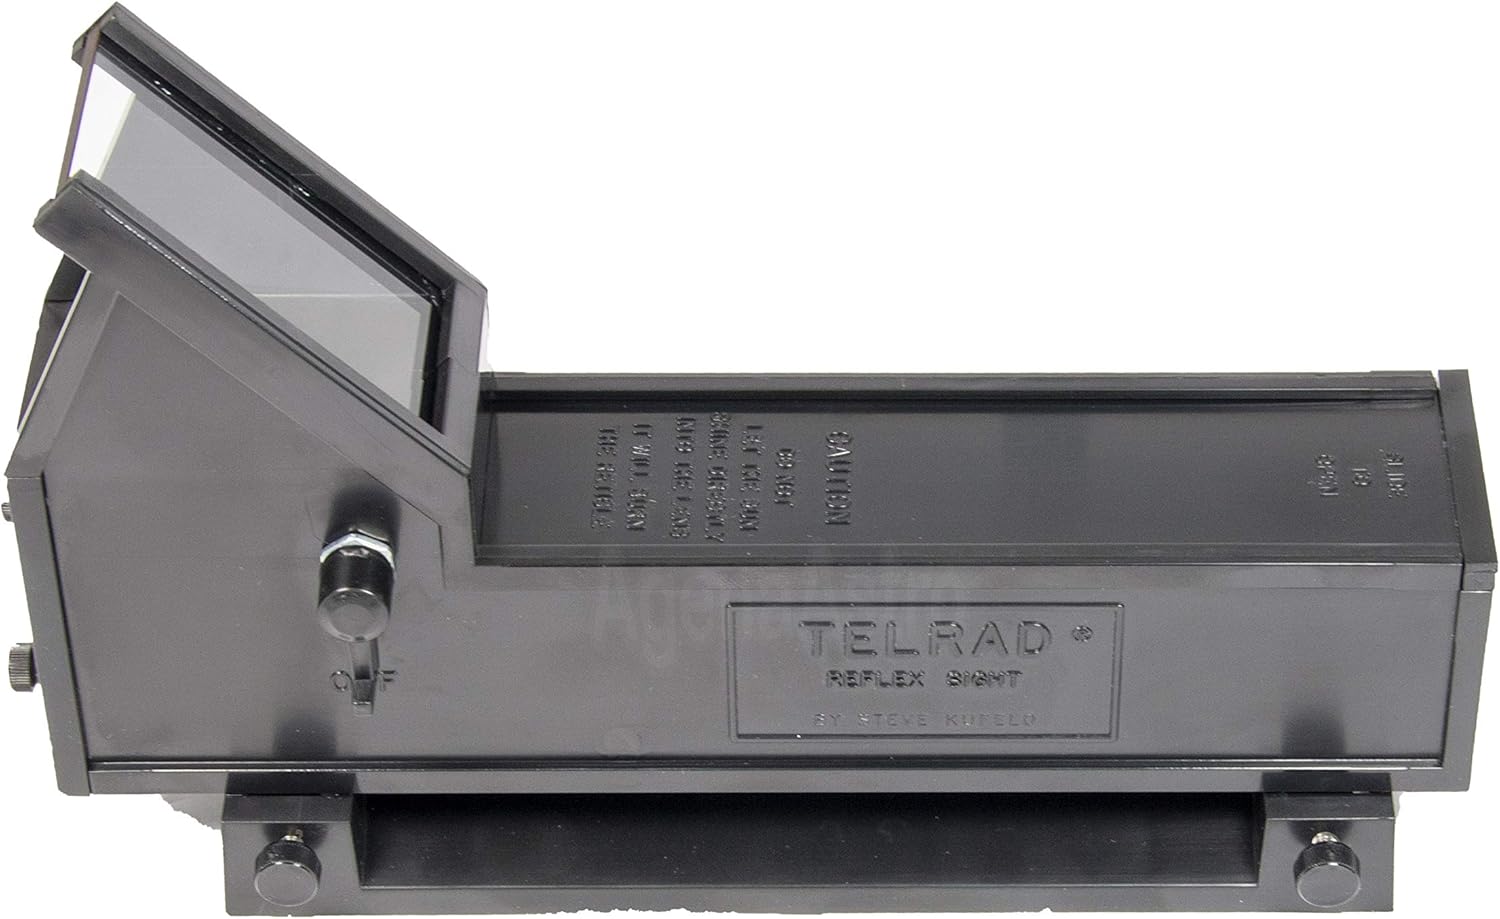
Figure 1: The TELRAD Reflex Finder, showing its main body and viewvindue.
2. Produktet er slutview og komponenter
The TELRAD Reflex Finder consists of several key components designed for ease of use and robust performance.
- Hovedenhed: Houses the optics, LED illuminator, and battery compartment.
- Monteringsbase: A separate base that attaches to your device, allowing the main unit to be easily removed and reattached.
- Reticle Pattern: Projects three concentric rings (4°, 2°, and 0.5° diameters) onto the viewing window for aiming.
- Lysstyrkekontrol: A knob or switch to adjust the intensity of the white LED illumination.
- Justeringsskruer: For fine-tuning the alignment of the reticle.

Figur 2: Vinklet view of the TELRAD Reflex Finder, highlighting its compact design.

Figur 3: Top-down view of the TELRAD Reflex Finder, showing the control knob and viewing område.
3. Opsætning
3.1. Attaching the Mounting Base
- Identify a suitable, clear space on your spotlight or device for mounting. Ensure the surface is clean and dry.
- The mounting base comes with double-sided adhesive tape. Peel off the protective backing from the adhesive on the base.
- Carefully align the mounting base on the desired surface and press firmly to ensure a secure attachment. Alternatively, Gaffer tape (not included) can be used for temporary or more flexible mounting.
- Allow the adhesive to set for the recommended time (refer to adhesive instructions if available) before attaching the main unit.

Figure 4: The TELRAD Reflex Finder main unit separated from its mounting base.

Figure 5: The mounting base showing the double-sided adhesive tape for attachment.
3.2. Installation af batterier
The TELRAD Reflex Finder requires 4 AA batteries (not included).
- Locate the battery compartment cover, typically on the underside or side of the main unit.
- Skub eller åbn dækslet i henhold til markeringerne.
- Isæt 4 AA-batterier, og sørg for at polerne (+/-) vender korrekt som angivet inde i batterirummet.
- Luk batterirummets dæksel forsvarligt.

Figure 6: The TELRAD Reflex Finder with its battery compartment open, showing where to insert AA batteries.
3.3. Attaching the Main Unit to the Base
Once the base is securely mounted and batteries are installed:
- Slide the main unit onto the mounting base until it clicks securely into place.
- Ensure it is firmly seated to prevent movement during operation.
4. Betjeningsvejledning
4.1. Powering On and Adjusting Brightness
Locate the brightness control knob on the side of the TELRAD unit. Rotate the knob to turn the unit on and adjust the intensity of the white LED reticle. Adjust the brightness to a comfortable level that allows clear visibility of the reticle against your target, especially in varying ambient light conditions.
4.2. Understanding the Reticle Pattern
The TELRAD projects a unique reticle pattern consisting of three concentric rings. These rings have specific angular diameters:
- Ydre ring: 4 degrees in diameter.
- Middle Ring: 2 degrees in diameter.
- Indre ring: 0.5 degrees in diameter.
These rings provide a visual reference for aiming. To point your spotlight or device, look through the TELRAD and move the device until the desired ring (or the center of the pattern) is aligned with your target.

Figure 7: The projected reticle pattern with 4°, 2°, and 0.5° concentric rings.
4.3. Aligning the Finder
For precise aiming, the TELRAD Reflex Finder needs to be aligned with the device it is mounted on. This typically involves:
- Point your spotlight or device at a distant, stationary target.
- Look through the TELRAD and use the adjustment screws (usually two for horizontal and vertical alignment) to move the reticle pattern until its center aligns with the target.
- Repeat this process until the reticle remains centered on the target when the spotlight is also accurately aimed.
5. Vedligeholdelse
5.1. Rensning
- Use a soft, lint-free cloth to gently wipe the exterior of the unit.
- For viewing window, use a lens cleaning solution and a microfiber cloth specifically designed for optics. Avoid abrasive materials or harsh chemicals.
- Sørg for, at der ikke trænger fugt ind i de indvendige komponenter.
5.2. Udskiftning af batteri
Replace batteries when the reticle illumination becomes dim or inconsistent. Refer to Section 3.2 for battery installation instructions.
5.3. Opbevaring
When not in use for extended periods, it is recommended to remove the main unit from its mounting base and store it in a dry, dust-free environment. Remove batteries if storing for very long durations to prevent leakage.
6. Fejlfinding
- Reticle is dim or not visible:
- Kontroller batteriniveauet og udskift det om nødvendigt.
- Sørg for, at batterierne er isat med den korrekte polaritet.
- Adjust the brightness control knob.
- Reticle is not aligned with target:
- Re-align the finder using the adjustment screws as described in Section 4.3.
- Ensure the mounting base is securely attached and not loose.
- Enheden tændes ikke:
- Verify batteries are new and correctly installed.
- Check for any debris or corrosion in the battery compartment.
7. Specifikationer
| Feature | Detalje |
|---|---|
| Modelnummer | TE-TEL |
| Belysningsfarve | Hvid LED |
| Reticle Pattern | 3 Concentric Rings (4°, 2°, 0.5° diameters) |
| Længde | 8.15 tommer (ca. 20.7 cm) |
| Width (at base) | 2.24 tommer (ca. 5.7 cm) |
| Samlet højde | 4.92 tommer (ca. 12.5 cm) |
| Vægt | 11 ounce (ca. 312 gram) |
| Strømkilde | 4 AA batterier (medfølger ikke) |
| Byggemateriale | Robust ABS-plast |
| Kompatible enheder | Stage Spotlights, Terrestrial Devices |
8. Garanti og support
For warranty information, technical support, or to inquire about replacement parts and accessories, please contact TELRAD customer service or refer to the official TELRAD webwebsted. Gem din købskvittering som købsbevis i tilfælde af garantikrav.
Note: This product is specifically designed for terrestrial and stage/concert spotlight applications and is NOT intended for astronomy use. For astronomy versions, please refer to other TELRAD models.


