1. Introduktion
This manual provides detailed instructions for the assembly, operation, and maintenance of your Berkeley CHLOE Styling Station. Please read this manual thoroughly before assembly and use to ensure proper function and longevity of the product. Retain this manual for future reference.

Billede 1.1: Forside view of the Berkeley CHLOE Styling Station. This image displays the overall design of the styling station, featuring a brown cabinet with a silver top, a lockable drawer, and integrated appliance holders on the right side of the countertop.
2. Sikkerhedsoplysninger
- Sørg altid for, at alle komponenter er forsvarligt fastgjort før brug.
- Do not overload drawers or cabinets.
- Keep keys for the lockable drawer in a safe place, away from children.
- Avoid placing hot appliances directly on the cabinet surface; use the designated appliance holders.
- Denne enhed er kun beregnet til indendørs brug.
- Kontrollér regelmæssigt alle skruer og forbindelser for tæthed.
3. Pakkens indhold
Before beginning assembly, verify that all parts listed below are present and undamaged. If any parts are missing or damaged, contact Berkeley customer support.
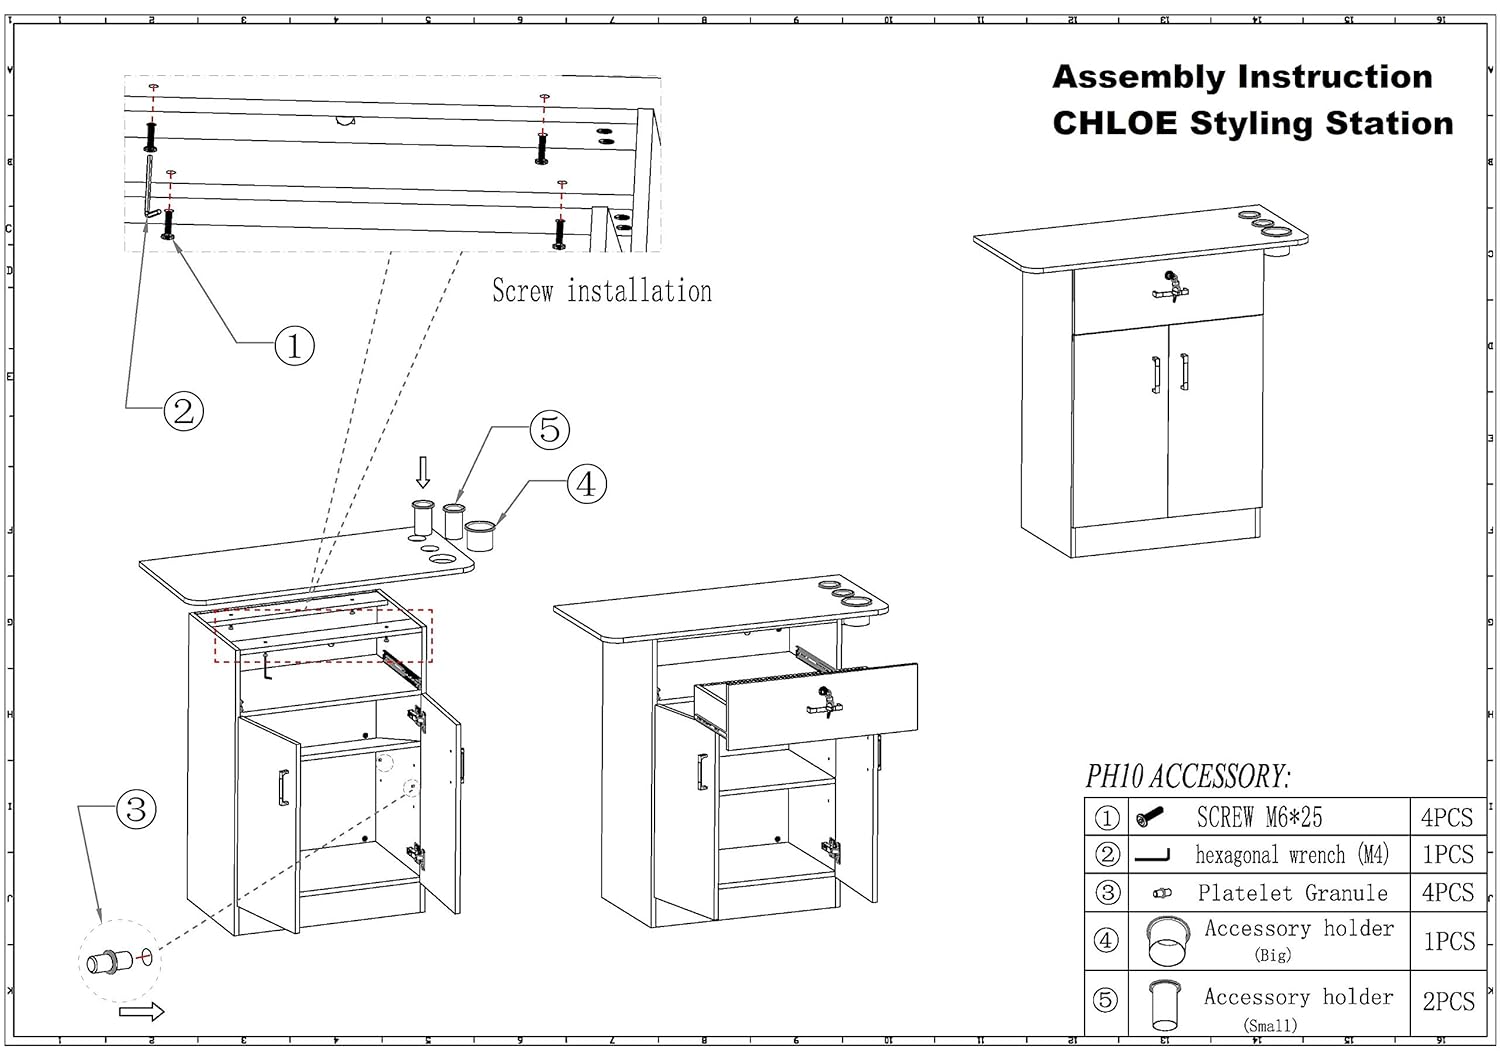
Image 3.1: Assembly instruction diagram for the CHLOE Styling Station. This diagram illustrates the various components and hardware required for assembly, including screws, a hexagonal wrench, platelet granules, and accessory holders.
Inkluderet tilbehør:
- SCREW M6*25: 4 PCS
- Hexagonal wrench (M4): 1 PCS
- Platelet Granule: 4 PCS
- Accessory holder (Big): 1 PCS
- Accessory holder (Small): 1 PCS
4. Opsætning og montering
Follow these steps carefully to assemble your Berkeley CHLOE Styling Station. Refer to Image 3.1 for visual guidance.
- Forbered komponenter: Unpack all components and hardware. Identify the main cabinet body, top panel, drawer, and accessory holders.
- Installer toppanel: Align the top panel with the main cabinet body. Secure the top panel using the provided SCREW M6*25 (labeled as '1' in Image 3.1) into the designated holes. Ensure the screws are tightened with the hexagonal wrench (labeled as '2').
- Insert Platelet Granules: Place the Platelet Granules (labeled as '3') into their respective slots on the cabinet. These typically act as shelf supports or decorative covers.
- Attach Accessory Holders: Insert the large accessory holder (labeled as '4') and the small accessory holder (labeled as '5') into the pre-drilled holes on the side of the top panel. Ensure they are firmly seated.
- Installer skuffe: Slide the drawer into its designated slot in the cabinet. Ensure it operates smoothly. The lock mechanism should be functional upon installation.
- Endelig kontrol: Verify that all screws are tight and the station is stable.
5. Betjeningsvejledning
5.1 Lockable Drawer
The styling station features a lockable drawer for secure storage of valuable tools and personal items.
- For at åbne: Insert the key into the lock and turn it to the unlocked position. Pull the drawer handle to open.
- For at lukke og låse: Push the drawer completely shut. Insert the key and turn it to the locked position. Remove the key.
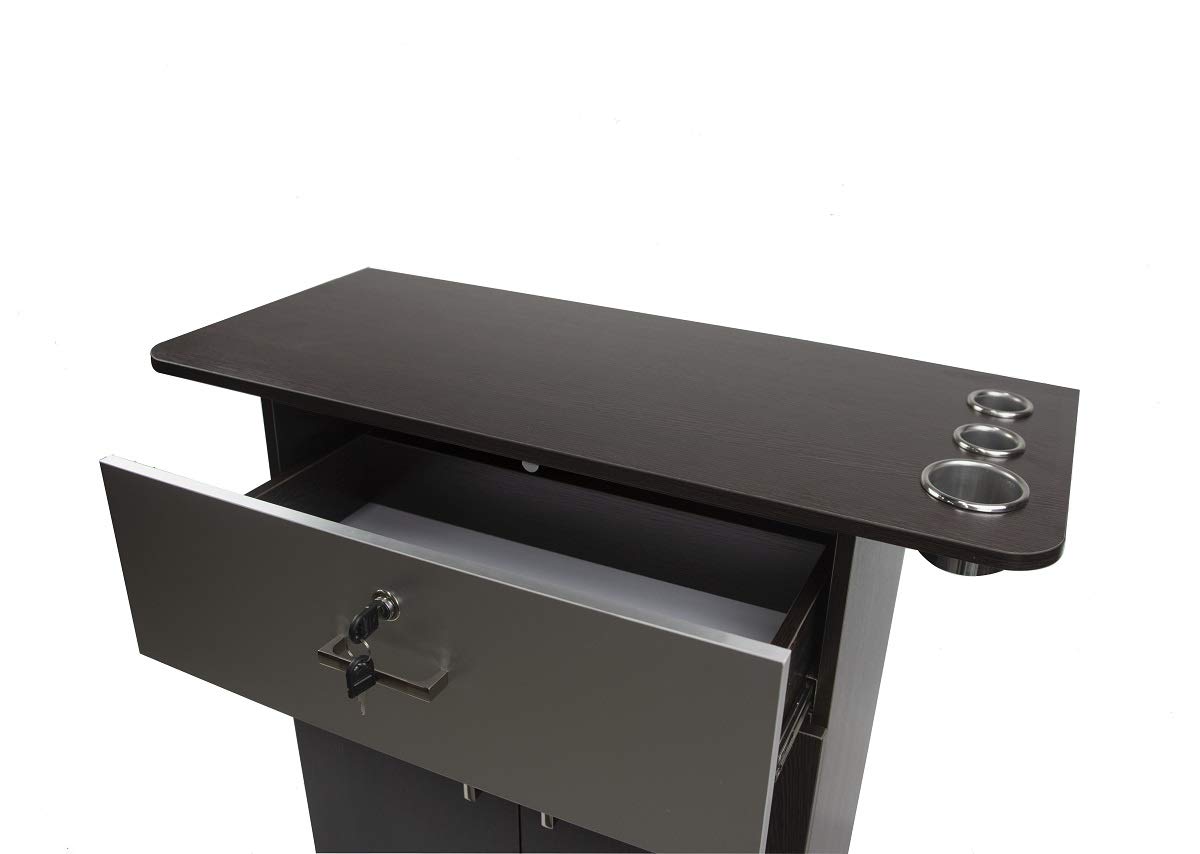
Image 5.1: The lockable drawer of the styling station shown in an open position with the key inserted. This illustrates the drawer's capacity and the locking mechanism.
5.2 Double Door Cabinet
The lower section of the styling station includes a double-door cabinet for larger storage needs.
- For at åbne: Pull the handles on both doors simultaneously.
- At lukke: Push both doors firmly until they are fully closed.
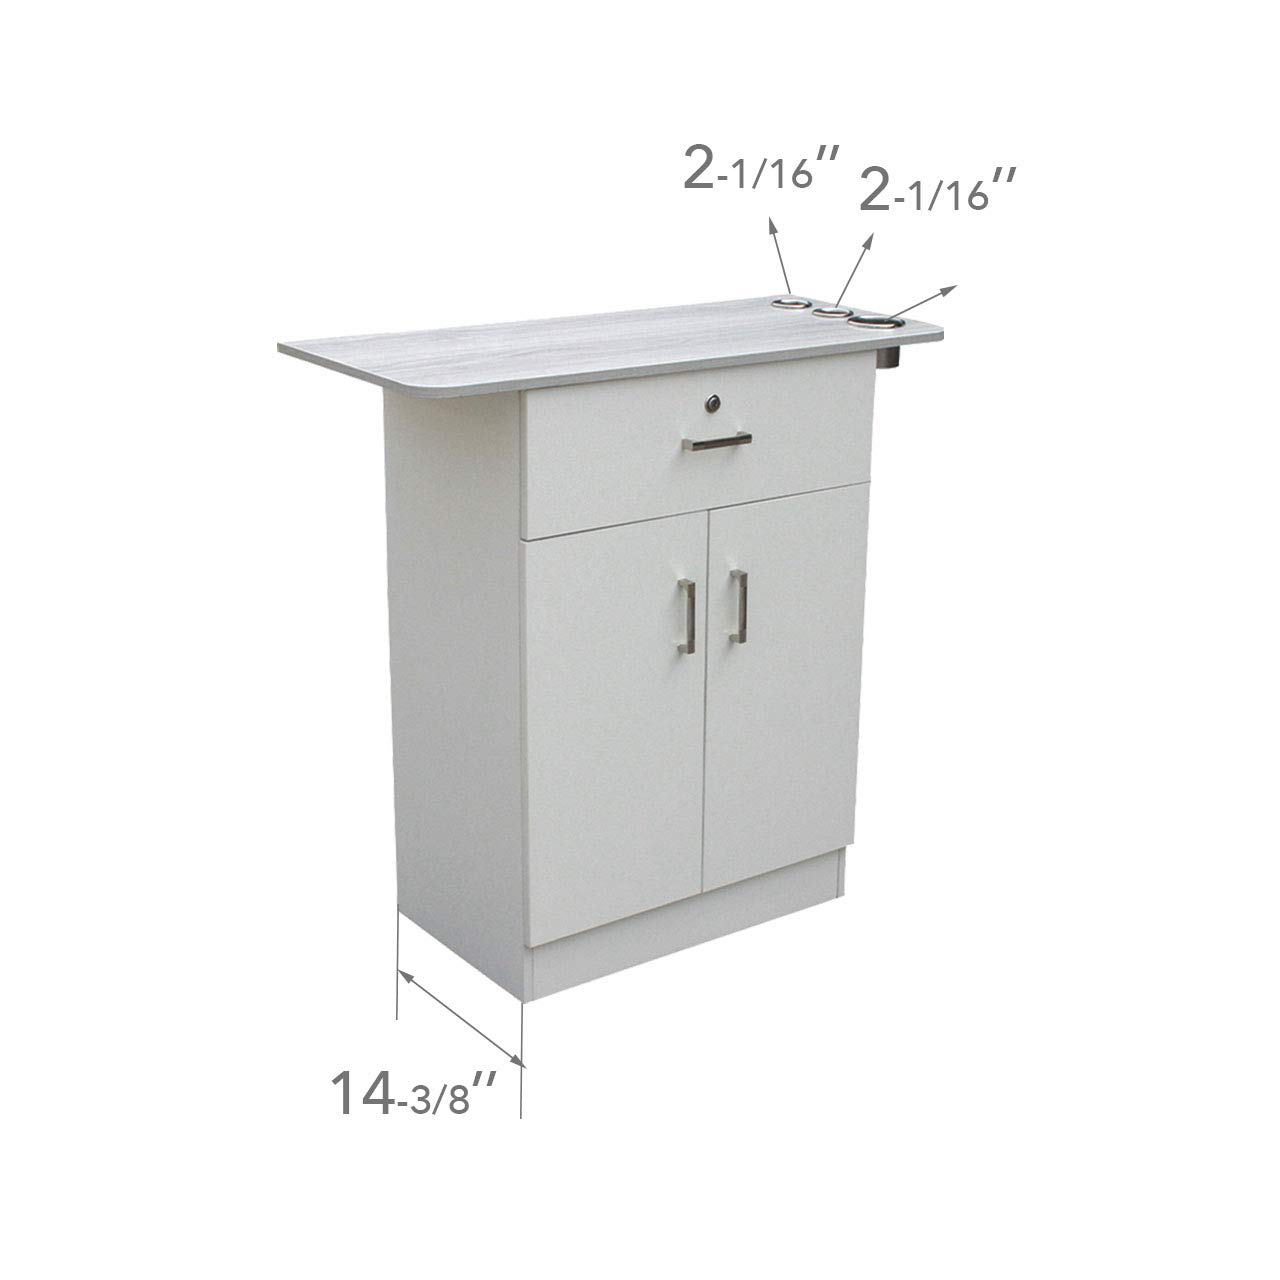
Image 5.2: The double-door cabinet of the styling station shown with both doors open, revealing the interior storage space and a shelf. This demonstrates the cabinet's storage capacity.
5.3 Appliance Holders
Three integrated appliance holders are located on the side of the top panel, designed to safely store hot styling tools.
- Insert styling tools such as hair dryers, curling irons, or flat irons into the appropriate sized holders.
- Ensure tools are cooled sufficiently before storing for extended periods.
6. Vedligeholdelse
- Rensning: Tør overflader af med en blød, damp cloth and a mild, non-abrasive cleaner. Avoid harsh chemicals that may damage the finish.
- Spild: Tør spild op med det samme for at forhindre pletter eller beskadigelse af træoverfladen.
- Hardware: Periodically check all screws and fasteners to ensure they remain tight. Tighten as necessary with the hexagonal wrench.
- Skuffeslider: If the drawer becomes stiff, apply a small amount of silicone-based lubricant to the drawer slides.
7. Fejlfinding
7.1 Drawer Not Locking/Opening
- Ensure the drawer is fully closed before attempting to lock.
- Kontroller om nøglen er sat helt i og drejet korrekt.
- Inspect the lock mechanism for any obstructions.
7.2 Cabinet Doors Not Closing Properly
- Check for any items obstructing the doors from closing.
- Inspect hinges for damage or misalignment. Adjust if necessary.
7.3 Station Instability
- Kontroller, at alle monteringsskruer er forsvarligt spændt.
- Ensure the station is placed on a flat, level surface.
8. Specifikationer
| Feature | Detalje |
|---|---|
| Mærke | Berkeley |
| Model | CHLOE |
| Produktdimensioner | 14.5" D x 23.8" B x 35.5" H |
| Vægt | 88 pund |
| Farve | Brown (Cabinet), Silver (Top) |
| Speciel funktion | Lockable Drawer, Appliance Holders |
| Monteringstype | Floor Mount (Free-Standing) |
| Appliance Holder Sizes | 2 x 2 1/16", 1 x 3" |
| Drawer Inside Dimensions | 20 1/4" (W) x 5 1/2" (H) x 11 1/4" (L) |

Image 8.1: Detailed dimensions diagram of the styling station. This image provides specific measurements for the overall height, width, depth, and individual sections of the unit, including the top, drawer, and cabinet.
9. Garantioplysninger
Specific warranty details for the Berkeley CHLOE Styling Station are not provided in this manual. For information regarding warranty coverage, terms, and conditions, please contact Berkeley customer support directly or refer to the product packaging or purchase documentation.
10. Kundesupport
If you have any questions, require assistance with assembly, or need to report a missing or damaged part, please contact Berkeley customer support.
- Online support: Visit the official Berkeley store on Amazon: Berkeley Store
- Refer to your purchase invoice or product packaging for additional contact information.


