1. Produktet er slutview
The PAXCESS Electric Power Washer P3.2 is a versatile and powerful cleaning tool designed for various outdoor tasks. It efficiently converts a standard garden hose into a high-pressure stream, making it suitable for cleaning surfaces such as decks, patios, driveways, sidewalks, sheds, siding, garden furniture, pavers, bricks, and fences. Its compact design and integrated hose reel ensure convenient storage and portability.

Figure 1.1: PAXCESS Electric Power Washer P3.2. This image shows the main unit with its integrated hose reel and spray gun holder.
Nøglefunktioner:
- Kraftig rengøring: Delivers up to 2300 PSI for effective removal of dirt and grime.
- Justerbar dyse: Easily switch between narrow fan, wide fan, and foam modes by twisting the nozzle.
- Integrated Hose Reel: Provides convenient storage for the high-pressure hose.
- Flere applikationer: Ideal for cleaning vehicles, outdoor furniture, patios, and more.
- Two Water Sucking Methods: Can draw water from a tap or a bucket.
- IPX5 vandtæt bedømmelse: Ensures durability and safety in wet conditions.
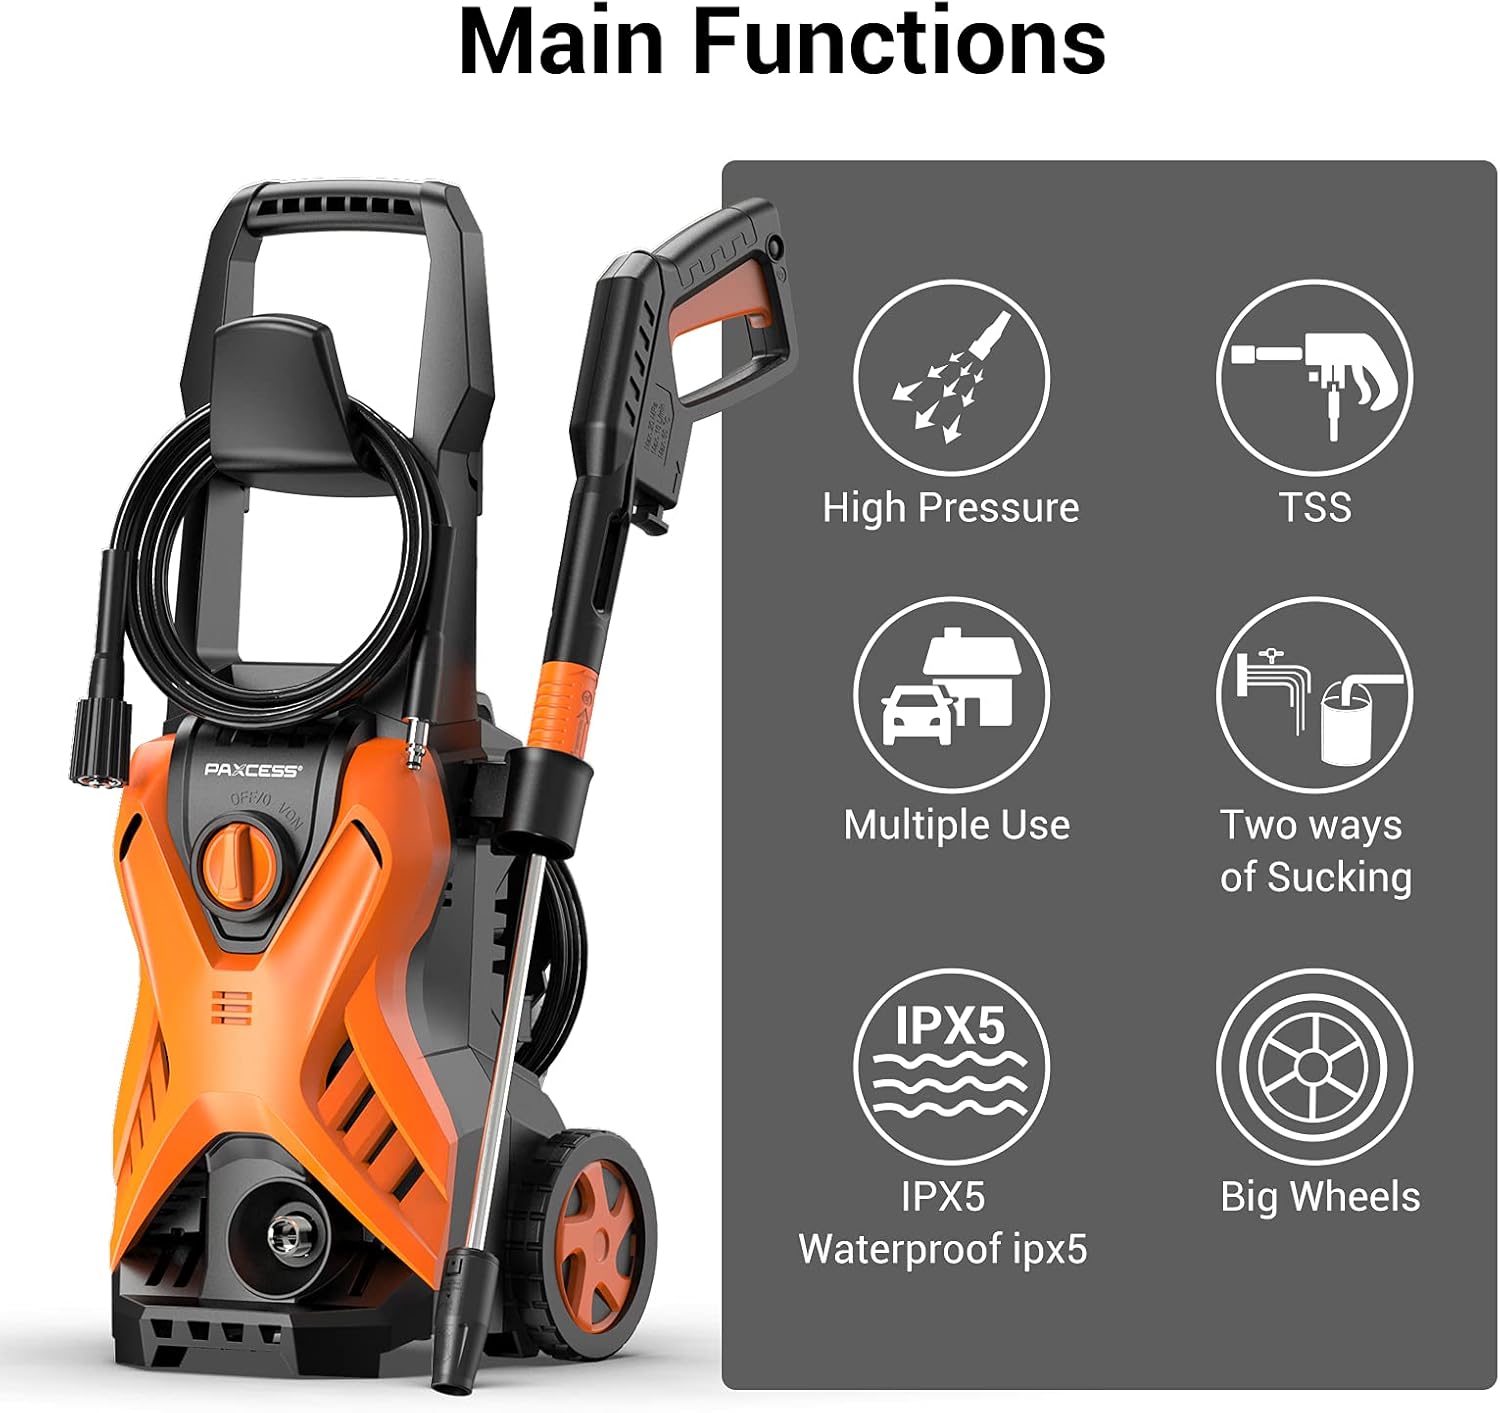
Figure 1.2: Icons illustrating the main functions: High Pressure, TSS (Total Stop System), Multiple Use, Two ways of Sucking, IPX5 Waterproof, and Big Wheels for mobility.

Figure 1.3: Icons highlighting product benefits: Water Save, Less Noise, Long Service Time, and High Pressure.
2. Sikkerhedsoplysninger
Læs og forstå altid alle sikkerhedsadvarsler og instruktioner, før du bruger højtryksrenseren. Manglende overholdelse af advarsler og instruktioner kan resultere i elektrisk stød, brand og/eller alvorlig personskade.
Generelle sikkerhedsregler:
- Elektrisk sikkerhed: Ensure the power outlet is properly grounded. Do not operate the pressure washer with a damaged cord or plug. Keep all connections dry and off the ground.
- Vandtilslutning: Use only clean water. Do not connect the unit to a potable water supply without a backflow preventer.
- Personlig sikkerhed: Wear appropriate personal protective equipment (PPE) such as safety goggles, gloves, and protective footwear. Do not direct the spray at people, pets, or electrical devices.
- Driftsmiljø: Operate the pressure washer on a stable, level surface. Keep the area clear of bystanders and obstacles.
- Børn og kæledyr: Keep children and pets away from the pressure washer during operation.
- Opretholdelse: Afbryd strømforsyningen, før der udføres vedligeholdelse eller rengøring.
3. Pakkens indhold
Carefully unpack all items and ensure you have received the following components. If any parts are missing or damaged, contact PAXCESS customer support.

Figure 3.1: All components included with the PAXCESS Electric Power Washer. This includes the main unit, spray gun, lance, high-pressure hose, and foam cannon.
- PAXCESS Electric Power Washer Unit
- Højtrykssprøjtepistol
- Justerbar sprøjtelanse
- High-Pressure Hose with Reel
- Rengøringsmiddeltank (skumkanon)
- Adapter til haveslange
- Strømledning med GFCI
- Dyserensningsstift
- Brugermanual
4. Opsætningsvejledning
Follow these steps to assemble and prepare your PAXCESS Electric Power Washer for first use.
- Fastgør håndtaget: Slide the handle into the designated slots on the main unit until it clicks into place.
- Tilslut højtryksslangen:
- Connect one end of the high-pressure hose to the outlet on the pressure washer unit. Tighten securely by hand.
- Connect the other end of the high-pressure hose to the spray gun. Ensure a tight connection to prevent leaks.
- Assemble the Spray Gun and Lance: Attach the adjustable spray lance to the spray gun. Twist until it locks securely.
- Tilslut vandforsyningen:
- Attach your garden hose to the water inlet on the pressure washer unit. Ensure the garden hose is free of kinks and has a steady water supply.
- If using a bucket for water supply, ensure the unit is set to the "Two Ways of Water Sucking" mode and follow specific instructions in the operating section.
- Tilslut til strøm: Plug the power cord into a grounded electrical outlet. Ensure the GFCI (Ground Fault Circuit Interrupter) is reset if necessary.

Figure 4.1: The pressure washer demonstrating its ability to draw water from a bucket, offering flexibility in water source.
5. Betjeningsvejledning
This section details how to operate your PAXCESS Electric Power Washer for various cleaning tasks.
5.1 Første opstart og priming
- Sørg for, at alle tilslutninger er sikre, og at vandforsyningen er tændt.
- Squeeze the trigger on the spray gun to release any air trapped in the system. Allow water to flow through the gun for about 30 seconds until a steady stream is achieved.
- Turn on the power switch on the pressure washer unit. The motor will start, and pressure will build.
5.2 Adjusting the Spray Pattern
The PAXCESS P3.2 features an adjustable nozzle that allows you to change the spray pattern by simply twisting the end of the lance.

Figure 5.1: Demonstrates the adjustable nozzle, showing narrow fan, wide fan, and foam modes.
- Narrow Fan: Provides a concentrated, high-impact stream for tough stains and precise cleaning.
- Wide Fan: Offers a broader spray for general cleaning of larger areas.
- Foam Mode: Activates the detergent tank for applying soap or cleaning solutions.
Always test the spray pattern on an inconspicuous area first to avoid damaging the surface.
5.3 Using the Detergent Tank (Foam Cannon)
- Fill the detergent tank with an appropriate pressure washer-safe cleaning solution.
- Attach the detergent tank to the spray gun.
- Twist the nozzle to the "Foam Mode" setting.
- Apply the detergent to the surface. Allow it to soak for a few minutes (refer to detergent instructions).
- Twist the nozzle back to a fan spray pattern and rinse the surface thoroughly.
5.4 Rengøringsapplikationer
The PAXCESS P3.2 is effective for a variety of cleaning tasks:
- Terrasser og indkørsler: Use a wide fan spray for general cleaning, and a narrow fan for stubborn spots.
- Køretøjer: Apply car wash soap using the foam cannon, then rinse with a wide fan spray. Maintain a safe distance to avoid paint damage.
- Siding and Fences: Start with a wide fan spray from a distance and gradually move closer if needed.

Figure 5.2: A visual comparison showing a muddy car before and after cleaning with the pressure washer, highlighting its effectiveness.

Figure 5.3: The pressure washer in action, cleaning a patio tile, demonstrating the 2300 PSI cleaning effect.
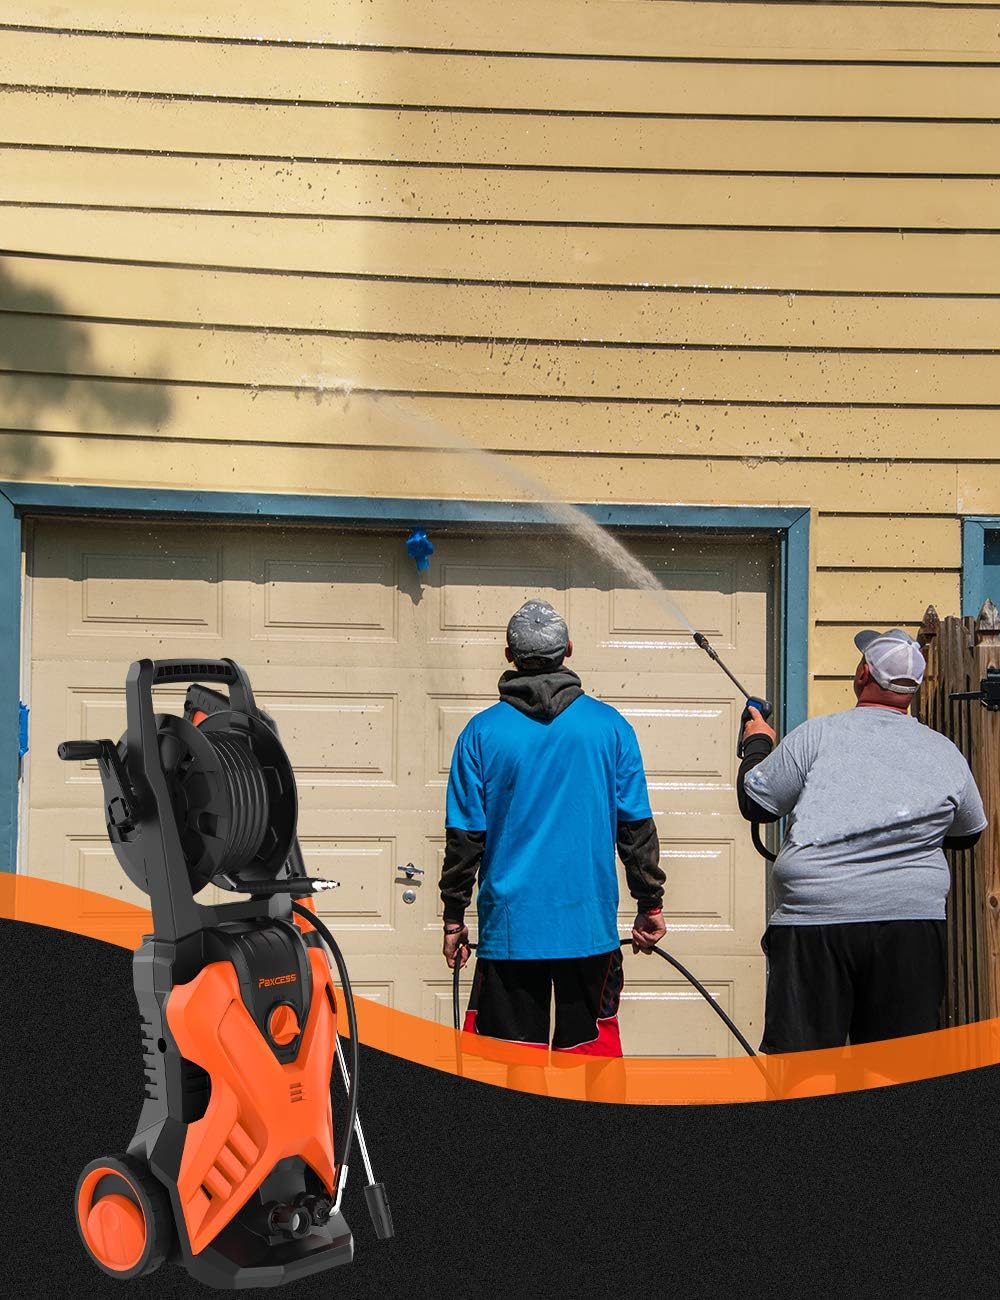
Figure 5.4: Two people using the PAXCESS pressure washer to clean the exterior of a house, showcasing its utility for larger tasks.
6. Vedligeholdelse
Regelmæssig vedligeholdelse sikrer din højtryksrensers lange levetid og optimale ydeevne.
6.1 Efter hver brug:
- Afbryd strøm og vand: Turn off the unit, unplug the power cord, and turn off the water supply.
- Lindre trykket: Tryk på sprøjtepistolens aftrækker for at udløse eventuelt resterende tryk i systemet.
- Afløbsvand: Disconnect all hoses and drain any water from the pump, hoses, and spray gun.
- Rens dyse: Use the provided nozzle cleaning pin to clear any debris from the nozzle opening.
- Tør ned: Rengør enhedens yderside med annonceamp klæde.
6.2 Opbevaring:
- Opbevar højtryksrenseren et tørt og frostfrit sted.
- If storing for an extended period, consider using a pump protector or antifreeze solution to prevent damage from freezing.
- Vikl højtryksslangen pænt op på den integrerede slangeopruller.
7. Fejlfinding
Se dette afsnit for almindelige problemer og løsninger. Hvis problemet fortsætter, skal du kontakte kundesupport.
| Problem | Mulig årsag | Løsning |
|---|---|---|
| Enheden starter ikke | No power supply; GFCI tripped; Power switch off | Check power connection; Reset GFCI; Turn power switch ON |
| Lavt tryk | Insufficient water supply; Kinked hose; Clogged nozzle; Air in pump | Ensure full water flow; Straighten hose; Clean nozzle; Prime pump by squeezing trigger with water on |
| Pulserende tryk | Air in pump; Water supply restriction; Clogged inlet filter | Prime pump; Check water supply for kinks; Clean inlet filter |
| Vand lækker | Løse forbindelser; Beskadigede O-ringe | Spænd alle forbindelser; Udskift beskadigede O-ringe |
8. Specifikationer
- Produktdimensioner: 32 x 33 x 67 tommer
- Varens vægt: 23.4 pund
- Fabrikant: PAXCESS
- ASIN: B083FKPVTS
- Varemodelnummer: Hose Reel Electric Power Washer
- Mærke: PAXCESS
- Strømkilde: Elektrisk med ledning
- Farve: Orange
- Maksimalt tryk: 3000 pund pr. kvadrattomme (PSI)
- Maksimal gennemstrømningshastighed: 1.76 gallon pr. minut (GPM)
9. Garanti og support
PAXCESS products are designed and manufactured to the highest quality standards. This product is covered by a limited warranty from the date of purchase. For detailed warranty information, please refer to the warranty card included in your package or visit the official PAXCESS webwebsted.
For technical support, troubleshooting assistance, or to order replacement parts, please contact PAXCESS customer service:
- Webwebsted: Visit the PAXCESS Store on Amazon
- E-mail: Refer to your product packaging or warranty card for specific contact email.
- Telefon: Refer to your product packaging or warranty card for specific contact number.
Please have your model number (P3.2) and purchase date available when contacting support.


