1. Introduktion
This manual provides detailed instructions for operating your MYPIN 1080P HDMI Video Capture Card. This device allows you to record Full HD 1080P video content from various HDMI sources, including game consoles, set-top boxes, and video players, directly onto a TF card without requiring a PC. It features a 3.5-inch LCD for real-time preview and playback, a remote control for convenient operation, and a built-in rechargeable battery for portable use. Please read this manual thoroughly to ensure proper use and maintenance of your device.
2. Pakkens indhold
Bekræft, at alle nedenstående varer er inkluderet i din pakke:
- MYPIN 1080P HDMI Video Capture Card
- Fjernbetjening
- Instruktionsmanual
- HDMI kabel
- USB-opladningskabel

The image displays the MYPIN 1080P HDMI Video Capture Card alongside its accessories: a remote control, a printed instruction manual, an HDMI cable, and a USB charging cable.
3. Produktet er slutview
Familiarize yourself with the components and ports of your MYPIN Video Capture Card.
3.1 Enhedslayout

This image shows the front of the MYPIN capture card, highlighting its 3.5-inch LCD screen on the left and the control buttons on the right. The included remote control is also visible below the device.

The image illustrates the side of the MYPIN capture card, detailing its various ports and controls. These include the HDMI In, HDMI Out, TF card slot, PC/DC USB port for power and data transfer, a microphone input, a headset output, and the On/Off switch.
3.2 Kontrolpanel og fjernbetjening
The device features an integrated control panel and comes with a dedicated remote control for ease of use.

This image provides a closer look at the control panel on the MYPIN capture card and its remote. Key buttons such as 'Rec/Stop', 'Menu', 'OK', and directional arrows are clearly visible, indicating support for both manual and remote operation.
4. Opsætningsvejledning
4.1 Strømforsyning til enheden
- Connect the USB Charge Cable to the PC/DC porten på capture-kortet.
- Connect the other end of the USB cable to a power source (e.g., USB wall adapter, computer USB port).
- Skub til ON/OFF switch to the 'ON' position to power on the device.
4.2 Indsættelse af et TF-kort
- Sørg for, at enheden er slukket.
- Find TF kort slot on the side of the device.
- Insert a TF card (up to 128 GB, formatted to FAT32 or exFAT) into the slot until it clicks into place.
4.3 Connecting HDMI Sources
- Connect an HDMI cable from your video source (e.g., game console, set-top box) to the HDMI-IN porten på capture-kortet.
- (Valgfrit) Til view the content on an external display while recording, connect another HDMI cable from the HDMI OUT port on the capture card to your TV or monitor.
4.4 Tilslutning af lydenheder
- To record external audio commentary, connect a 3.5mm TRS standard microphone to the MIC input port. (Note: TRRS microphones are not supported).
- To monitor audio privately, connect headphones to the HEADSET udgangsport.
This image clarifies microphone compatibility, showing a diagram that distinguishes between TRS (Tip-Ring-Sleeve) and TRRS (Tip-Ring-Ring-Sleeve) 3.5mm audio jacks. It explicitly states that only TRS standard microphones are supported for recording with the device.
5. Betjening
5.1 Grundlæggende optagelse
- Tænd for enheden.
- Ensure your HDMI source is connected and active. The video feed should appear on the 3.5-inch LCD screen.
- Tryk på Rec/Stop button on the device or the remote control to start recording. The recording indicator will illuminate.
- Tryk på Rec/Stop button again to stop recording. The recorded file will be saved to the inserted TF card.
5.2 Afspilning
- From the main interface, navigate to the playback menu using the directional buttons and confirm with OK.
- Select the desired recorded file fra listen.
- Trykke OK for at starte afspilningen.
- Use the control buttons (Rew, F.F, Pause/Play) for media control.
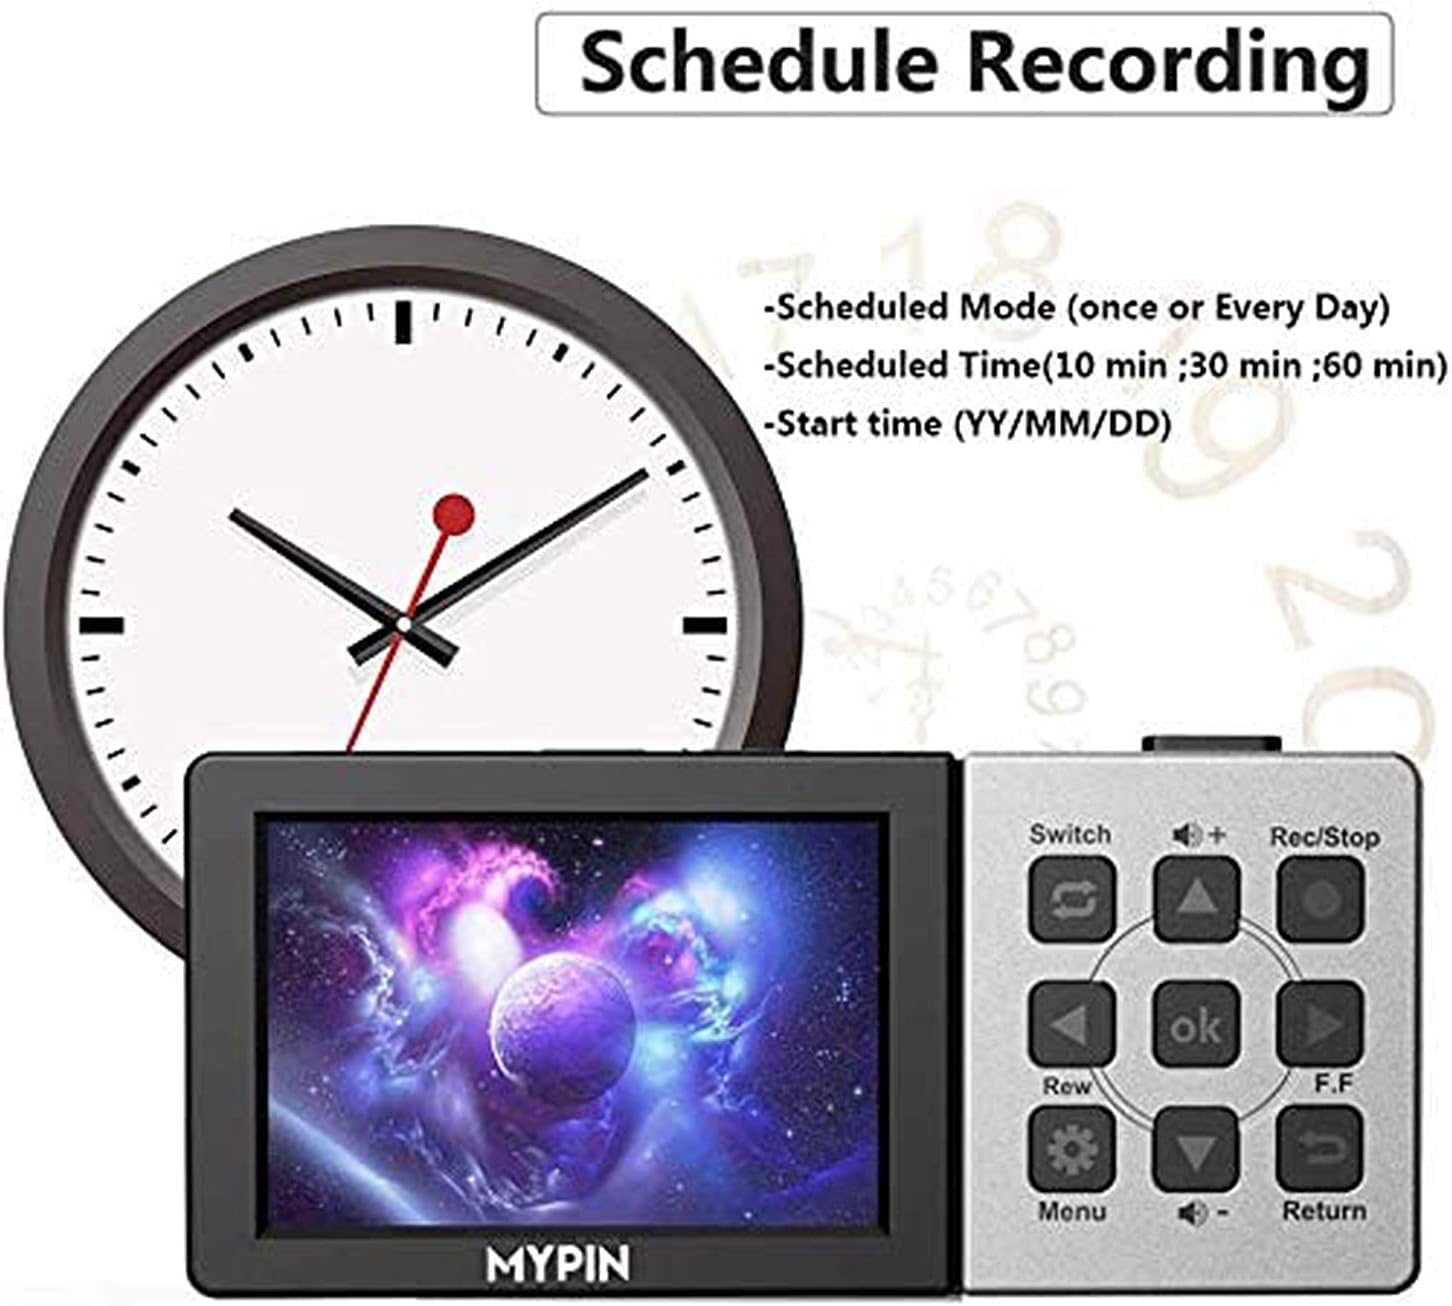
5.3 Planlagt optagelse
The device supports scheduling recordings for convenience.
- Access the Menu using the Menu button on the device or remote.
- Navigate to the "Schedule Recording" option.
- Set the desired recording mode (e.g., once, daily), scheduled time (e.g., 10 min, 30 min, 60 min), and start time (YY/MM/DD).
- Confirm your settings. The device will automatically begin recording at the specified time.

This image shows the user interface for setting up scheduled recordings on the MYPIN capture card. It highlights options to configure the recording mode (e.g., once, daily), duration (e.g., 10, 30, 60 minutes), and the specific start date and time.
5.4 Lydstyrkekontrol
Use the volume buttons on the device or remote control to adjust the playback volume through the built-in speaker or connected headphones.
6. Vedligeholdelse
- Hold enheden ren og fri for støv. Brug en blød, tør klud til rengøring.
- Undgå at udsætte enheden for ekstreme temperaturer, fugt eller direkte sollys.
- Forsøg ikke at skille enheden ad, da dette vil ugyldiggøre garantien.
- Ensure the TF card is properly inserted and removed to prevent damage.
7. Fejlfinding
If you encounter issues with your MYPIN Video Capture Card, refer to the following common solutions:
| Problem | Mulig årsag | Løsning |
|---|---|---|
| No video on LCD screen or external display. | Incorrect HDMI connection, source not active, or incompatible resolution. | Check all HDMI cable connections. Ensure the video source is powered on and outputting a signal. Verify the source resolution is 1080P or lower. |
| Enheden optager ikke. | TF card full, not inserted, or incompatible format. | Ensure a TF card is inserted and has sufficient free space. Format the TF card to FAT32 or exFAT if necessary. |
| No audio from microphone input. | Incorrect microphone type or connection. | Ensure you are using a 3.5mm TRS standard microphone. Check the microphone connection. |
| Fjernbetjeningen reagerer ikke. | Low battery in remote, obstructed IR sensor. | Replace the remote control battery. Ensure there is a clear line of sight between the remote and the device's IR sensor. |
| Optaget files are split into multiple segments. | This is normal behavior for long recordings due to file system limitations. | The device automatically splits recordings into segments (e.g., 25-minute files) to manage file sizes on the TF card. This is not an error. |
8. Specifikationer
Key technical specifications for the MYPIN 1080P HDMI Video Capture Card:
- Videooptagelsesopløsning: 1080p ved 60 fps
- Vise: 3.5 tommer LCD
- Opbevaring: TF Card (up to 128 GB, FAT32/exFAT)
- Input: HDMI, 3.5mm Microphone (TRS standard)
- Produktion: HDMI, 3.5mm Headset
- Batteri: Indbygget 3000mAh lithiumbatteri
- Strømforsyning: USB DC 5V
- Dimensioner: 6.89 x 4.57 x 2.05 cm (omtrentlige pakkemål)
- Vægt: 13.7 ounces (omtrentlig varevægt)
- Modelnummer: B07VB65SDK
9. Garanti og support
For warranty information and technical support, please refer to the contact details provided with your purchase or visit the official MYPIN webwebsted. Gem din købsbevis til garantikrav.


