Indledning
The Rexing V1 Basic Dash Cam is designed to provide reliable video evidence on the road. With its advanced features and user-friendly design, it ensures your driving experiences are securely recorded. This manual will guide you through the setup, operation, and maintenance of your new dash cam.
Hvad er der i æsken
- Rexing V1 Basic Dash Cam
- Car Power Cable (12V adapter with USB port)
- Brugermanual
- Selvklæbende montering
- Kabelhåndteringsklip
- Memory Card (Note: Some packages may include a memory card, otherwise it needs to be purchased separately.)

Image: Rexing V1 Basic Dash Cam and included accessories.
Opsætningsvejledning
1. Montering af Dash Cam
Attach the dash cam to your vehicle's windshield using the provided adhesive mount. Position it discreetly behind your rearview spejlet for at sikre, at det ikke blokerer for din view. The lens is adjustable, allowing you to fine-tune the recording angle after mounting.

Image: The discreet design of the Rexing V1 Basic Dash Cam, mounted on a car windshield.
2. Indsættelse af hukommelseskortet
Insert a high-endurance Micro SD card (up to 256GB, Class 10 or higher recommended) into the designated slot on the side of the dash cam. Ensure the device is powered off before inserting or removing the memory card to prevent data corruption.

Billede: Side view of the Rexing V1 Basic Dash Cam showing the Micro SD card slot.
3. Strømforsyning til enheden
Connect the dash cam to your car's 12V power outlet using the provided car power cable. The cable is long enough to be routed around your windshield for a clean installation. The 12V adapter also features an additional USB port for charging other devices.

Image: The Rexing V1 Basic Dash Cam highlighting its premium features and power connection.
Video: Officielt produkt slutview of the Rexing V1 Basic Dash Cam, demonstrating its features and setup.
Betjeningsvejledning
Automatisk optagelse
The Rexing V1 Basic Dash Cam is designed for convenience. It automatically powers on and begins recording when your vehicle starts, and powers off when the vehicle is turned off, ensuring continuous coverage without manual intervention.
Loop-optagelse
The dash cam records video in seamless loops. When the memory card is full, the oldest unlocked footage is automatically overwritten, ensuring that recording never stops. You can set the loop recording duration to 1, 2, or 3 minutes via the settings menu.

Image: Illustration of the Loop Recording function, showing older filebliver overskrevet.
G-Sensor (Accident Auto-Detection)
Equipped with a built-in G-sensor, the dash cam automatically detects sudden shakes or collisions. In such an event, the current video footage is locked and protected from being overwritten, providing crucial evidence in case of an accident. The sensitivity of the G-sensor can be adjusted in the settings.
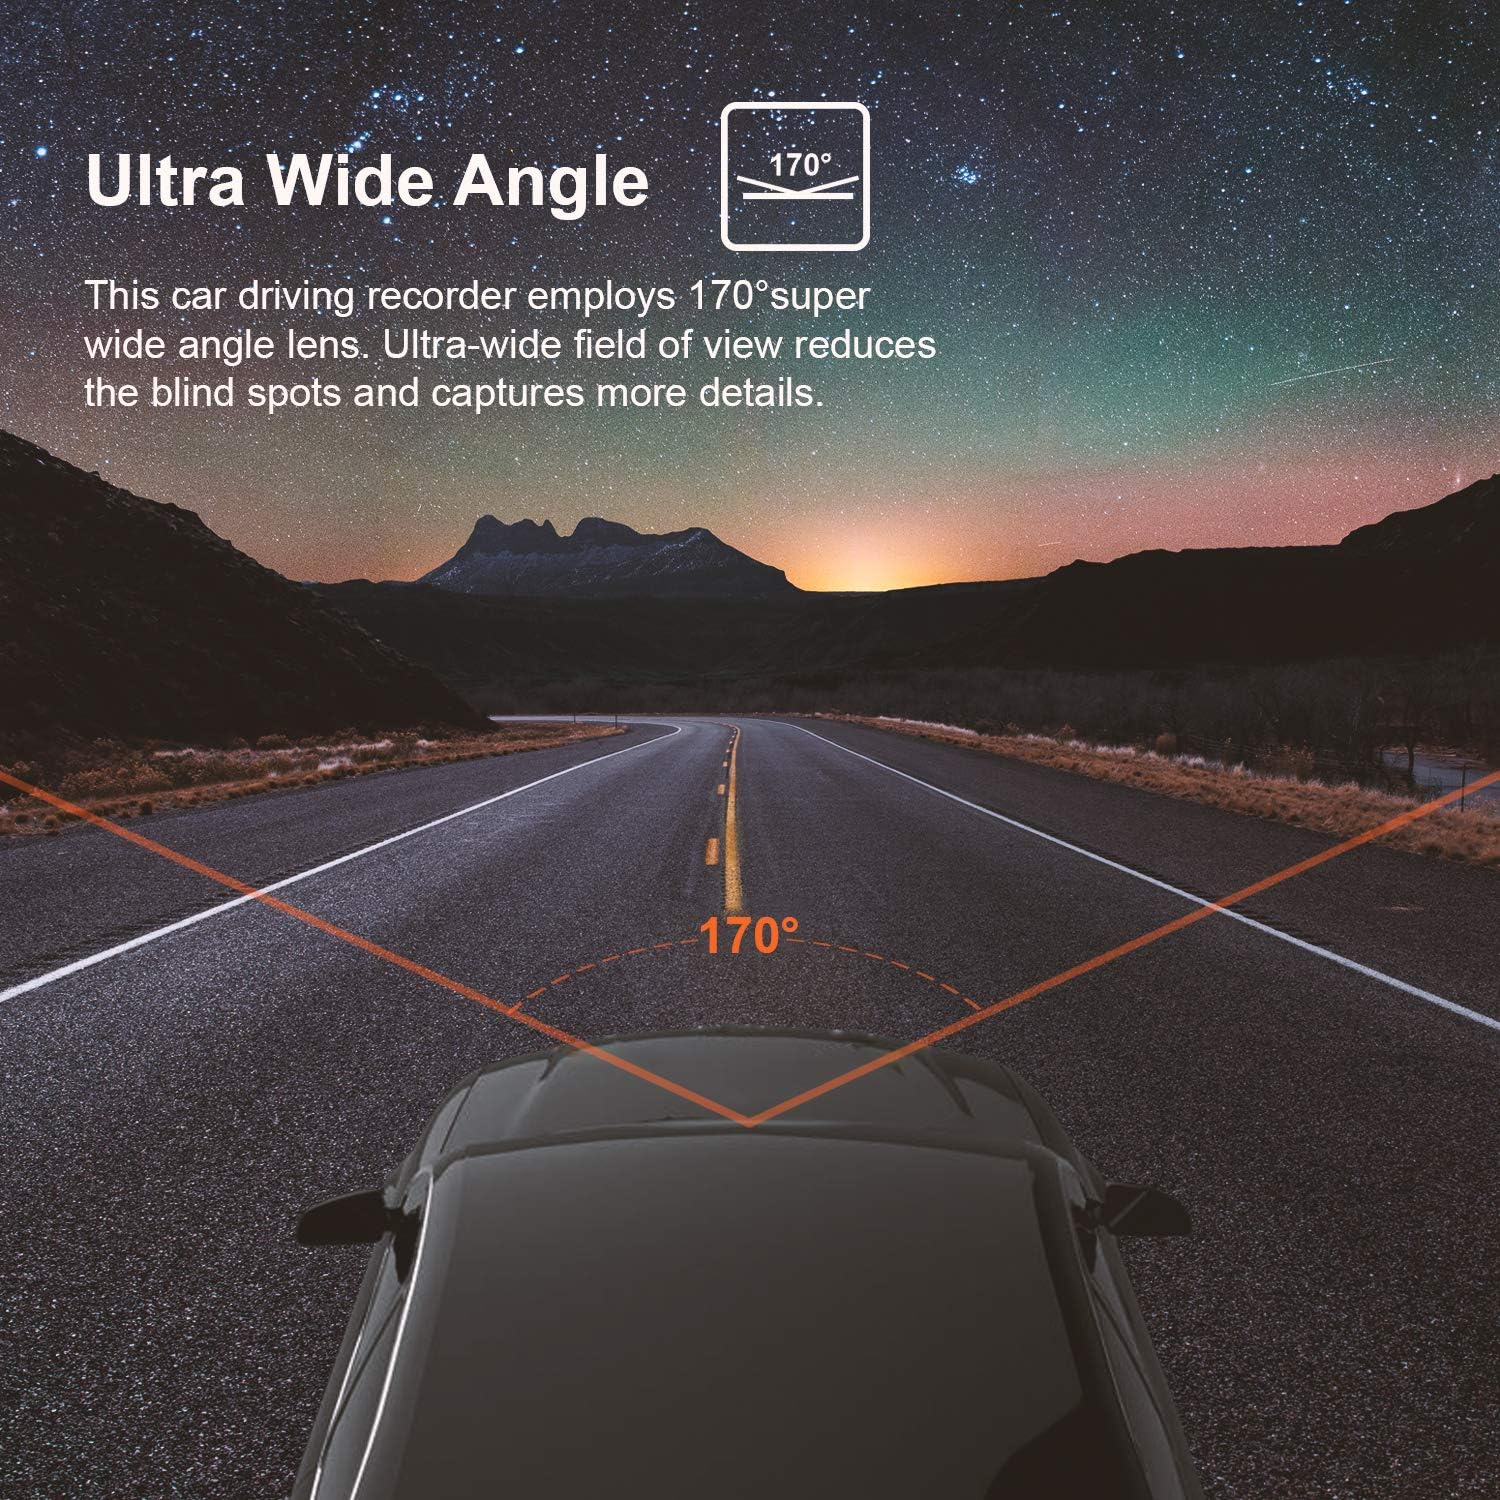
Image: The Gravity Sensor icon indicating footage is locked upon collision detection.
Parkeringsmonitor
When the parking monitor feature is enabled, the dash cam will automatically turn on and begin recording if it detects any vibration or impact while your vehicle is parked. This provides 24/7 surveillance and protection for your car.

Image: The Parking Monitor feature ensures surveillance even when the car is off.
Super Night Vision & WDR
The dash cam features a combination of F1.8 large aperture, WDR (Wide Dynamic Range), and HDR (High Dynamic Range) to ensure clear images even in low-light conditions. This eliminates the need for an auxiliary light source at night, making it easy to obtain sharp, color-accurate footage.
Image: Visual representation of Superior Night Vision and WDR enhancing video quality in low light.
170° Super Wide Angle Lens
The 170° super wide-angle lens provides an ultra-wide field of view, reducing blind spots and capturing more details of the road ahead. This comprehensive coverage helps to preserve the real scene in your recordings.

Image: Depiction of the 170° super wide-angle lens capturing a broad view af vejen.
Optional GPS Functionality
While the GPS unit is sold separately, the Rexing V1 Basic Dash Cam is compatible with an optional GPS module. When connected, it allows you to record your driving route, location, and speed, which can be viewved hjælp af Rexing GPS Player-softwaren på din computer.
Image: The Rexing V1 Basic Dash Cam, compatible with an optional GPS module for tracking driving data.
Using the Mobile App (TimaCam)
The dash cam supports WiFi connectivity, allowing you to connect it to your smartphone via the TimaCam app (available on App Store and Google Play). Through the app, you can access camera settings, view live footage, and download recorded videos directly to your phone.
Pleje og vedligeholdelse
To ensure the longevity and optimal performance of your Rexing V1 Basic Dash Cam, follow these care guidelines:
- Temperaturmodstand: The dash cam is designed to withstand extreme temperatures from -5°F to 160°F (-20°C to 71°C). However, prolonged exposure to direct sunlight in extremely hot conditions may affect performance.
- Rensning: Use a soft, dry cloth to clean the camera lens and body. Avoid using harsh chemicals or abrasive materials that could scratch the lens or damage the device.
- Hukommelseskort: Regularly format your memory card (at least once a month) to ensure stable recording and prevent data corruption. Use only high-endurance Micro SD cards from reputable brands.
Image: The dash cam is built to withstand a wide range of temperatures, from hot deserts to snowy environments.
Fejlfinding af almindelige problemer
If you encounter any issues with your Rexing V1 Basic Dash Cam, refer to the following common solutions:
- Enheden tænder ikke: Ensure the power cable is securely connected to both the dash cam and the car's 12V outlet. Check if the car's 12V outlet is functioning. If the battery is completely discharged, it may take a few minutes to turn on after connecting to power.
- Hukommelseskortfejl: If the dash cam displays a memory card error, try formatting the card through the camera's settings menu. If the issue persists, try a different high-endurance Micro SD card.
- Footage Not Saving/Looping: Ensure loop recording is enabled in the settings. Check the G-sensor sensitivity; if it's too high, it might lock too many files, filling up the card quickly.
- Dårlig videokvalitet: Ensure the lens is clean and free from smudges. Check the video resolution settings to ensure it's set to your desired quality (e.g., 1080p FHD).
- Enheden fryser: If the device freezes, press and hold the power button for 4 seconds to reset it. If the problem continues, try updating the firmware or contacting customer support.
Produktspecifikationer
| Feature | Detalje |
|---|---|
| Produktdimensioner | 3.5 x 2.25 x 1.5 tommer |
| Varens vægt | 3.2 ounce |
| Varemodelnummer | Rexing V1 Basic |
| Batterier | 1 Lithium Ion batterier påkrævet (medfølger) |
| Forbindelsesteknologier | Hjælpeenhed, trådløs |
| Særlige funktioner | Loop Recording, G-Sensor, Night Vision |
| Farve | Sort |
| Hvad er der i æsken | Cable, User Manual, Memory Card |
| Fabrikant | Rexing |
| Dato først tilgængelig | 2. oktober 2019 |
| Orientering | Front |
| Type køretøjstjeneste | Bil |
| Videooptagelsesopløsning | 1080p |
| Monteringstype | Selvklæbende montering |
| Felt Af View | 170 grader |
Garanti og kundesupport
Rexing products are designed for quality and reliability. For warranty information, technical support, or any inquiries regarding your Rexing V1 Basic Dash Cam, please contact Rexing customer support:
- Webwebsted: www.rexingusa.com
- E-mail: care@rexingusa.com
Hav venligst din produktmodel og købsoplysninger klar, når du kontakter support.


