1. Introduktion
Tak for købetasing the SENCOR SWS 3000 W Weather Station. This device provides accurate indoor and outdoor temperature and humidity readings, along with time and date display. Please read this manual carefully before operating the device to ensure proper use and to maximize its lifespan.
2. Sikkerhedsoplysninger
- Udsæt ikke hovedenheden eller sensoren for ekstreme temperaturer, direkte sollys eller fugt.
- Undgå at tabe enheden eller udsætte den for kraftige stød.
- Forsøg ikke selv at skille enheden ad eller reparere den. Overlad al service til kvalificeret personale.
- Bortskaf brugte batterier ansvarligt i henhold til lokale regler.
- Opbevar enheden utilgængeligt for børn.
3. Pakkens indhold
Kontroller venligst pakkens indhold for at sikre, at alle varer er til stede:
- SENCOR SWS 3000 W Main Unit (Weather Station)
- Trådløs udendørs sensor
- Brugervejledning (dette dokument)
4. Produktet er slutview

Figure 4.1: The SENCOR SWS 3000 W Weather Station main unit (left) and its accompanying wireless outdoor sensor (right).

Figur 4.2: Vinklet view of the SENCOR SWS 3000 W main unit, showcasindens display og kontrolknapper.
The SENCOR SWS 3000 W Weather Station consists of a main display unit and a wireless outdoor sensor. The main unit features a clear LCD display with white backlight, showing indoor and outdoor temperature, humidity, time, and date. The wireless sensor transmits outdoor data to the main unit.

Figur 4.3: Nærbillede view of the wireless outdoor sensor, which transmits temperature and humidity data to the main unit.

Figur 4.4: Bagside view of the main unit, showing the battery compartment and the integrated stand for tabletop placement.
5. Opsætning
5.1 Batteriinstallation
The SENCOR SWS 3000 W Weather Station is battery-powered. Ensure you have the correct battery types as specified in the specifications section.
- Hovedenhed: Open the battery compartment cover on the back of the main unit (refer to Figure 4.4). Insert the required AAA batteries, observing the correct polarity (+/-). Close the cover securely.
- Trådløs sensor: Open the battery compartment cover on the back of the wireless sensor (refer to Figure 4.3). Insert the required batteries (typically AAA), observing the correct polarity (+/-). Close the cover securely.
5.2 Sensorplacering
Proper placement of the wireless sensor is crucial for accurate outdoor readings.
- Place the sensor in a shaded area to avoid direct sunlight, which can cause inaccurate temperature readings.
- Ensure the sensor is protected from direct rain or snow.
- Position the sensor within the effective transmission range (up to 30 meters in open air) of the main unit. Walls and other obstacles can reduce this range.
- Avoid placing the sensor near large metal objects or electrical appliances that may interfere with the wireless signal.

Figur 5.1: Eksample placement of the main unit indoors and the wireless sensor outdoors for optimal performance.
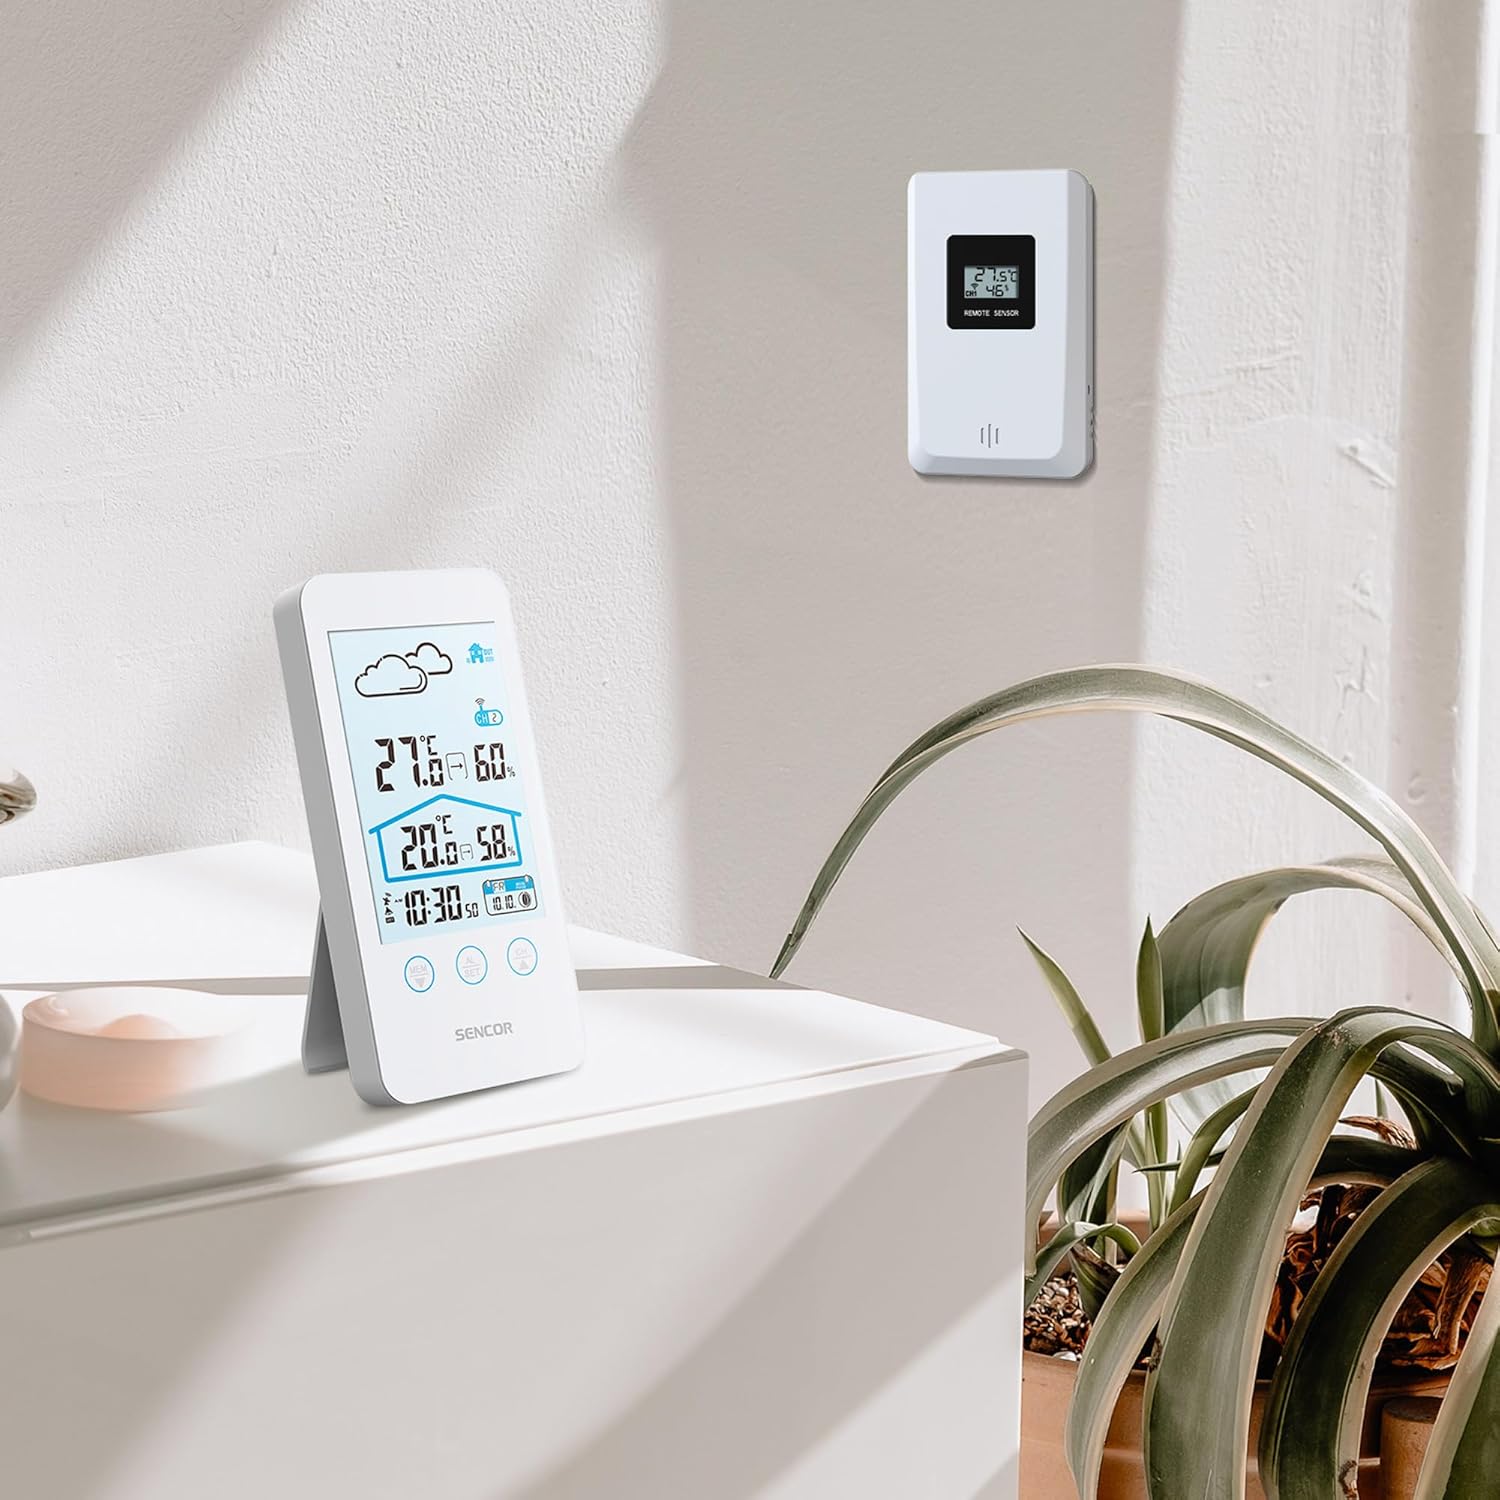
Figure 5.2: The main unit can be placed on a flat surface, while the sensor is mounted on a wall or suitable outdoor location.
5.3 Første opstart og parring
After installing batteries in both units, the main unit will automatically search for the wireless sensor. This process may take a few minutes.
- Place the main unit and the sensor close to each other during the initial pairing process.
- Når den er tilsluttet, vises udetemperaturen og luftfugtigheden på hovedenhedens display.
- If the connection is not established, remove and reinsert the batteries from both units, then try again.
6. Betjeningsvejledning
6.1 Vis information
The LCD display provides various information at a glance:
- Udendørs temperatur og luftfugtighed: Displayed prominently at the top.
- Indendørs temperatur og luftfugtighed: Displayed below the outdoor readings.
- Tid og dato: Located at the bottom of the display.
- Weather Forecast Icon: An icon indicating predicted weather conditions (e.g., sunny, cloudy, rainy).
- Kanalindikator: Shows which sensor channel is currently displayed (if multiple sensors are used).
- Batteriindikator: Alerts when batteries are low for either unit.

Figur 6.1: Detaljeret view of the SENCOR SWS 3000 W display, highlighting various information segments.
6.2 Indstilling af tid og dato
To set the time and date on your weather station:
- Press and hold the "AL/SET" button (usually located below the display) for a few seconds until the time digits start flashing.
- Use the "CH" or "MEM" buttons to adjust the flashing value (e.g., hour, minute).
- Press "AL/SET" again to confirm the setting and move to the next adjustable item (e.g., minute, year, month, day).
- Repeat until all settings are configured. Press "AL/SET" one last time to exit the setting mode.
6.3 Valg af temperaturenhed (°C/°F)
Sådan skifter du mellem Celsius (°C) og Fahrenheit (°F):
- Locate the °C/°F button, usually on the back or side of the main unit, or sometimes integrated with another button (e.g., "MEM" or "CH" with a short press).
- Press this button to toggle between the two temperature units. The display will update accordingly.
6.4 Channel Selection (for multiple sensors)
If you have multiple wireless sensors (up to 3 supported by SWS 3000 W), you can switch between their readings:
- Press the "CH" button (Channel) on the main unit.
- Each press will cycle through the available channels (CH1, CH2, CH3) or an auto-cycle mode.
- Ensure each sensor is set to a different channel using its internal switch (if available).
6.5 Memory Function (Min/Max Readings)
The weather station records the minimum and maximum temperature and humidity readings over a period.
- Press the "MEM" button (Memory) to view de maksimalt registrerede værdier.
- Press "MEM" again to view de mindste registrerede værdier.
- Press "MEM" a third time to return to current readings.
- To clear the recorded Min/Max values, press and hold the "MEM" button while viewved dem.
7. Vedligeholdelse
- Rensning: Tør hovedenheden og sensoren af med en blød kludamp klæde. Brug ikke slibende rengøringsmidler eller opløsningsmidler.
- Udskiftning af batteri: Udskift batterierne, når indikatoren for lavt batteriniveau vises på displayet. Udskift altid alle batterier i en enhed på samme tid.
- Opbevaring: Hvis enheden opbevares i længere tid, skal alle batterier fjernes for at forhindre lækage. Opbevares køligt og tørt.
8. Fejlfinding
| Problem | Mulig årsag | Løsning |
|---|---|---|
| Intet display på hovedenheden. | Batterierne er døde eller isat forkert. | Kontroller batteripolariteten, og udskift dem med nye. |
| Outdoor reading not displayed or flashing. | Sensor uden for rækkevidde, lavt sensorbatteri eller interferens. | Move sensor closer to main unit. Replace sensor batteries. Relocate units away from interference sources. Re-pair units if necessary. |
| Unøjagtige temperatur-/fugtighedsmålinger. | Sensor exposed to direct sunlight or moisture. | Flyt sensoren til et skyggefuldt, beskyttet område. |
| Time/Date incorrect. | Not set correctly or batteries removed. | Follow instructions in Section 6.2 to set time and date. |
9. Specifikationer
| Feature | Detalje |
|---|---|
| Modelnummer | SWS 3000 W |
| Mærke | Sencor |
| Hovedenhedens dimensioner (L x B x H) | 80 x 161 x 23 mm |
| Vægt af hovedenhed | 165 g |
| Indendørs temperaturområde | 0 °C til 60 °C |
| Udendørs temperaturområde | 0 °C til 60 °C |
| Temperatur nøjagtighed | ±1 °C |
| Fugtighedsområde | 20% til 95% RH |
| Trådløs frekvens | 433 MHz |
| Transmission Range | Op til 30 meter (udendørs) |
| Strømkilde (hovedenhed) | AAA-batterier (medfølger ikke) |
| Strømkilde (sensor) | AAA-batterier (medfølger ikke) |
| Speciel funktion | Letvægtsdesign |
| Farve | Hvid |
Note: Specifications are subject to change without notice. Battery quantities are typical and should be confirmed with product packaging.
10. Garanti og support
SENCOR products are designed and manufactured to the highest quality standards. For warranty information, please refer to the warranty card included with your product or visit the official SENCOR webwebsted. For teknisk support eller serviceforespørgsler, kontakt venligst SENCORs kundeservice via deres officielle kanaler.
Gem din købskvittering som købsbevis af garantihensyn.


