Indledning
This manual provides comprehensive instructions for the installation, operation, and maintenance of your VTech TELVTC50 Corded Telephone. Please read this manual thoroughly before using your new telephone to ensure proper function and to take full advantage af dens funktioner.
Pakkens indhold
Sørg for, at alle varer er til stede i din pakke:
- VTech TELVTC50 Corded Telephone Unit
- Oprullet håndsætledning
- Telefonledning
Produkt overview
Familiarize yourself with the components of your VTech TELVTC50 telephone.

Figur 1: Forside View of the Telephone. This image shows the telephone's keypad, LCD display, and function buttons including UP, DOWN, BACK, SET/FLASH, RD/PAUSE, and DEL/EXIT.

Figur 2: Top-Down View of the Telephone. This perspective highlights the compact design and the arrangement of the handset and base unit.
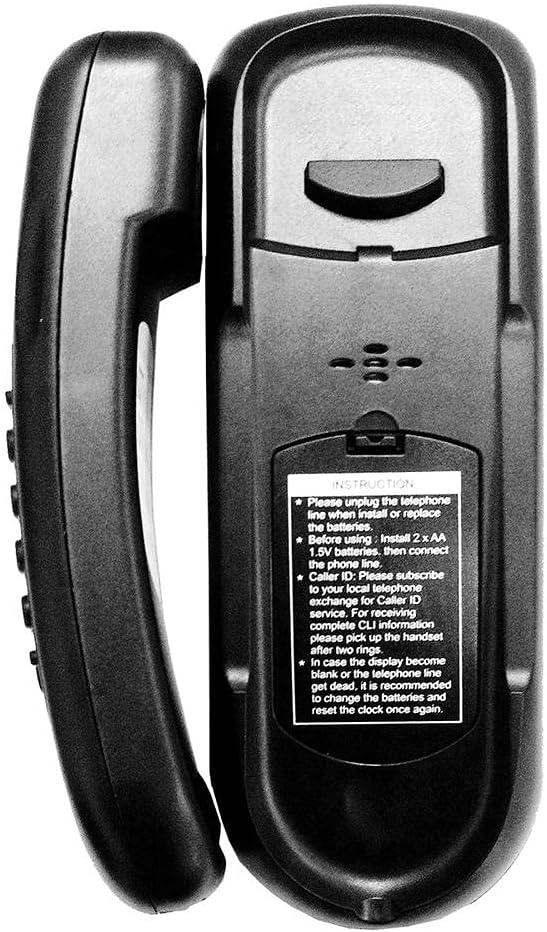
Figur 3: Tilbage View of the Telephone. This image displays the battery compartment cover, wall-mount slots, and a label with important instructions regarding battery installation for Caller ID functionality and clock reset.
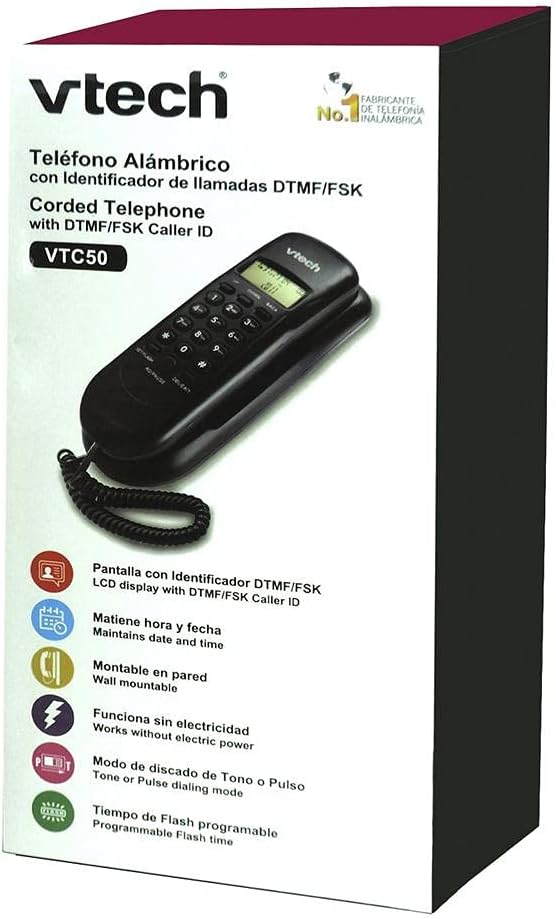
Figur 4: Produktemballage. The packaging highlights key features such as DTMF/FSK Caller ID LCD display, date and time maintenance, wall-mountable design, operation without external electric power, Tone or Pulse dialing mode, and programmable Flash time.
Opsætning
Follow these steps to set up your VTech TELVTC50 telephone.
1. Battery Installation (for Caller ID and Display)
While the telephone functions for basic calls without batteries, 2 AA 1.5V batteries are required for Caller ID display and maintaining the clock/date. Refer to Figure 3 for the battery compartment location.
- Locate the battery compartment on the back of the telephone unit.
- Åbn batterirummets dæksel.
- Insert 2 AA 1.5V batteries, observing the correct polarity (+ and -).
- Luk batterirummets dæksel forsvarligt.
2. Connecting the Telephone Line
- Connect one end of the coiled handset cord to the handset and the other end to the jack on the side of the telephone base unit.
- Connect one end of the telephone line cord to the TEL LINE jack on the back of the telephone unit.
- Tilslut den anden ende af telefonledningen til et standard telefonstik i væggen.
3. Wall Mounting or Desk Placement
Your VTech TELVTC50 telephone can be placed on a desk or mounted on a wall.
Skrivebordsplacering:
Simply place the telephone on a flat, stable surface.
Vægmontering:
The telephone features integrated wall-mount slots on the back (refer to Figure 3). You will need two screws (not included) spaced appropriately to align with these slots on your wall plate.
- Ensure the telephone line cord is connected.
- Align the wall-mount slots on the back of the telephone with the screws on your wall plate.
- Slide the telephone down to secure it in place.
4. Initial Clock and Date Setting
After installing batteries, the display may show an incorrect date or time. Use the SET/FLASH knap og OP/NED buttons to adjust the clock and date as needed. Consult the operating instructions for detailed steps on setting the time and date.
Betjeningsvejledning
Foretag et opkald
- Tag håndsættet.
- Lyt efter en klartone.
- Ring det ønskede telefonnummer op ved hjælp af tastaturet.
- Vent på, at opkaldet forbindes.
- When finished, place the handset back on the base.
Modtagelse af et opkald
- When the telephone rings, pick up the handset.
- Begynd din samtale.
- When finished, place the handset back on the base.
Using Caller ID
To utilize Caller ID features, you must subscribe to Caller ID service from your local telephone provider. For complete Caller ID information, it is recommended to pick up the handset after two rings.
Reviewopkaldshistorik:
Brug UP og NED buttons to scroll through the stored incoming call numbers. The telephone stores up to 30 incoming numbers.
Deleting Call History:
Mens viewing a call entry, press the DEL/EXIT button to delete the current entry.
Flash funktion
De SET/FLASH button is used to activate call waiting or transfer calls if you have these services from your telephone provider. The flash time is programmable.
Redial/Pause Function
De RD/PAUSE button is used to redial the last number dialed. It can also be used to insert a pause during dialing, which is useful for accessing external lines or voicemail systems.
Tone/Pulse Dialing Mode
Your telephone supports both Tone and Pulse dialing modes. The default setting is typically Tone. If you need to change this, consult your telephone service provider for the correct setting for your line. Instructions for changing this setting are usually found within the phone's menu system, accessed via the SET/FLASH knap.
Opretholdelse
Rengøring af telefonen
To keep your telephone clean, wipe it with a soft, slightly damp cloth. Do not use harsh chemicals or abrasive cleaners, as these can damage the finish.
Udskiftning af batteri
If the display becomes blank or the clock/date resets frequently, it is recommended to replace the 2 AA batteries. Refer to the "Battery Installation" section for instructions.
Fejlfinding
If you experience issues with your VTech TELVTC50 telephone, try the following solutions:
| Problem | Mulig løsning |
|---|---|
| Ingen klartone. |
|
| Skærmen er tom eller virker ikke. |
|
| Caller ID is not working. |
|
| Kan ikke foretage eller modtage opkald. |
|
Specifikationer
- Model: TELVTC50
- Mærke: VTech
- Type: Kablet telefon
- Monteringsmuligheder: Wall or Table
- Strømkilde: Electric with cable (no external power adapter needed for basic function)
- Batteries (for Caller ID/Display): 2 x AA 1.5V (medfølger ikke)
- Materiale: Plast
- Farve: Sort
- Dimensioner (L x B x H): 30 x 10 x 7 cm (ca. 11.8 x 3.9 x 2.8 tommer)
- Vægt: Cirka 0.5 kg (500 gram)
- Opkaldstilstand: Tone/Pulse selectable
- Opkalds-id: DTMF/FSK compatible (subscription required)
- Call History Storage: Up to 30 incoming numbers, 9 outgoing numbers
- UPC: 183420003681
Garanti og support
For warranty information and technical support, please refer to the documentation included with your purchase or visit the official VTech webwebstedet. Behold din købskvittering som købsbevis.
For further assistance, you may contact VTech customer service directly.


