1. Introduktion
Thank you for choosing the Tacklife PES01A Circular Saw. This powerful and versatile tool is designed for efficient and precise cutting of various materials, including wood and plastic. Featuring a robust 1500W motor, laser guide, and adjustable cutting capabilities, it is an ideal tool for both professional and DIY projects. Please read this manual thoroughly before operation to ensure safe and effective use of your new circular saw.

Figure 1.1: Tacklife PES01A Circular Saw overview.
2. Generelle sikkerhedsinstruktioner
Følg altid grundlæggende sikkerhedsforanstaltninger, når du bruger elektrisk værktøj, for at reducere risikoen for brand, elektrisk stød og personskade. Gem denne manual til senere brug.
2.1. Arbejdsområdesikkerhed
- Hold arbejdsområdet rent og godt oplyst. Rodede eller mørke områder inviterer til ulykker.
- Brug ikke elværktøj i eksplosive atmosfærer, såsom i nærheden af brændbare væsker, gasser eller støv. Elværktøj danner gnister, som kan antænde støv eller dampe.
- Hold børn og omkringstående væk, mens du betjener et elværktøj. Distraktioner kan få dig til at miste kontrollen.
2.2. Elektrisk sikkerhed
- Elværktøjsstik skal passe til stikkontakten. Modificer aldrig stikket på nogen måde.
- Undgå kropskontakt med jordede eller jordede overflader, såsom rør, radiatorer, komfurer og køleskabe. Der er en øget risiko for elektrisk stød, hvis din krop er jordet eller jordet.
- Udsæt ikke elværktøj for regn eller våde forhold. Vand, der trænger ind i et elværktøj, øger risikoen for elektrisk stød.
- Misbrug ikke ledningen. Brug aldrig ledningen til at bære, trække eller trække elværktøjet ud. Hold ledningen væk fra varme, olie, skarpe kanter eller bevægelige dele.
2.3. Personlig sikkerhed
- Brug altid øjenbeskyttelse. Brug sikkerhedsbriller eller beskyttelsesbriller.
- Brug høreværn, når du bruger værktøjet i længere perioder.
- Klæd dig ordentligt på. Bær ikke løstsiddende tøj eller smykker. Hold dit hår og tøj væk fra bevægelige dele.
- Vær opmærksom, hold øje med, hvad du laver, og brug din sunde fornuft, når du betjener et elværktøj.
- Use safety clamps or a vise to secure the workpiece. This is safer than using your hand and it frees both hands to operate the tool.
2.4. Circular Saw Specific Safety
- Hold hænderne væk fra skæreområdet og klingen. Hold din anden hånd på hjælpehåndtaget eller motorhuset. Hvis begge hænder holder saven, kan de ikke skæres af klingen.
- Ræk ikke ind under arbejdsemnet. Beskyttelsen kan ikke beskytte dig mod klingen under emnet.
- Tilpas skæredybden til emnets tykkelse. Mindre end en hel tand af klingen skal være synlig under arbejdsemnet.
- Hold aldrig arbejdsemnet i dine hænder eller på tværs af benet, mens du skærer. Fastgør emnet til en stabil platform.
- Hold elværktøjet i de isolerede gribeflader, når du udfører en operation, hvor skæretilbehøret kan komme i kontakt med skjulte ledninger eller sin egen ledning.
- Always ensure the lower guard is closed before placing the saw down.
3. Komponenter og funktioner
Familiarize yourself with the parts of your Tacklife PES01A Circular Saw before operation.

Figure 3.1: Key components of the circular saw.
- 1. Kraftig motor: Ensures good heat dissipation.
- 2. Laserafbryder: Activates the laser guide.
- 3. 3M Power Cord & Cable Tie: Convenient for storage and use.
- 4. Dobbelt sikkerhedsafbryder: Requires pressing both buttons to start, preventing accidental injury.
- 5. Rubberized Handle: For et komfortabelt og sikkert greb.
- 6. Support Handle: Provides additional control.
- 7. Aluminum Alloy Cover: Durable housing.
- 8. Iron Base Plate: Sturdy base for cutting.
- 9. Iron Blade Guard: Protects the blade.
Inkluderet tilbehør:

Figure 3.2: Standard accessories included with the saw.
- 1 x Tacklife PES01A Circular Saw
- 1 x 185mm 24-Tooth TCT Blade (for wood/plastic)
- 1 x 185mm 40-Tooth TCT Blade (for wood/plastic)
- 1 x Hex Wrench (for blade changes)
- 1 x Parallel Guide Ruler
- 1 x Dust Port Adapter (35mm diameter)
- 1 x brugermanual
- 1 x garantikort
4. Opsætning og montering
4.1. Blade Installation/Removal
- Ensure the saw is unplugged from the power source before attempting any blade changes.
- Tryk og hold spindellåseknappen nede.
- Using the hex wrench, loosen the blade bolt by turning it counter-clockwise.
- Løft den nederste klingebeskyttelse, og fjern forsigtigt den gamle klinge.
- Placer det nye blad på spindlen, og sørg for, at tænderne peger i pilens retning på savens beskyttelsesskærm.
- Replace the blade bolt and tighten it securely with the hex wrench while holding the spindle lock button.
- Release the spindle lock and check that the blade rotates freely and the guard moves smoothly.
4.2. Attaching the Parallel Guide Ruler
The parallel guide ruler helps achieve straight cuts parallel to the edge of the workpiece.
- Slide the guide ruler into the slot on the front of the saw's base plate.
- Adjust the ruler to the desired cutting width.
- Tighten the locking screw to secure the ruler in place.
4.3. Tilslutning af støvudsugning
For a cleaner work environment, connect a vacuum cleaner to the dust port.
- Attach the 35mm dust port adapter to the dust outlet on the saw.
- Connect your vacuum cleaner hose to the adapter.
5. Betjeningsvejledning
5.1. Justering af skæredybde
The cutting depth can be adjusted to match the thickness of your material. The maximum cutting depth at 90° is 65mm (2.5 inches).

Figure 5.1: Adjusting cutting depth for straight and bevel cuts.
- Loosen the depth adjustment lever located at the rear of the saw.
- Raise or lower the base plate to the desired cutting depth. Ensure only a small portion of the blade teeth extends below the workpiece.
- Spænd dybdejusteringshåndtaget godt fast.
5.2. Adjusting Bevel Angle (Miter Cut)
The saw can make bevel cuts up to 45°. The maximum cutting depth at 45° is 45mm (1.8 inches).
- Loosen the bevel adjustment knob/lever at the front of the saw.
- Tilt the base plate to the desired angle (0° to 45°).
- Tighten the bevel adjustment knob/lever securely.
5.3. Brug af laserguiden
The integrated laser guide provides a visual line for precise cutting.

Figure 5.2: The laser guide assists in making straight cuts.
- Locate the laser switch on the saw.
- Flip the switch to turn the laser on. A red laser line will project onto your workpiece, indicating the cutting path.
- Align the laser line with your marked cut line on the material.
- Turn off the laser when not in use to conserve battery (if applicable) or prevent accidental activation.
5.4. At lave et snit
Sørg altid for, at emnet er sikkert fastgjortamped før skæring.

Figure 5.3: Cutting a wooden board with the circular saw.

Figure 5.4: Cutting a plastic sheet with the circular saw.
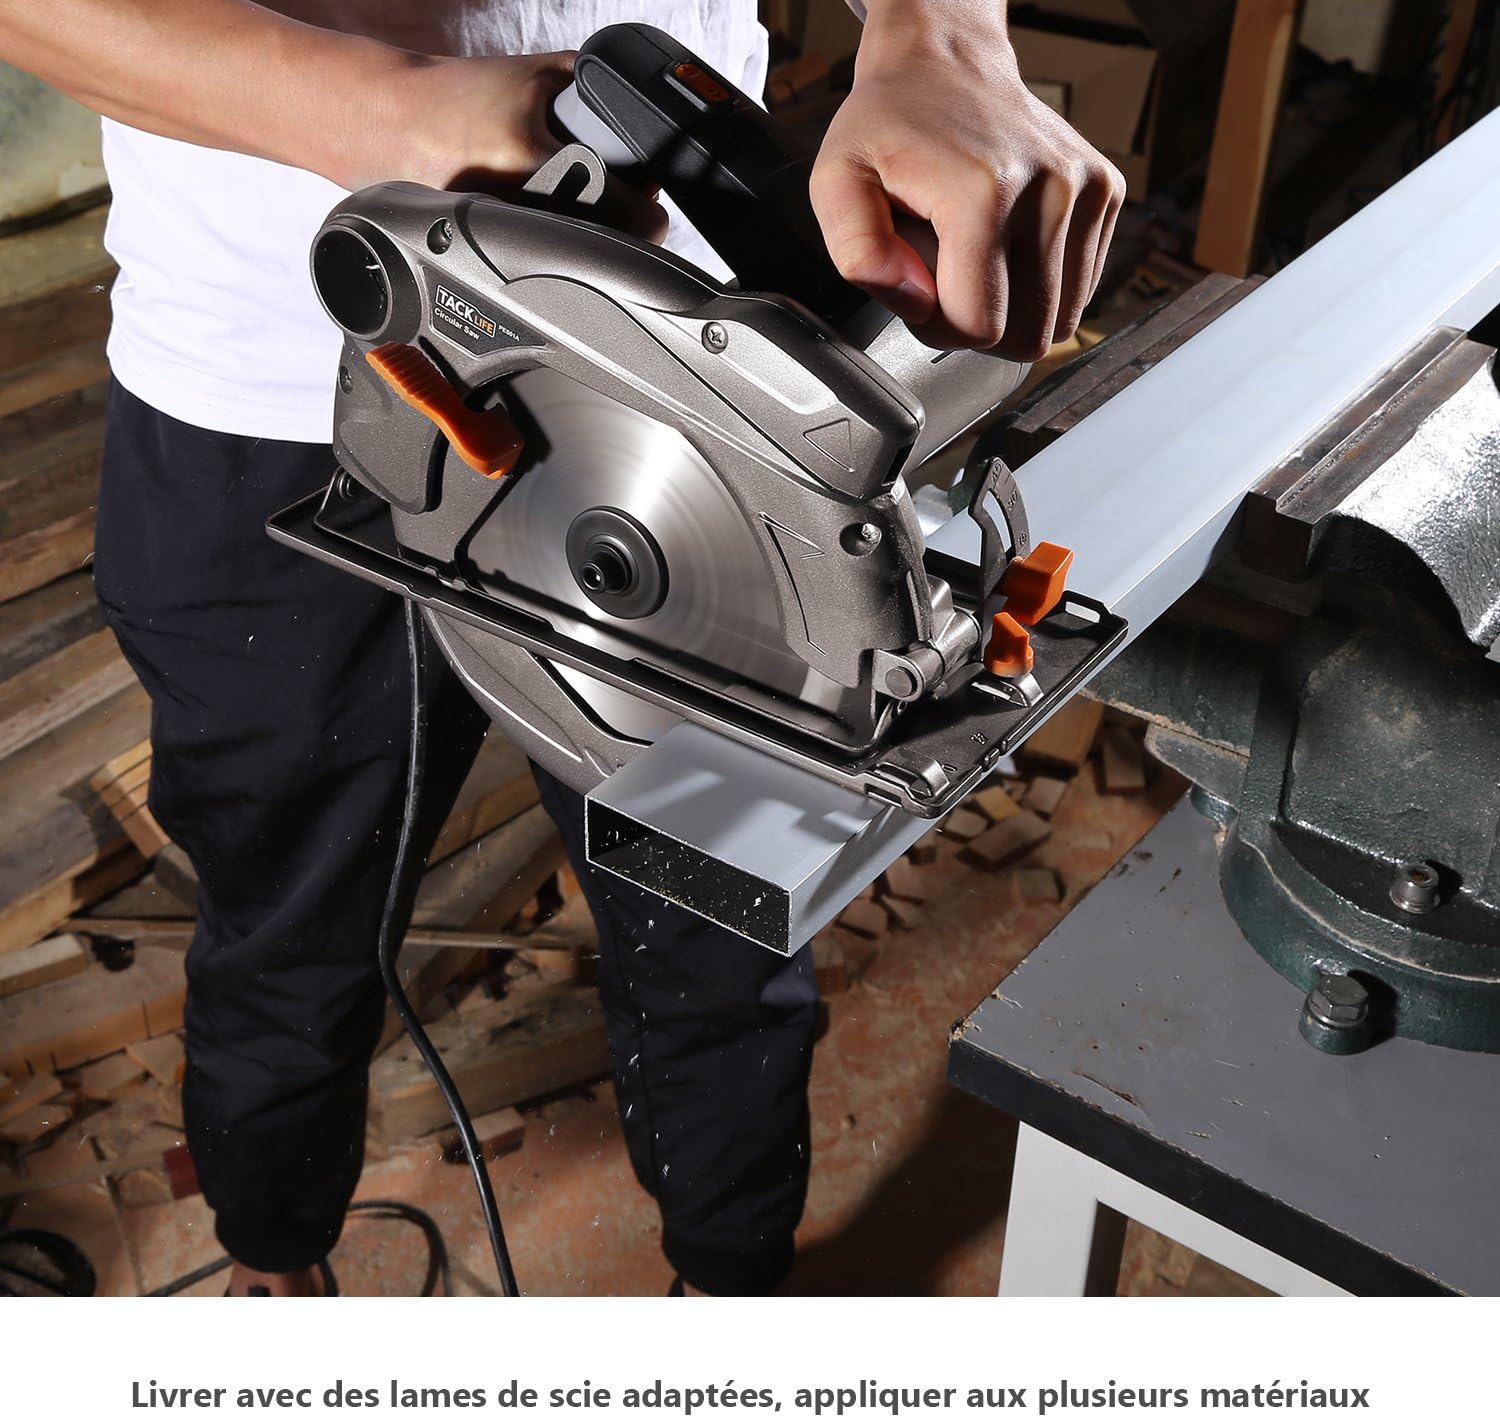
Figure 5.5: Cutting a metal profile with the circular saw (ensure appropriate blade is used).
- Sæt saven i en passende stikkontakt.
- Hold the saw firmly with both hands, ensuring a stable grip on the main and auxiliary handles.
- To start the saw, press the double safety switch (requires pressing both buttons simultaneously for safety).
- Lad bladet nå fuld hastighed, før du begynder at skære.
- Guide the saw smoothly and steadily along your marked line. Do not force the saw; let the blade do the work.
- Maintain a consistent feed rate.
- Når snittet er færdigt, slippes aftrækkeren og klingen stopper helt, før saven løftes fra emnet.
- Unplug the saw after use.
6. Vedligeholdelse
Regelmæssig vedligeholdelse sikrer din rundsavs lange levetid og sikker drift.
6.1. Rensning
- Tag altid stikket ud af saven før rengøring.
- Use a soft brush or compressed air to remove dust and debris from the motor vents and blade guard.
- Wipe down the exterior of the saw with a damp klæde. Brug ikke skrappe kemikalier eller slibende rengøringsmidler.
- Keep the base plate clean to ensure smooth gliding over the workpiece.
6.2. Knivpleje
- Inspect blades regularly for dullness, cracks, or missing teeth. Replace damaged blades immediately.
- Clean resin and pitch buildup from blades using a suitable blade cleaner.
- Opbevar knivene korrekt for at forhindre skader og korrosion.
6.3. Opbevaring
- Opbevar saven på et tørt og sikkert sted utilgængeligt for børn.
- Beskyt netledningen mod skader under opbevaring.
7. Fejlfinding
Dette afsnit omhandler almindelige problemer, du kan støde på med din rundsav.
| Problem | Mulig årsag | Løsning |
|---|---|---|
| Saven starter ikke. | No power supply; Safety switch not engaged; Faulty power cord. | Check power outlet and circuit breaker; Ensure both safety switch buttons are pressed; Inspect power cord for damage. |
| Blade not cutting smoothly or burning wood. | Dull or dirty blade; Incorrect blade for material; Overfeeding the saw. | Replace or clean blade; Use appropriate blade for the material; Reduce feed rate. |
| Overdreven vibration. | Loose blade; Damaged blade; Worn bearings. | Tighten blade bolt; Replace blade; Contact customer support if bearings are suspected. |
| Laser guide not working. | Laser switch off; Laser lens dirty; Laser module faulty. | Turn on laser switch; Clean laser lens; Contact customer support. |
| Dust collection is poor. | Dust port clogged; Vacuum not powerful enough; Hose not properly connected. | Clear dust port; Use a more powerful vacuum; Ensure hose is securely attached. |
8. Tekniske specifikationer
| Feature | Specifikation |
|---|---|
| Model | PES01A |
| Strømindgang | 1500 W |
| Voltage | 230 volt |
| Hastighed uden belastning | 4700 RPM |
| Bladets diameter | 185 mm (7-1/4 tommer) |
| Maks. skæredybde (90°) | 65 mm (2.5 tommer) |
| Maks. skæredybde (45°) | 45 mm (1.8 tommer) |
| Skrå kapacitet | 0° - 45° |
| Vægt | 4.9 kg (10.8 lbs) |
| Laserguide | Ja |
| Støvportdiameter | 35 mm |
9. Garanti og support
Tacklife products are manufactured to high-quality standards and are warranted against defects in materials and workmanship. Please refer to the included warranty card for specific terms and conditions, including the warranty period and registration process.
Figur 9.1: Eksample of included warranty card.
Kundesupport:
For technical assistance, troubleshooting, or warranty claims, please contact Tacklife customer support. Contact information can typically be found on the warranty card or the official Tacklife webwebsted.
- Webwebsted: www.tacklife.com (Tjek venligst den officielle webhjemmeside for de mest opdaterede kontaktoplysninger.)
- E-mail: Refer to your warranty card or product packaging.
When contacting support, please have your product model (PES01A) and purchase date ready.


