1. Introduktion
This manual provides detailed instructions for the Verbatim Store 'n' Go Secure Portable Hard Drive, Model 53403. It covers product features, setup, operation, maintenance, and troubleshooting to ensure optimal performance and data security. Please read this manual thoroughly before using the device.
2. Sikkerhedsoplysninger
- Udsæt ikke enheden for ekstreme temperaturer, direkte sollys eller høj luftfugtighed.
- Undgå at tabe eller udsætte enheden for kraftige stød.
- Forsøg ikke at skille enheden ad eller ændre den. Dette vil ugyldiggøre garantien.
- Keep the device away from liquids and corrosive materials.
- Sørg for tilstrækkelig ventilation under brug for at forhindre overophedning.
3. Pakkens indhold
Bekræft at alle varer er til stede i pakken:
- Verbatim Store 'n' Go Secure Portable Hard Drive (2TB)
- USB-C til USB-A-kabel
- USB-A til USB-C adapter
- Nero Backup Software (on drive, Windows compatible only)
- Hurtig startvejledning
4. Produktet er slutview
The Verbatim Store 'n' Go Secure Portable Hard Drive offers secure data storage with 256-bit AES hardware encryption and an integrated keypad for password access. It features a robust design and high-speed USB 3.1 Gen 1 connectivity.
4.1 Nøglefunktioner
- Hardwarekryptering: 256-bit AES hardware encryption for robust data security.
- Integreret tastatur: Numeric keypad for secure password entry.
- Højhastighedsforbindelse: USB 3.1 Gen 1 interface for fast data transfer (up to 5 Gbps).
- Universal kompatibilitet: Includes USB-C to USB-A cable and USB-A to USB-C adapter for broad device compatibility.
- LED-indikatorer: Visual feedback for power, drive activity, and encryption status.
- Holdbart design: Combined aluminum and plastic housing.
4.2 Enhedskomponenter

The device features a numeric keypad on its top surface for entering your security PIN. LED indicators are located near the keypad to show the drive's status.

The USB-C port on the side of the drive is used for connecting to your computer and for power. The drive is bus-powered, meaning it draws power directly from the USB connection.
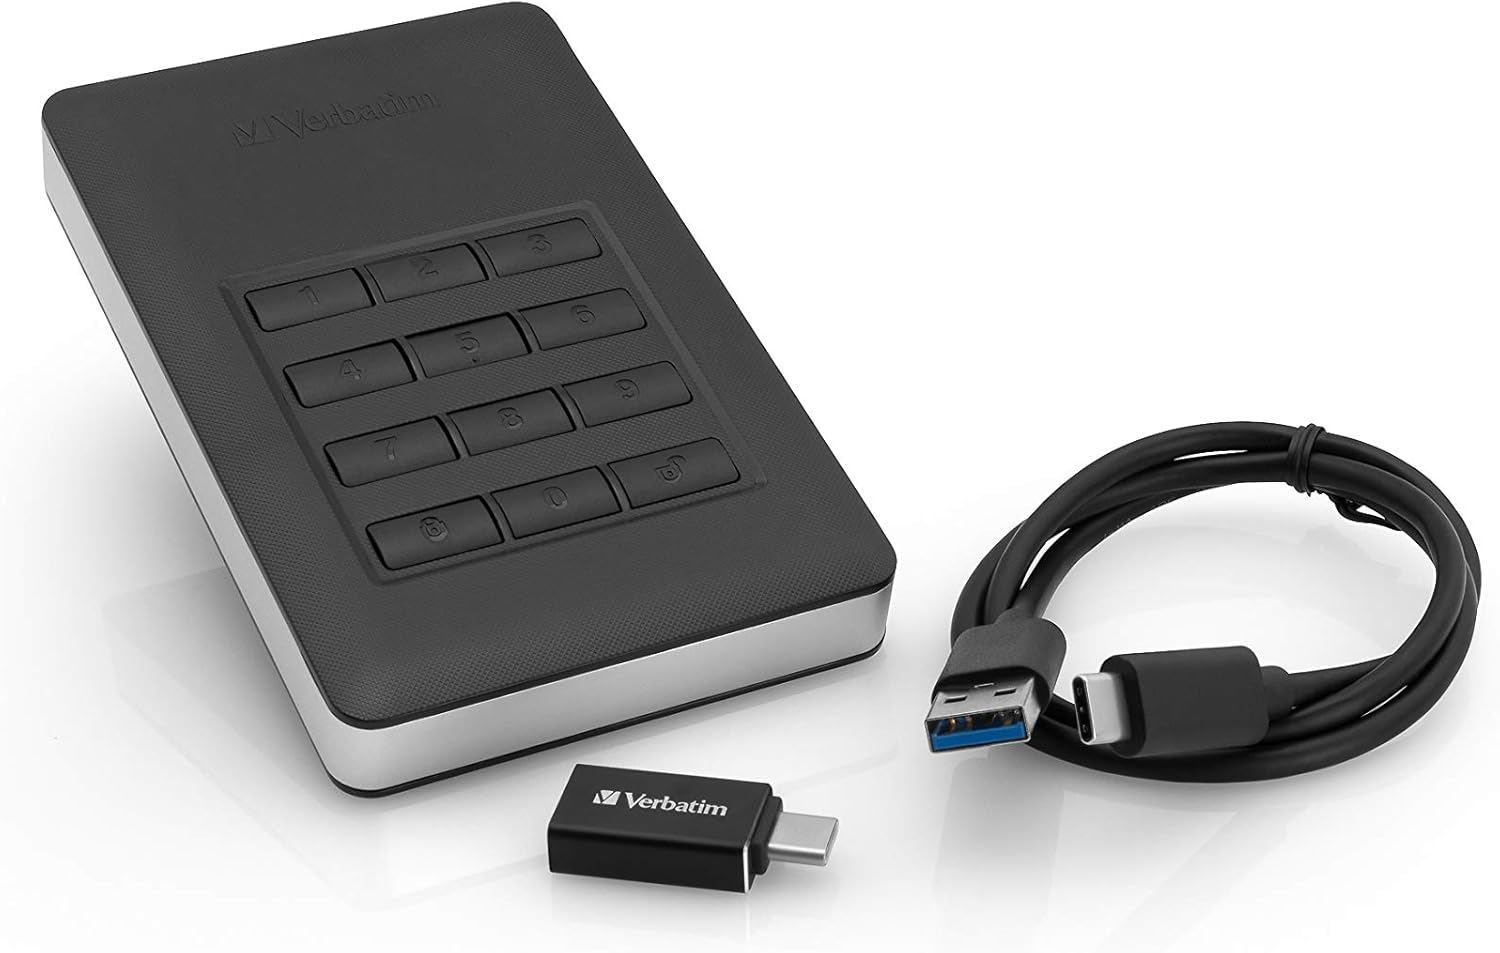
The included cables and adapter ensure compatibility with various devices, from older USB-A ports to newer USB-C ports.
5. Opsætning
5.1 Første tilslutning
- Connect the appropriate USB cable (USB-C to USB-A or USB-C to USB-C using the adapter) to the drive's USB-C port.
- Tilslut den anden ende af kablet til en ledig USB-port på din computer.
- The drive's LEDs will illuminate, indicating it is receiving power. Your computer will detect new hardware, but the drive will not be accessible until unlocked.
5.2 Setting Your PIN (First Use)
Upon first connection, you must set up your administrator PIN. This PIN will be required to unlock the drive.
- Tryk og hold på NØGLE button for 3 seconds. The green and red LEDs will flash alternately.
- Enter your desired PIN (4 to 12 digits).
- Tryk på NØGLE knappen igen for at bekræfte.
- Indtast den samme pinkode igen for at bekræfte.
- Tryk på NØGLE button one last time. The green LED will flash briefly, indicating successful PIN setup.
Vigtig: Remember your PIN. There is no backdoor or recovery method if you forget it, and your data will become permanently inaccessible.
5.3 Formatering af drevet (valgfrit)
The drive comes pre-formatted. If you need to reformat it for specific operating system requirements or to resolve issues, follow your operating system's disk management instructions. Be aware that formatting will erase all data on the drive.
5.4 Nero Backup Software Installation (Windows Only)
The drive includes Nero Backup Software. This software is compatible with Windows operating systems only. To install:
- Unlock the drive as described in Section 6.1.
- Navigate to the drive in 'My Computer' or 'This PC'.
- Locate and run the Nero Backup installer file.
- Følg instruktionerne på skærmen for at fuldføre installationen.
6. Betjening af enheden
6.1 Unlocking the Drive
To access your data, the drive must be unlocked after connecting it to your computer.
- Connect the drive to your computer. The red LED will be solid.
- Enter your administrator PIN on the keypad.
- Tryk på NØGLE knap.
- If the PIN is correct, the green LED will illuminate, and the drive will become accessible on your computer.

6.2 Locking the Drive
To secure your data when not in use or before disconnecting:
- Tryk og hold på NØGLE knappen i 3 sekunder.
- The green LED will turn off, and the red LED will illuminate, indicating the drive is locked.
- Alternatively, the drive will automatically lock after a period of inactivity (default is 30 minutes, configurable via software).
6.3 Changing the Administrator PIN
- Unlock the drive (Section 6.1).
- Tryk og hold på NØGLE button for 3 seconds. The green and red LEDs will flash alternately.
- Indtast din strøm administrator PIN.
- Tryk på NØGLE knap.
- Indtast din ny PIN (4 to 12 digits).
- Tryk på NØGLE knappen for at bekræfte.
- Re-enter the new PIN to verify.
- Tryk på NØGLE button one last time. The green LED will flash briefly, confirming the PIN change.
6.4 Dataoverførsel
Once the drive is unlocked and recognized by your computer, you can transfer files by dragging and dropping them into the drive's folder, or by using copy/paste functions, similar to any other external storage device.
7. Vedligeholdelse
7.1 Rengøring
Brug en blød, tør og fnugfri klud til at rengøre drevets yderside. Brug ikke flydende rengøringsmidler eller slibende materialer.
7.2 Proper Disconnection
Always safely eject the drive from your operating system before physically disconnecting it. This prevents data corruption. After ejecting, the drive will automatically lock.
7.3 firmwareopdateringer
Periodically check the Verbatim support website for any available firmware updates for your device. Firmware updates can improve performance, add features, or fix bugs.
8. Fejlfinding
- Drive not recognized by computer:
Ensure the USB cable is securely connected to both the drive and the computer. Try a different USB port or cable. Make sure the drive is unlocked using your PIN. - Forgot PIN:
If you forget your PIN, there is no recovery method. The drive and all data on it will become permanently inaccessible. Verbatim cannot assist in PIN recovery. - Langsomme dataoverførselshastigheder:
Ensure you are connected to a USB 3.0 or 3.1 port for optimal performance. Older USB 2.0 ports will result in slower speeds. Close other applications that might be using system resources. - LED-indikatorer virker ikke:
Verify the drive is properly connected and receiving power. If the issue persists, contact Verbatim support. - Nero Backup Software not installing/working:
Ensure your operating system is Windows. The software is not compatible with macOS. Check for any error messages during installation.
9. Specifikationer
| Feature | Detalje |
|---|---|
| Modelnummer | 53403 |
| Digital lagerkapacitet | 2 TB |
| Interface | USB 3.1 Gen 1 (compatible with USB 3.0 & 2.0) |
| Hardware kryptering | AES 256-bit |
| Dimensioner (L x B x H) | 123.5 mm x 76 mm x 11 mm (4.86 x 2.99 x 0.43 tommer) |
| Varens vægt | Ca. 283 gram (6.7 ounces) |
| Driftstemperatur | 5°C til 50°C (41°F til 122°F) |
| Opbevaringstemperatur | -40°C til 70°C (-40°F til 158°F) |
| Driftsfugtighed | 5% til 90%, Ikke-kondenserende |
| Systemkrav | Windows 10, 8, 7; Mac OS X 10.4 or later |
| Magt | Bus powered via USB cable |
| Etui materiale | Plast og aluminium |
10. Garantioplysninger
Verbatim products are designed for reliability and performance. This product is covered by a limited warranty. For specific warranty terms and conditions, please refer to the warranty card included with your product or visit the official Verbatim webwebsted.
11. Support
If you encounter any issues or have questions not covered in this manual, please visit the Verbatim support webwebsted med ofte stillede spørgsmål, drivere og kontaktoplysninger.
Ordret support Webwebsted: www.verbatim.com/support


