Indledning
Thank you for choosing the KidKraft Grand View Wooden Dollhouse. This manual provides essential information for the assembly, operation, and maintenance of your dollhouse. Please read these instructions carefully before beginning assembly and retain them for future reference.
Sikkerhedsoplysninger
- Voksensamling påkrævet.
- Keep small parts away from children before and during assembly to prevent choking hazards.
- Sørg for, at alle fastgørelseselementer er forsvarligt fastspændt før brug.
- Regularly inspect the dollhouse for loose parts or damage. Discontinue use if any damage is found.
- Dette produkt er kun beregnet til indendørs brug.
Reservedelsliste
Before assembly, please verify that all components listed below are present. Refer to the assembly diagram for visual identification of parts.
Dollhouse Components:
- Main structural panels (walls, floors, roof)
- Trapper
- Elevator mechanism
- Garageporte
- Various fasteners (screws, dowels, etc.)
Included Accessories (34 pieces):
- Bedroom furniture (bed, nightstand, lamp)
- Bathroom fixtures (bathtub, toilet, sink)
- Living room furniture (sofa, coffee table, armchair)
- Kitchen furniture (table, chairs, stools)
- Dining room furniture (table, chairs)
- Outdoor accessories (planters, pet accessories)
- Additional decorative items

Image: The KidKraft Grand View Dollhouse fully assembled, showcasing its multiple rooms and the included 34 pieces of furniture and accessories.
Setup and Assembly (EZkraft Assembly)
The KidKraft Grand View Dollhouse features EZkraft assembly, designed to reduce assembly time. Follow these steps carefully for optimal results.
Nødvendige værktøjer:
- Stjerneskruetrækker (medfølger ikke)
Monteringstrin:
- Udpak og organiser: Carefully remove all components from the packaging. Lay them out on a clean, flat surface. Group similar parts together.
- Fastgør sidepaneler: Begin by attaching the main side panels to the base. Ensure the pre-drilled holes align.
- Install Floor Levels: Secure each floor level into the designated slots on the side panels.
- Assemble Interior Walls: Insert the interior room divider panels.
- Attach Roof Sections: Secure the roof panels to the top structure.
- Install Staircases: Place the staircases between the floor levels.
- Assemble Elevator: Follow the specific instructions for the working elevator mechanism. Ensure it moves smoothly between floors.
- Attach Garage Doors: Install the functional garage doors.
- Place Furniture and Accessories: Once the main structure is complete, arrange the 34 pieces of furniture and accessories in the various rooms as desired.
- Endelig kontrol: Verify that all screws are tight and all components are securely in place.

Image: Two children engaging with the KidKraft Grand View Dollhouse, demonstrating its scale and playability.

Image: A child operating the functional elevator within the dollhouse, showing a doll inside.

Image: A woman demonstrating the EZkraft assembly feature by attaching a roof panel to the dollhouse.
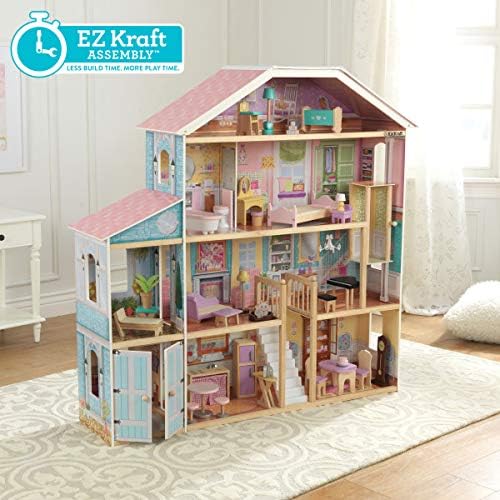
Image: The KidKraft Grand View Dollhouse with the "EZ Kraft Assembly" logo, indicating simplified construction.
Driftsfunktioner
The Grand View Dollhouse includes several interactive features to enhance play.
- Fungerende elevator: Manually slide the elevator up and down between floors to transport dolls.
- Opening Garage Doors: The garage doors can be opened and closed for vehicle access or additional play space.
- Movable Furniture: All 34 accessory pieces can be rearranged to customize the dollhouse layout.

Billede: En detaljeret view of the living room and kitchen areas, showing furniture and decorative elements.

Billede: En detaljeret view of the bedroom and attic spaces, highlighting furniture and design.
Vedligeholdelse og pleje
To ensure the longevity of your KidKraft Grand View Dollhouse, follow these maintenance guidelines:
- Rensning: Tør overflader af med en blød, damp klud. Undgå slibende rengøringsmidler eller stærke kemikalier.
- Inspektion: Periodically check all screws and connections to ensure they remain tight. Tighten any loose fasteners as needed.
- Opbevaring: Store the dollhouse in a dry, indoor environment away from direct sunlight and extreme temperatures to prevent warping or fading.
Fejlfinding
| Problem | Mulig årsag | Løsning |
|---|---|---|
| Delene passer ikke sammen. | Forkert orientering eller skævt justerede huller. | Review the assembly instructions and diagrams carefully. Ensure parts are oriented correctly before attempting to connect them. |
| Dollhouse feels unstable. | Loose fasteners or incomplete assembly. | Check all screws and connections. Tighten any loose fasteners. Ensure all structural components are fully engaged. |
| Elevator is not moving smoothly. | Obstruction or improper installation. | Inspect the elevator track for any obstructions. Re-check the elevator assembly steps to ensure correct installation. |
Specifikationer
- Modelnummer: 65954
- Dimensioner (L x B x H): 127.25 x 32 x 128.27 cm (ca. 50.1 x 12.6 x 50.5 tommer)
- Vægt: 4.54 kg (ca. 10 lbs)
- Materiale: Wood, MDF, Fabric
- Number of Pieces (Accessories): 34
- Doll Compatibility: Designed for 30 cm (12-inch) dolls
- Montering påkrævet: Yes (EZkraft Assembly)
- Batterier påkrævet: Ingen
- Anbefalet alder: knægt

Image: The KidKraft Grand View Dollhouse with key dimensions (height and width) indicated for reference.
Produktvideoer
The following videos provide additional visual guidance and demonstrations of the dollhouse features.
Video: En 30-sekunders overview of a KidKraft dollhouse, showcasing its various rooms and features. This video provides a general idea of KidKraft dollhouse design and play possibilities.
Garanti og support
For warranty information, replacement parts, or customer support, please visit the official KidKraft website or contact their customer service department. Please have your model number (65954) and date of purchase available when contacting support.
KidKraft Officiel Webwebsted: www.kidkraft.com


