1. Introduktion
The Wagner Control Pro 170 Airless Paint Sprayer with Cart is designed to provide a superior finish for various painting and staining projects. Featuring High Efficiency Airless (HEA) technology, this sprayer reduces overspray by up to 55% compared to traditional airless sprayers, offering improved control and a consistent, soft spray pattern. Its durable pump and rebuildable fluid section ensure extended product life, making it suitable for homeowners tackling large projects such as exterior siding, decks, fences, garage doors, sheds, walls, and ceilings.

Image 1: Wagner Control Pro 170 Airless Paint Sprayer with Cart.
2. Sikkerhedsoplysninger
ADVARSEL: Dette produkt kan udsætte dig for kemikalier, herunder bly, som i staten Californien er kendt for at forårsage kræft og fosterskader eller anden reproduktiv skade. For mere information gå til www.P65Warnings.ca.gov.
Always wear appropriate personal protective equipment (PPE) including eye protection, gloves, and a respirator when operating the paint sprayer. Ensure adequate ventilation in your work area. Read and understand all safety warnings and instructions provided in the complete manual before use.
3. Opsætning
Proper setup is crucial for safe and effective operation. Follow these steps to assemble and prepare your sprayer:
- Fastgør håndtaget: Fastgør håndtaget sikkert til hovedenheden.
- Connect Suction and Return Tubes: Slide the suction tube and return tube onto their respective fittings. Secure both with the provided clamps.
- Thread Hose to Fluid Outlet: Connect the spray hose to the fluid outlet on the sprayer and tighten with a wrench.
- Attach Spray Gun: Spin the spray gun onto the hose and tighten securely with a wrench.
- Prepare Paint Container: Place the suction tube into a 1 or 5-gallon paint container.
- Forbered pumpen: Depress the SureFlo™ pusher valve to free the inlet ball. Turn the prime/spray valve down to the prime position. Allow the pump to run until paint flows freely from the return tube.
Video 1: Wagner High Efficiency Airless Sprayer Setup. This video demonstrates the assembly and initial priming process for the sprayer.

Image 2: The sprayer's suction tube drawing paint directly from a 5-gallon container.
4. Betjeningsvejledning
Achieve optimal results by following proper spraying techniques:
- Adjust Pressure Control: The pressure control knob allows you to regulate paint flow. For most applications, a setting of 2-3 is sufficient with HEA technology.
- Hold afstand: Keep the spray gun approximately 10-12 inches from the surface for consistent coverage.
- Konsekvent bevægelse: The spray gun should be moving when the trigger is pulled and released. Use complete, full passes.
- Overlap Strokes: Overlap each spray stroke by approximately 50% to ensure even coverage and avoid streaks.
- Testspray: Always perform a test spray on a scrap piece of material before beginning your project to ensure the desired pattern and coverage.
Video 2: Wagner High Efficiency Airless Spraying. This video illustrates effective spraying techniques for various surfaces.
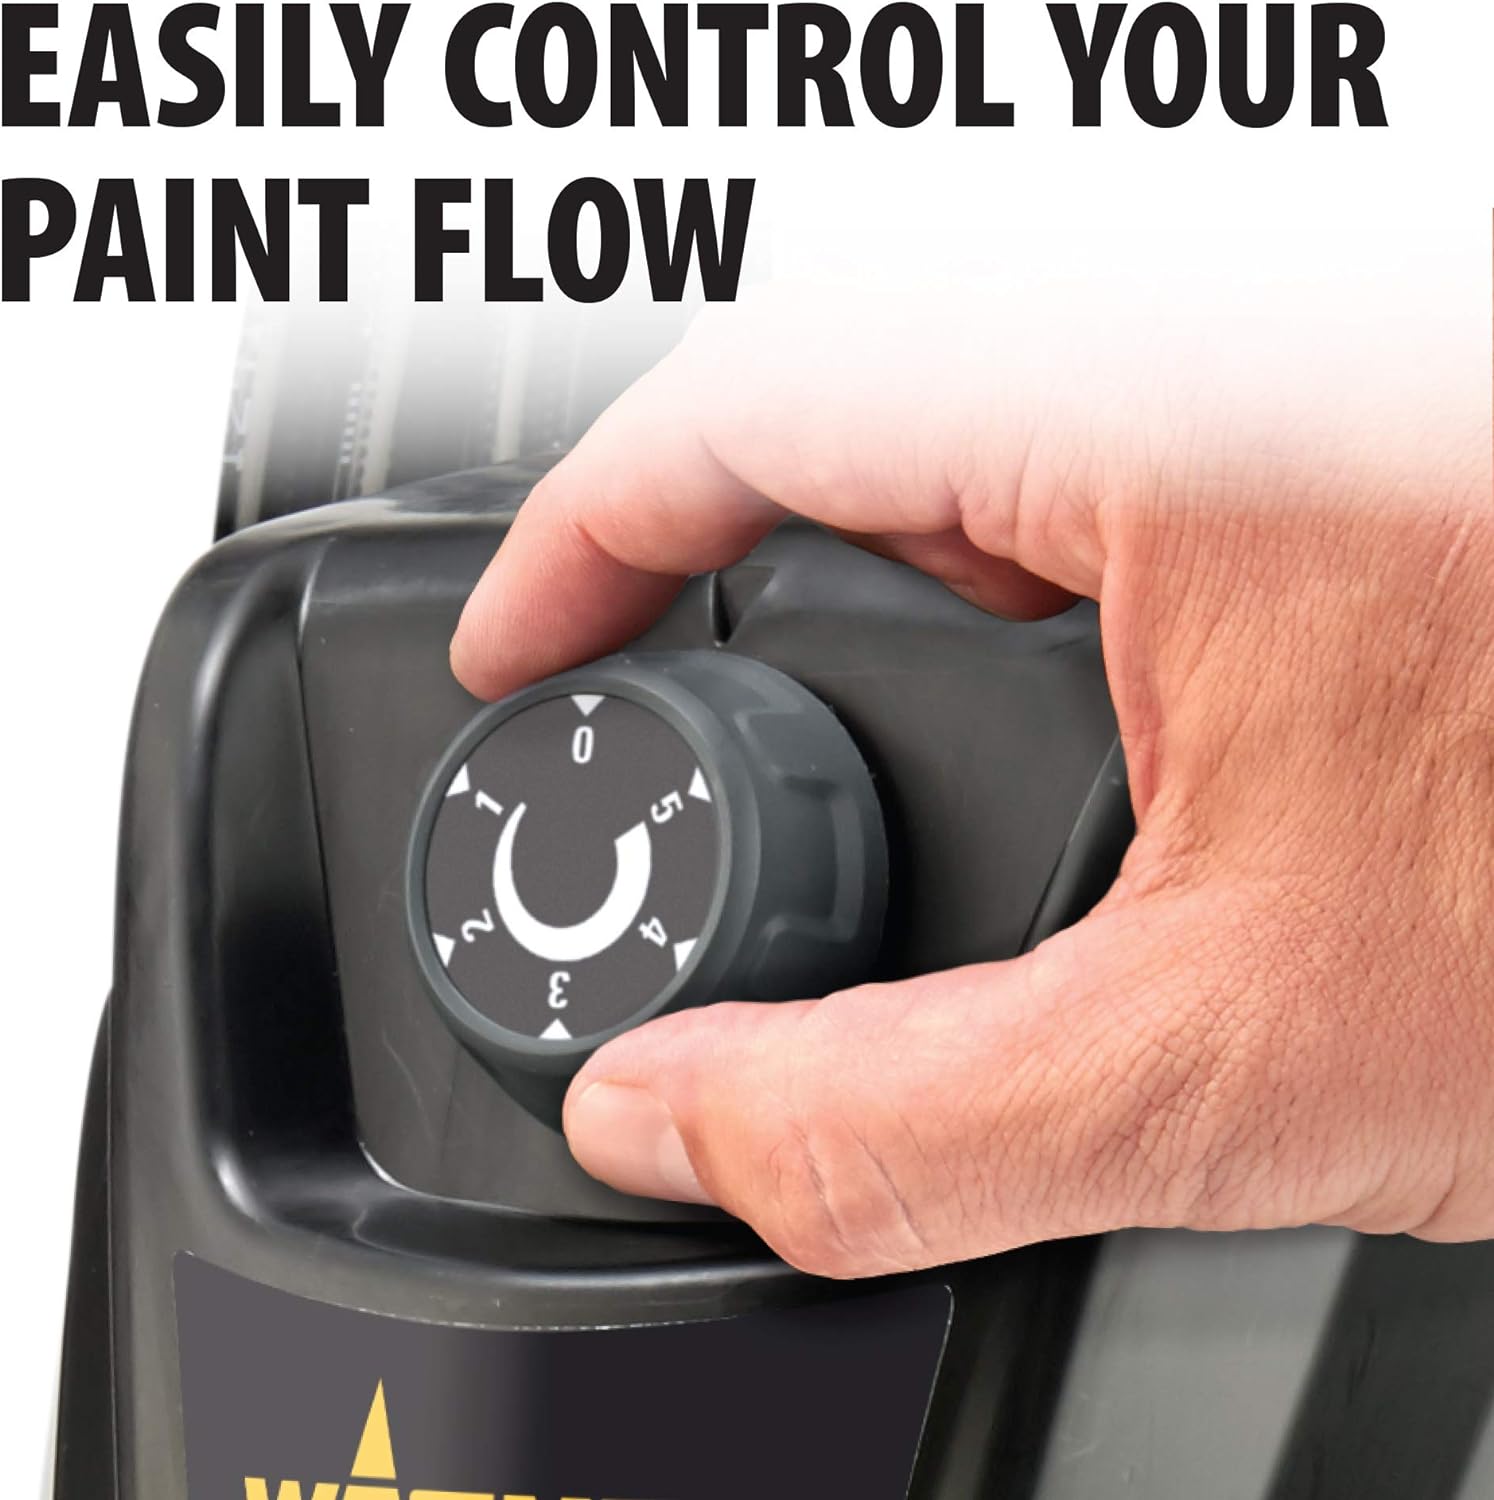
Image 3: Adjusting the pressure control knob to regulate paint flow.

Image 4: High Efficiency Airless (HEA) technology significantly reduces overspray compared to standard airless systems.

Image 5: Wagner Control Pro Tip Recommendation Chart for various coatings and pattern widths.
5. Vedligeholdelse & Rengøring
Thorough cleaning after each use is essential to maintain sprayer performance and longevity. Follow these steps:
- Perform Pressure Relief: Lock the spray gun trigger, turn the prime/spray knob to prime, and turn the pressure control knob to 0. Unlock the trigger and pull it to relieve pressure from the system. Lock the trigger again.
- Remove Tip and Guard: Remove the spray tip and guard from the gun and place them in a cleaning solution.
- Place Suction Tube in Cleaning Solution: Transfer the suction tube from the paint container to a bucket of appropriate cleaning solution (water for latex, mineral spirits for oil-based).
- Skyl systemet: Point the spray gun into a waste bucket. While squeezing the trigger, turn the control knob to 2 and turn the prime/spray knob to spray. Continue squeezing the trigger until clear fluid is coming out.
- Repeat Pressure Relief: Perform the pressure relief procedure again.
Video 3: Wagner High Efficiency Airless Sprayer Cleanup. This video provides a detailed guide on cleaning your sprayer after use.
6. Fejlfinding
If you encounter issues with your Wagner Control Pro 170 sprayer, consider the following common problems and solutions:
- Ingen sprøjtning eller lavt tryk: Check for clogs in the spray tip, gun filter, or suction tube. Ensure the prime/spray valve is in the correct position and the pressure control knob is set appropriately. Verify the power connection.
- Uregelmæssigt sprøjtemønster: This can often be resolved by cleaning or replacing the spray tip. Ensure the tip is rotated forward correctly. Adjust the distance from the surface and your spraying technique.
- Overdreven oversprøjtning: While HEA technology reduces overspray, ensure you are using the correct tip size for your material and maintaining the recommended distance from the surface. Lowering the pressure setting can also help.
- Pumpe primer ikke: Ensure the suction tube is fully submerged in paint/solution and the SureFlo™ pusher valve is depressed to free the inlet ball. Check for air leaks in the suction system.
For more detailed troubleshooting steps and solutions, please refer to the complete product manual.
7. Specifikationer
| Feature | Detalje |
|---|---|
| Mærke | Wagner |
| Modelnavn | Control Pro 170 Cart |
| Varemodelnummer | 0580715 |
| Maksimalt driftstryk | 1500 PSI |
| Flowhastighed | Op til 0.33 gallon i minuttet |
| Slange længde | 50 fod (600 tommer) |
| Strømkilde | Elektrisk |
| Materiale | Metal (High-strength polymer casing for durability) |
| Varens vægt | 39.5 pund |
| Produktdimensioner | 17 x 20 x 32 tommer |
| Anbefalede anvendelser | Maleri |
8. Garanti og support
The Wagner Control Pro 170 Airless Paint Sprayer is backed by a 2 års garanti, recognized as one of the best and longest in the industry. This warranty covers defects in materials and workmanship under normal use.

Image 6: The Wagner Control Pro 170 comes with a 2-year warranty.
For warranty claims, technical assistance, or to purchase replacement parts, please contact Wagner customer support. Refer to your complete product manual for specific contact information or visit the official Wagner webwebsted.


