Indledning
This manual provides detailed instructions for the safe and proper installation, operation, and maintenance of your WALI GSDM002 Dual Monitor Gas Spring Desk Mount. Please read this manual thoroughly before installation and retain it for future reference. If you have any questions or require assistance, please contact WALI customer support.
Sikkerhedsoplysninger
ADVARSEL: Failure to read and follow all instructions may result in personal injury or damage to the product. Always ensure the mounting surface can safely support the combined weight of the mount and monitors. Do not exceed the maximum weight capacity. Use safety gear and proper tools during installation.
- Verify VESA compatibility and monitor weight before installation.
- Spænd ikke skruerne for hårdt for at undgå skader.
- Sørg for, at alle forbindelser er sikre inden brug.
- Hold børn væk fra bevægelige dele.
Pakkens indhold
Kontroller venligst, at alle komponenter er til stede og ubeskadigede:
- 1 x WALI Dual Monitor Gas Spring Stand
- Monteringshardwaresæt
- Brugermanual
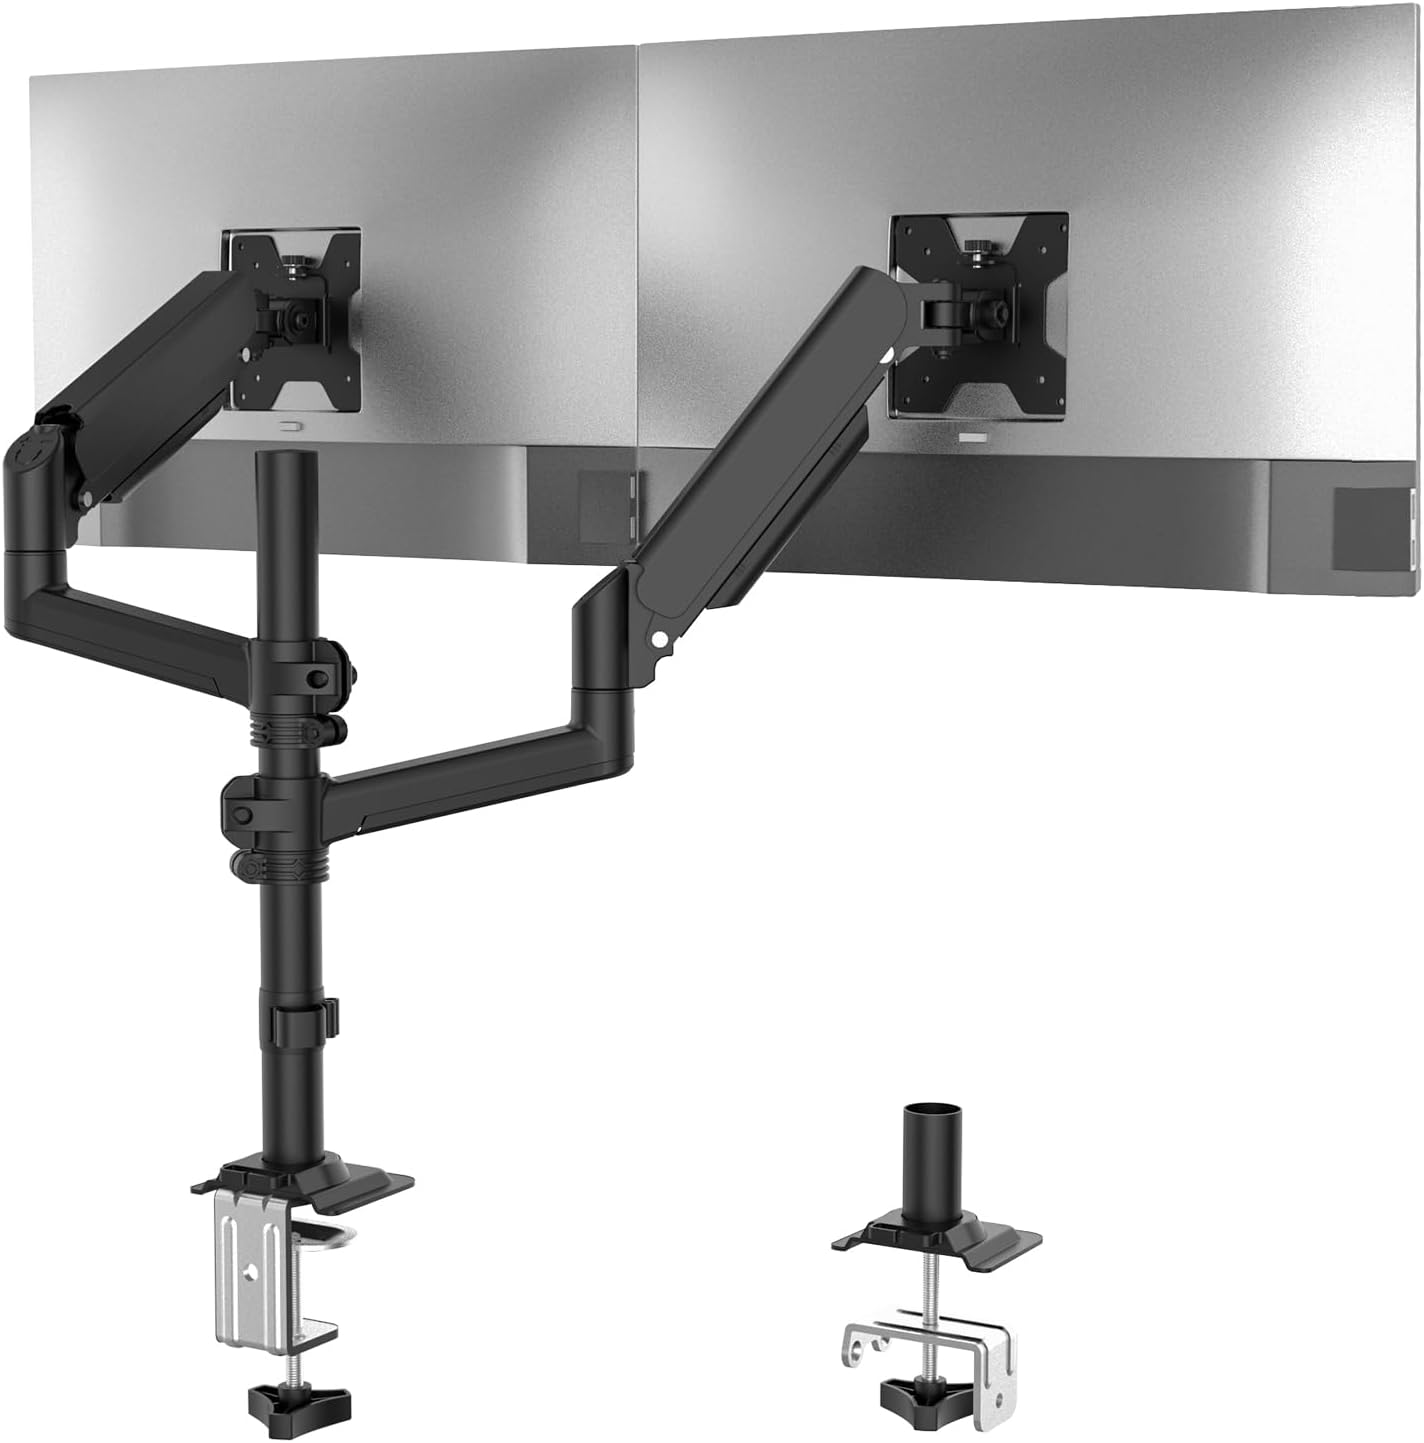
Image: The WALI GSDM002 Dual Monitor Gas Spring Desk Mount, showcasing its two monitor arms attached to a central pole, with both C-clamp and grommet mounting options visible.
Specifikationer
| Feature | Detalje |
|---|---|
| Modelnummer | GSDM002 |
| Kompatibel skærmstørrelse | 13" til 32" |
| Maksimal vægtkapacitet | 19.8 lbs per arm |
| VESA-kompatibilitet | 75x75mm, 100x100mm |
| Monteringsmuligheder | C-Clamp, Grommet Base |
| C-Clamp Tykkelsesområde | 0.39" - 2.76" |
| Grommet Base Thickness Range | 0.39" - 1.97" |
| Tilt rækkevidde | +70° / -45° |
| Drejningsområde | +/-180° |
| Rotation | 360° |
| Maks højde | 26.6" |
| Max forlængelse | 20.3" |
| Materiale | Legeret stål |
Opsætning og installation
Step 1: Choose Your Mounting Option
The WALI GSDM002 offers two installation methods: C-clamp or Grommet Base. Select the option that best suits your desk.

Image: A visual comparison of the C-clamp mounting method, which secures to the edge of a desk, and the grommet base method, which uses an existing hole in the desk.
C-Clamp Installation:
- Fastgør C-clamp til bunden af hovedstangen.
- Placer C-clamp on the edge of your desk and tighten the knob until secure. Ensure the desk thickness is between 0.39" and 2.76".
Installation af tyllebund:
- If your desk has a grommet hole, insert the grommet base through the hole.
- Secure the base from underneath the desk using the provided hardware. Ensure the desk thickness is between 0.39" and 1.97".
Step 2: Attach Monitor Arms to Pole
Slide the monitor arms onto the central pole at your desired height. Use the provided Allen key to tighten the set screws on the arms to secure them in place.
Trin 3: Fastgør skærme til VESA-plader
- Carefully attach your monitors to the VESA plates on each arm using the appropriate screws from the hardware kit. Ensure your monitors have VESA mounting holes (75x75mm or 100x100mm).
- Confirm that each monitor weighs no more than 19.8 lbs.

Image: Two monitors are shown mounted on the WALI GSDM002, demonstrating its compatibility with large screens and flexible orientation, with one monitor in portrait mode and the other in landscape mode.
Betjening og justeringer
Monitorpositionering
The gas spring arms allow for flexible positioning of your monitors. You can adjust the height, tilt, swivel, and rotation to achieve an ergonomic viewvinkel.
- Højdejustering: Skub eller træk forsigtigt skærmen op eller ned.
- Vip: Tilt the monitor screen +70° upwards or -45° downwards.
- Drejelig: Swivel the monitor +/-180° horizontally.
- Rotation: Rotate the monitor 360° for portrait or landscape orientation.
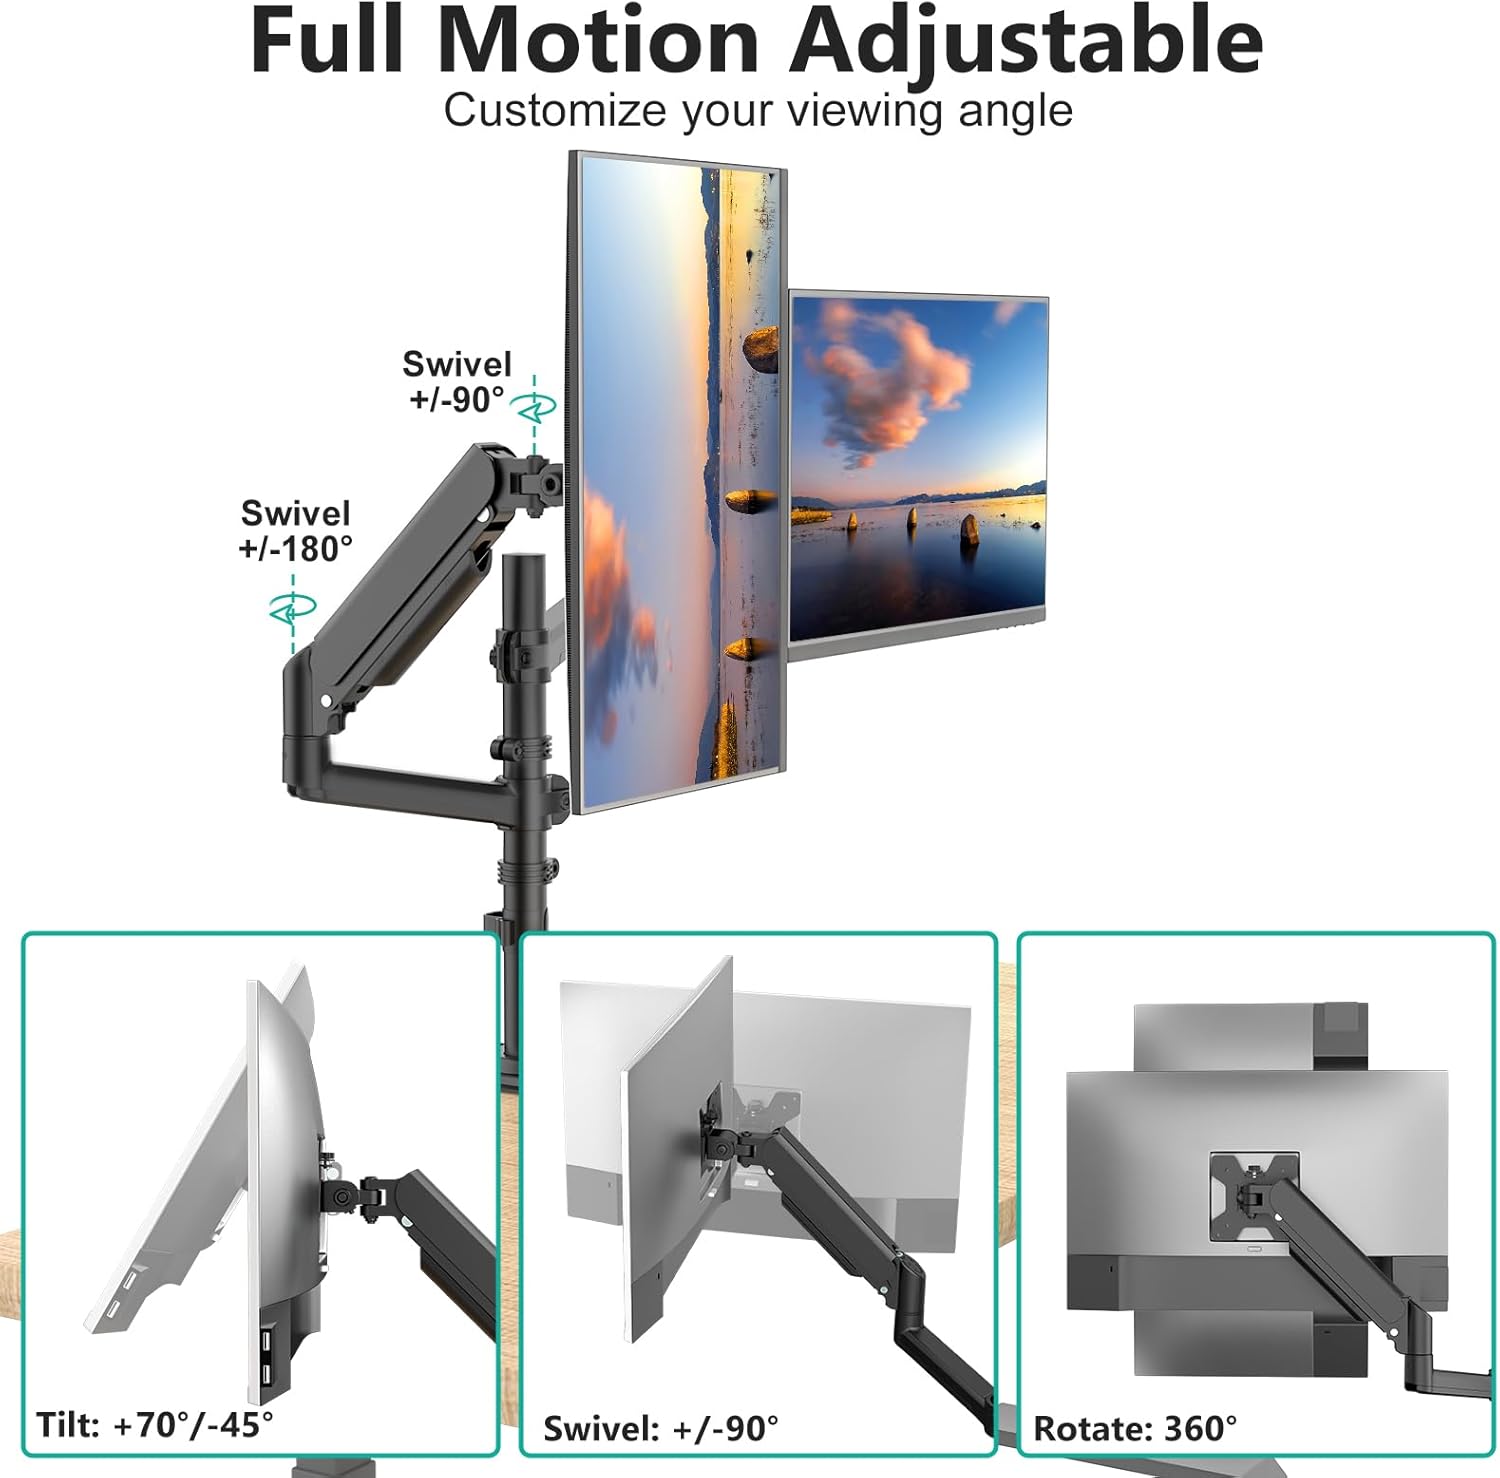
Image: A diagram illustrating the full range of motion for the monitor arm, including tilt (+70°/-45°), swivel (+/-180°), and 360° rotation, with monitors shown in various positions.
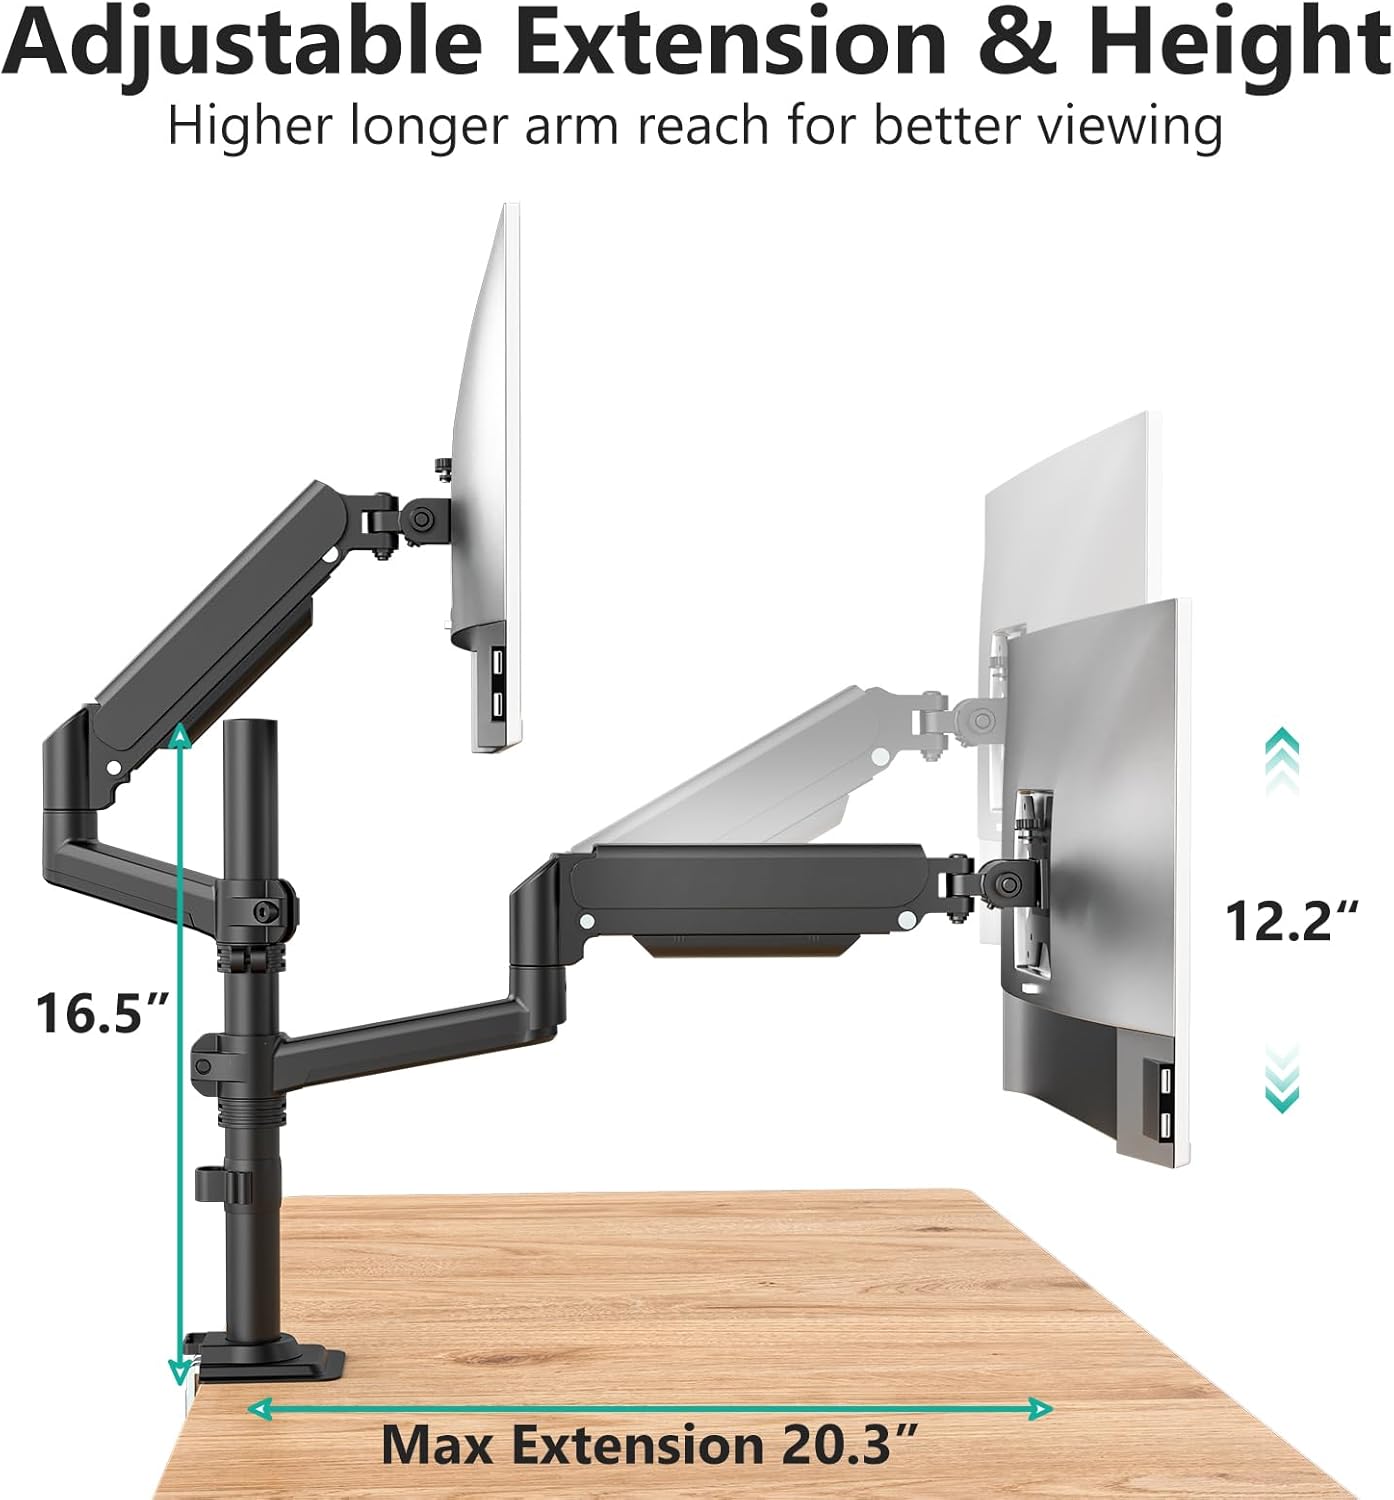
Image: A diagram highlighting the adjustable extension (up to 20.3 inches) and height (up to 16.5 inches) of the monitor arm, demonstrating its reach and vertical range.
Justering af gasfjederspænding
The gas spring tension may need adjustment based on your monitor's weight to ensure it holds its position. An Allen key is provided for this purpose.
- For lighter monitors: Turn the adjustment screw clockwise to decrease tension.
- For heavier monitors: Turn the adjustment screw counter-clockwise to increase tension.

Billede: Et nærbillede view of the gas spring tension adjustment point on the monitor arm, showing an Allen key being used to turn the screw for calibration.
Kabelstyring
Integrated cable management clips are provided along the arms and on the central pole to keep your cables tidy and organized. Route your monitor and power cables through these clips to maintain a clean workspace.
Opretholdelse
To ensure the longevity and proper function of your WALI monitor mount, follow these maintenance guidelines:
- Regularly check all screws and connections to ensure they remain tight.
- Rengør holderen med en blød kludamp klæde. Undgå slibende rengøringsmidler.
- Do not apply lubricants to the gas spring mechanism unless specifically instructed by WALI support.
Fejlfinding
| Problem | Mulig årsag | Løsning |
|---|---|---|
| Monitor sags or does not stay in position. | Gasfjederens spænding er for lav til skærmens vægt. | Increase gas spring tension by turning the adjustment screw counter-clockwise. |
| Monitor is difficult to move. | Gasfjederens spænding er for høj til skærmens vægt. | Decrease gas spring tension by turning the adjustment screw clockwise. |
| Bjerget føles ustabilt. | C-clamp or grommet base is not securely tightened. | Spænd C-cl'en igenamp or grommet base. Ensure desk thickness is within specified limits. |
| Skærmene er ikke i vater. | Minor adjustment needed at the VESA plate. | Adjust the leveling screws on the VESA plate or slightly rotate the monitor. |
Garanti og support
WALI products are designed for durability and performance. This product comes with a standard limited warranty. For specific warranty details, please refer to the warranty card included with your purchase or visit the official WALI webwebsted.
For technical assistance, missing parts, or any other inquiries, please contact our experienced and friendly US-based customer support team. Support is available 7 days a week.
Kontaktoplysninger: Please refer to the contact details provided on the WALI webwebstedet eller din produktemballage.


