Indledning
This manual provides detailed instructions for the safe installation, operation, and maintenance of your Project Source 11-Inch Flush Mount Light fixture. Please read this manual thoroughly before beginning installation and retain it for future reference. This product is designed for indoor use only.
Sikkerhedsoplysninger
ADVARSEL: Risiko for elektrisk stød. Afbryd strømmen ved sikringen eller afbryderen før installation eller service.
- Alle elektriske forbindelser skal være i overensstemmelse med lokale forskrifter, forordninger eller National Electric Code (NEC).
- Kontakt en kvalificeret elektriker, hvis du er usikker på installationsprocessen.
- Installer ikke denne armatur i våde eller dråber.amp steder.
- Ensure all wires are properly connected and secured to prevent short circuits.
- Overskrid ikke det maksimale wattage specified for this fixture.
- Håndter glaskomponenter forsigtigt for at forhindre brud.
Pakkens indhold
Kontroller, at alle komponenter er til stede, før installationen påbegyndes:
- Project Source 11-Inch Flush Mount Light Fixture (2 units)
- Mounting Hardware Kit (screws, wire nuts)
- Instruktionsmanual (dette dokument)
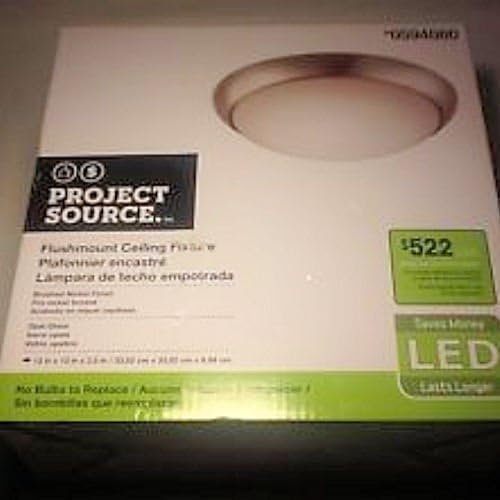
Image: The retail packaging box for the Project Source 11-Inch Flush Mount Light. The box is white with green accents, featuring an image of the light fixture and "PROJECT SOURCE" branding.
Opsætning og installation
Nødvendige værktøjer (ikke inkluderet):
- Phillips hovedskruetrækker
- Trådstrippere
- Elektrisk tape (valgfrit)
- Sikkerhedsbriller
Installationstrin:
- Sluk for strømmen: Locate the circuit breaker or fuse box that controls the power to the light fixture location. Turn off the power completely before proceeding.
- Fjern gammelt armatur (hvis relevant): Fjern forsigtigt alle eksisterende lysarmaturer, og bemærk ledningsforbindelserne.
- Forbered ledningsføring: If necessary, strip approximately 1/2 inch of insulation from the ends of the house supply wires.
- Tilslut ledninger:
- Tilslut sort ledningen fra armaturet til sort (hot) wire from the ceiling box using a wire nut.
- Tilslut hvid ledningen fra armaturet til hvid (neutral) wire from the ceiling box using a wire nut.
- Tilslut grønt eller bart kobber ground wire from the fixture to the grønt eller bart kobber ground wire from the ceiling box using a wire nut.
Ensure all wire nuts are securely tightened. Wrap electrical tape around wire nuts for added security if desired.
- Monteringsbeslag: Carefully tuck all wires into the junction box. Align the fixture's mounting holes with the screws on the junction box or mounting bracket. Secure the fixture to the ceiling using the provided screws.
- Install Glass Diffuser: Gently place the glass diffuser into the fixture and secure it according to the fixture's design (e.g., twist-lock, spring clips, or decorative nuts).
- Gendan strøm: Turn the power back on at the circuit breaker or fuse box. Test the light fixture to ensure it functions correctly.

Image: A pair of Project Source 11-Inch Flush Mount Light fixtures. Each fixture features a brushed nickel base and a domed, frosted white glass diffuser, designed to provide soft, diffused light.
Betjeningsvejledning
The Project Source 11-Inch Flush Mount Light is designed for simple operation. Once properly installed and wired, the light fixture is controlled by a standard wall switch connected to the circuit. Flip the wall switch to the "ON" position to illuminate the fixture, and to the "OFF" position to turn it off.
Note: This fixture uses integrated LED technology and does not require bulb replacement.
Opretholdelse
To ensure the longevity and appearance of your light fixture, follow these simple maintenance guidelines:
- Rensning: Før rengøring skal du sørge for, at strømmen til armaturet er slukket ved afbryderen. Brug en blød, tør eller let fugtetamp cloth to wipe down the exterior surfaces. Do not use abrasive cleaners, solvents, or polishes as they may damage the finish or glass.
- Glaspleje: The frosted glass diffuser can be carefully removed for cleaning if necessary. Wash with mild soap and water, rinse thoroughly, and dry completely before reattaching.
- Ingen pæreudskiftning: This fixture features integrated LED components. There are no bulbs to replace. If the light stops working, refer to the Troubleshooting section.
Fejlfinding
If your light fixture is not functioning as expected, consult the following common issues and solutions:
| Problem | Mulig årsag | Løsning |
|---|---|---|
| Lyset tændes ikke. |
|
|
| Lyset flimrer eller dæmpes. |
|
|
| Glass diffuser is loose. |
|
|
If the problem persists after trying these solutions, contact a qualified electrician or customer support.
Specifikationer
| Feature | Detalje |
|---|---|
| Mærke | Projektkilde |
| Model | 11-Inch Flush Mount Light (2-Pack) |
| Produktdimensioner | 11 x 11 x 3 tommer |
| Varens vægt | 4.1 pund |
| Materiale | Glas |
| Maksimal kompatibel wattage | 120 watt |
| Type pære | Integreret LED |
| Stil | Klassisk |
Garanti og support
This product is a refurbished item. Please refer to the seller's specific return and warranty policy at the point of purchase for details regarding coverage and support for refurbished products. General support for Project Source products may be available through their official channels.
For technical assistance or further inquiries, please contact the retailer or manufacturer directly.


