1. Introduktion
Tak for købetasing the Project Source 2-Pack 13-inch Bronze Flush Mount Light fixtures. These fixtures are designed to provide ambient lighting with a traditional aesthetic, featuring a durable bronze finish and an elegant alabaster glass shade. They are suitable for various indoor spaces, including bathrooms, bedrooms, kitchens, dining rooms, and living rooms, enhancing the decor while providing reliable illumination.
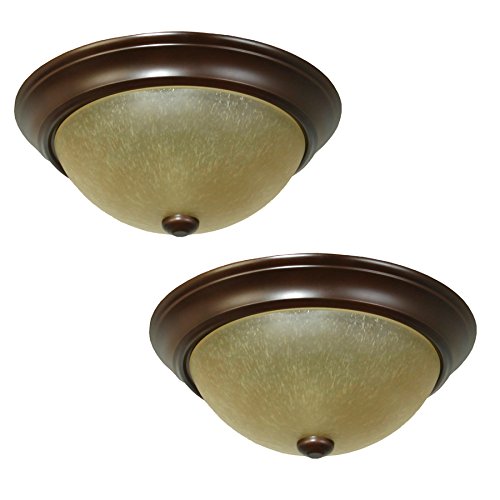
Figur 1: Two Project Source 13-inch Bronze Flush Mount Light fixtures. Each fixture features a round bronze base and a dome-shaped alabaster glass shade, secured by a small finial at the bottom center of the shade.
2. Vigtige sikkerhedsoplysninger
ADVARSEL: Risiko for elektrisk stød. Afbryd strømmen ved sikringsboksen eller afbryderen før installation eller service.
- Læs alle instruktioner omhyggeligt, før installationen påbegyndes.
- Alle elektriske forbindelser skal være i overensstemmelse med lokale forskrifter, forordninger eller National Electric Code (NEC). Kontakt en kvalificeret elektriker, hvis du ikke er bekendt med korrekt elektrisk ledningsføring.
- Use only UL-listed wire connectors for the electrical connections.
- Overskrid ikke det maksimale wattagsom specificeret for denne armatur (14 watt pr. pære).
- Brug sikkerhedsbriller og passende beskyttelsesudstyr under installationen.
- Sørg for, at armaturet er korrekt jordet.
3. Pakkens indhold
Kontroller, at alle komponenter er til stede, før installationen påbegyndes:
- 2 x 13-inch Bronze Flush Mount Light Fixtures (with alabaster glass shades)
- Monteringshardware (skruer, trådmøtrikker, monteringsbeslag)
- Note: Light bulbs are NOT included.
4. Specifikationer
| Feature | Detalje |
|---|---|
| Mærke | Projektkilde |
| Modelnummer | 40804 |
| Dimensioner (Bredde x Højde) | 13 tommer x 5.36 tommer |
| Slutte | Bronze |
| Skærmmateriale | Alabast glas |
| Antal lys | 2 per fixture |
| Pære base type | Medium base (E-26) |
| Anbefalet pæreform | A15 |
| Maksimal Bulb Wattage | 14 Watts (per bulb) |
| Sikkerhedsfortegnelse | UL-listet |
| Rumkompatibilitet | Bathroom, Bedroom, Kitchen, Dining Room, Living Room |
| Installationstype | Flush Mount |
| Varens vægt (pakke) | 7.04 pund |
5. Opsætning og installation
Nødvendige værktøjer: Phillips head screwdriver, flathead screwdriver, wire strippers, electrical tape, safety glasses.
Trin før installation:
- Sluk for strømmen: Locate the circuit breaker or fuse box that supplies power to the light fixture location. Turn off the power completely before proceeding.
- Forbered området: Clear the work area and ensure you have stable footing if using a ladder.
- Pakker ud: Carefully remove the fixture and all components from the packaging.
Installationstrin:
- Fastgør monteringsbeslag: Secure the mounting bracket (included) to the electrical junction box in the ceiling using the provided screws. Ensure it is firmly attached.
- Tilslut elektriske ledninger:
- Tilslut sort (hot) wire from the ceiling to the sort wire of the fixture using a wire nut.
- Tilslut hvid (neutral) wire from the ceiling to the hvid wire of the fixture using a wire nut.
- Tilslut jord wire (bare copper or green) from the ceiling to the jord wire of the fixture (or the ground screw on the mounting bracket) using a wire nut or by wrapping it securely around the screw.
- Secure Fixture to Mounting Bracket: Carefully push the wired fixture up towards the ceiling, aligning the holes in the fixture base with the screws on the mounting bracket. Secure the fixture in place with the decorative nuts or screws provided.
- Installer pærer: Insert the recommended A15 shape, E-26 medium base light bulbs (not included) into the sockets. Do not exceed 14 Watts per bulb.
- Fastgør glasskærm: Carefully place the alabaster glass shade onto the fixture. Secure it in place using the finial or retaining ring provided, tightening it gently until snug. Do not overtighten.
- Gendan strøm: Når installationen er færdig, og alle forbindelser er sikre, skal strømmen genoprettes ved afbryderen.
6. Betjeningsvejledning
Once the Project Source Flush Mount Light fixtures are correctly installed and power is restored, they can be operated using the standard wall switch connected to the circuit. Simply toggle the wall switch to turn the lights on or off.
7. Pleje og vedligeholdelse
Regular cleaning will help maintain the appearance and performance of your light fixtures.
- Rengøring af armaturet: Dust the bronze finish regularly with a soft, dry cloth. For more thorough cleaning, wipe the bronze finish with a damp cloth and a mild, non-abrasive soap solution, then dry immediately with a clean, soft cloth to prevent water spots.
- Cleaning the Glass Shade: The alabaster glass shade can be removed for cleaning. Wash it with mild soap and water, then rinse thoroughly and dry completely before reattaching to the fixture.
- Udskiftning af pære: Always ensure the power is turned off at the circuit breaker and the bulbs have cooled down before attempting to replace them. Use only bulbs that meet the specified wattage og basistype.
- Do not use abrasive cleaners, solvents, or polishes on any part of the fixture, as they may damage the finish or glass.
8. Fejlfinding
Hvis du støder på problemer med din lampe, kan du se følgende almindelige problemer og løsninger:
- Lyset tænder ikke:
- Check that the power supply is on at the circuit breaker.
- Ensure the light bulbs are correctly installed and are not burnt out. Try replacing with a known working bulb.
- Verify that all wire connections (black to black, white to white, ground) are secure and properly connected.
- Lys flimrer:
- Ensure the light bulbs are fully tightened in their sockets.
- Check for any loose wire connections within the fixture or junction box.
- Confirm that the bulbs used are compatible with the fixture and are not exceeding the maximum wattage.
- Glass shade is loose or wobbles:
- Gently tighten the finial or retaining ring that secures the glass shade. Do not overtighten.
If the problem persists after attempting these solutions, please consult a qualified electrician or contact customer support.
9. Garanti og kundesupport
For detailed warranty information regarding your Project Source 2-Pack 13-in W Bronze Flush Mount Light, please refer to the documentation included with your original purchase. Warranty terms typically cover defects in materials and workmanship for a specified period.
If you require technical assistance, have questions about installation, or need to report a defect, please contact Project Source customer service directly through their official website or the contact information provided in your product packaging. Please have your model number (40804) and purchase details ready when contacting support.


