1. Introduktion
This manual provides comprehensive instructions for the installation, operation, and maintenance of your 6 Sigma Carburetor Jet Kit for the Cagiva Blues 125 motorcycle. This kit is designed to optimize your carburetor's performance, especially after modifications to the exhaust or intake system. Proper installation ensures maximum engine performance and longevity by correcting lean fuel conditions.
Sættets indhold:
- Hoveddyser
- Nålejusterere
- Nylon afstandsstykker
- Drill Bits for: Slide Hole Modification (with CV carb), Slide Spring Modification (with CV carb), Idle Mixture Modification
- Carburetor Schematic
- Bike Specific Specifications
- Carburetor Synchronizer Tool (instructions to build for $5)
- Step-by-step instructions customized to your bike with photos
- Carburetor Cleaning Procedure
- Korrekt tuningteknikker
2. Vigtige sikkerhedsoplysninger
Always exercise caution when working with fuel systems and motorcycles. Ensure the engine is cool before beginning any work. Disconnect the battery to prevent accidental starting. Work in a well-ventilated area and keep fire extinguishers nearby. Fuel is highly flammable. Wear appropriate personal protective equipment, including gloves and eye protection. If you are unsure about any step, consult a qualified mechanic.
Juridisk ansvarsfraskrivelse: Please check your local laws and regulations regarding vehicle modifications before purchasing or installing this product.
3. Opsætning og installation
Installation of the 6 Sigma Jet Kit requires basic hand tools and adherence to the detailed, customized instructions provided with your kit. The process involves disassembling, modifying, and reassembling the carburetor. It is crucial to follow the bike-specific instructions for optimal results.
Kontrol før installation:
- Ensure your carburetor is clean and free of debris or varnish. Refer to the included Carburetor Cleaning Procedure.
- Confirm any aftermarket exhaust or intake components are already installed, as the jet kit is designed to compensate for these modifications.
- Gather all necessary basic hand tools as specified in your customized instructions.
Installation trin overview:
The following is a general overview. Always refer to the step-by-step instructions with photos customized for your specific bike included in your kit.
- Carefully remove the carburetor(s) from the motorcycle.
- Disassemble the carburetor(s) according to the provided schematic.
- Install the new Main Jets, Needle Adjusters, and Nylon Spacers as directed.
- Perform the Slide Hole Modification, Slide Spring Modification, and Idle Mixture Modification using the supplied drill bits, if applicable to your carburetor type (CV carb).
- Reassemble the carburetor(s), ensuring all gaskets and seals are correctly seated.
- Reinstall the carburetor(s) onto the motorcycle.
- Perform carburetor synchronization using the instructions provided for building a synchronizer tool, if your bike has multiple carburetors.
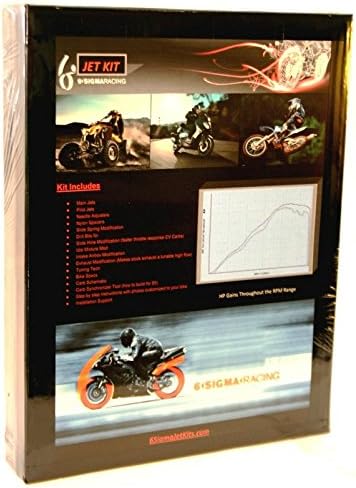
Figure 1: The retail packaging for the 6 Sigma Racing Carburetor Jet Kit. It features the brand logo, the product name 'JET KIT', and several smaller images of motorcycles and ATVs in action. A graph illustrating horsepower gains across the RPM range is visible, alongside a list detailing the kit's inclusions such as main jets, needle adjusters, and various modification tools.

Figur 2: En detaljeret view of the 6 Sigma Racing Carburetor Jet Kit packaging. It clearly shows the 'Kit Includes' section, listing components like main jets, needle adjusters, and drill bits for various carburetor modifications. A prominent graph illustrates the potential horsepower gains across the RPM range, emphasizing the performance benefits of the kit.
4. Operating Principles and Tuning
The stock carburetor settings are often designed to meet emissions regulations, not for peak performance. When an aftermarket exhaust or intake is installed, the engine receives more air, leading to a lean fuel condition. A lean condition can cause engine damage due to excessive heat and detonation, often indicated by exhaust popping.
This jet kit enriches the fuel mixture across all throttle positions, correcting the lean condition and allowing the engine to run cooler and more efficiently. This results in increased horsepower, improved throttle response, and extended engine life.
Tuning Techniques:
The kit includes specific instructions on proper tuning techniques. It is essential to follow these guidelines to achieve the best performance and ensure the engine operates within safe parameters. Tuning involves adjusting the fuel delivery to match the engine's air intake, optimizing for your specific modifications.
5. Vedligeholdelse
Regular maintenance of your carburetor is crucial for sustained performance after installing the jet kit. This includes periodic cleaning of the carburetor to prevent fuel deposits from obstructing the jets and passages. Refer to the Carburetor Cleaning Procedure included with your kit for detailed steps. Inspect fuel lines and connections for leaks or wear regularly.
6. Fejlfinding
If you encounter issues after installing the jet kit, review følgende almindelige problemer og løsninger:
Almindelige problemer:
- Engine Popping (especially on deceleration): This typically indicates a lean fuel condition. Double-check all jetting components and adjustments. Ensure there are no air leaks in the intake or exhaust system.
- Poor Performance or Hesitation: Verify that all kit components are installed correctly and that the tuning techniques have been applied accurately for your specific modifications. Incorrect jet sizes or needle settings can lead to suboptimal performance.
- Brændstoflækager: Inspect all carburetor gaskets, O-rings, and fuel lines for proper seating and integrity. Ensure all screws and clamps are tightened to specification.
- Vanskeligheder ved at starte: Confirm proper choke operation and idle mixture screw settings. A very rich or very lean idle mixture can cause starting issues.
If troubleshooting steps do not resolve the issue, please refer to the support information provided with your kit.
7. Specifikationer
| Feature | Detalje |
|---|---|
| Mærke | 6 Sigma |
| Modelnummer | 6SIG4499 |
| UPC | 715658125622 |
| Anbefalede anvendelser | Motorcycle (Cagiva Blues 125) |
| Brændstoftype | Benzin |
| Flange type | Bolt på |
8. Garanti og support
Tilfredshedsgaranti:
6 Sigma offers a 100% Satisfaction Guarantee. Upon installation, if you are not happy with the results, you are eligible for a full refund. Please refer to the specific terms and conditions provided with your purchase for details on how to claim this guarantee.
Teknisk support:
For further assistance, technical questions, or support regarding the installation and tuning of your jet kit, please refer to the contact information provided with your product or visit the official 6 Sigma website. Our support team is available to help ensure you achieve optimal performance from your motorcycle.


