1. Introduktion
This manual provides detailed instructions for the safe and effective use of your BRESSER BRM-300AM Studio Flash Kit. This kit includes two powerful 300W studio flash units, designed for product and portrait photography. Please read this manual thoroughly before operating the equipment and retain it for future reference.
2. Sikkerhedsoplysninger
Overhold altid følgende sikkerhedsforanstaltninger for at forhindre personskade eller beskadigelse af udstyret:
- Do not expose the flash units to rain, moisture, or extreme temperatures.
- Sørg for, at strømforsyningen matcher voltagde krav, der er specificeret på enheden.
- Always disconnect the power cable before cleaning or performing any maintenance.
- Avoid touching the flash tube or modeling lamp immediately after use, as they can be extremely hot.
- Do not operate the flash unit if it has been dropped or damaged.
- Opbevares utilgængeligt for børn.
- Use only BRESSER approved accessories and replacement parts.
3. Pakkens indhold
Bekræft, at alle nedenstående varer er til stede i din pakke:
- 2 x BRESSER BRM-300AM Studio Flash Units
- 2 x Light Stands (200 cm)
- 2 x Softboxes (60 x 90 cm)
- 1 x Sync Flash Cable
- 2 x 150W Modeling Lamps
- 2 x 300W Flash Tubes
- 2 x strømkabler
- 2 x reservesikringer

Figur 3.1: Overview of the BRESSER BRM-300AM Studio Flash Kit components, including two flash heads, two softboxes, and two light stands.
4. Produktet er slutview
The BRESSER BRM-300AM is a compact and powerful studio flash unit. It features a Bowens-S bayonet mount for compatibility with various light modifiers.
4.1 Flash Unit Components

Figur 4.1: Detaljeret view of the BRM-300AM flash unit, showing the flash tube, modeling lamp, and Bowens-S mount.
- Flash-rør: Provides the main light output.
- Modellering L.amp: A 150W halogen lamp for præviewlyseffekter.
- Bowens-S Mount: For attaching softboxes, reflectors, and other light modifiers.
- Monteringsbeslag: For attaching the flash unit to a light stand.
4.2 Kontrolpanel

Figur 4.2: The control panel of the BRM-300AM flash unit in an off state.

Figur 4.3: The control panel of the BRM-300AM flash unit in an operational state, showing the digital display and various buttons.
- Digital skærm: Shows flash power level (1.0 to 6.0).
- Afbryderen: Hovedafbryder til tænd/sluk for enheden.
- LAMP Knap: Toggles the modeling lamp tænd/sluk.
- CELL Button: Activates/deactivates the optical slave cell for wireless triggering.
- LYD-knap: Slår den hørbare blitzindikator til/fra.
- TEST knap: Udløser en testblitz.
- +/- knapper: Adjust flash power output.
- SYNC Port: 3.5mm jack for wired sync connection.
5. Opsætningsvejledning
5.1 Samling af lysstativer
- Extend the legs of the light stand to form a stable base.
- Tighten the locking knob at the base to secure the legs.
- Extend the telescopic sections of the stand to the desired height and secure each section with its locking knob.
5.2 Installing the Flash Tube and Modeling Lamp
- Ensure the flash unit is powered off and unplugged.
- Carefully insert the 300W flash tube into its socket, aligning the pins. Do not force it.
- Screw the 150W modeling lamp into its socket. Avoid touching the glass part of the lamp directly with bare hands.
5.3 Attaching the Softbox
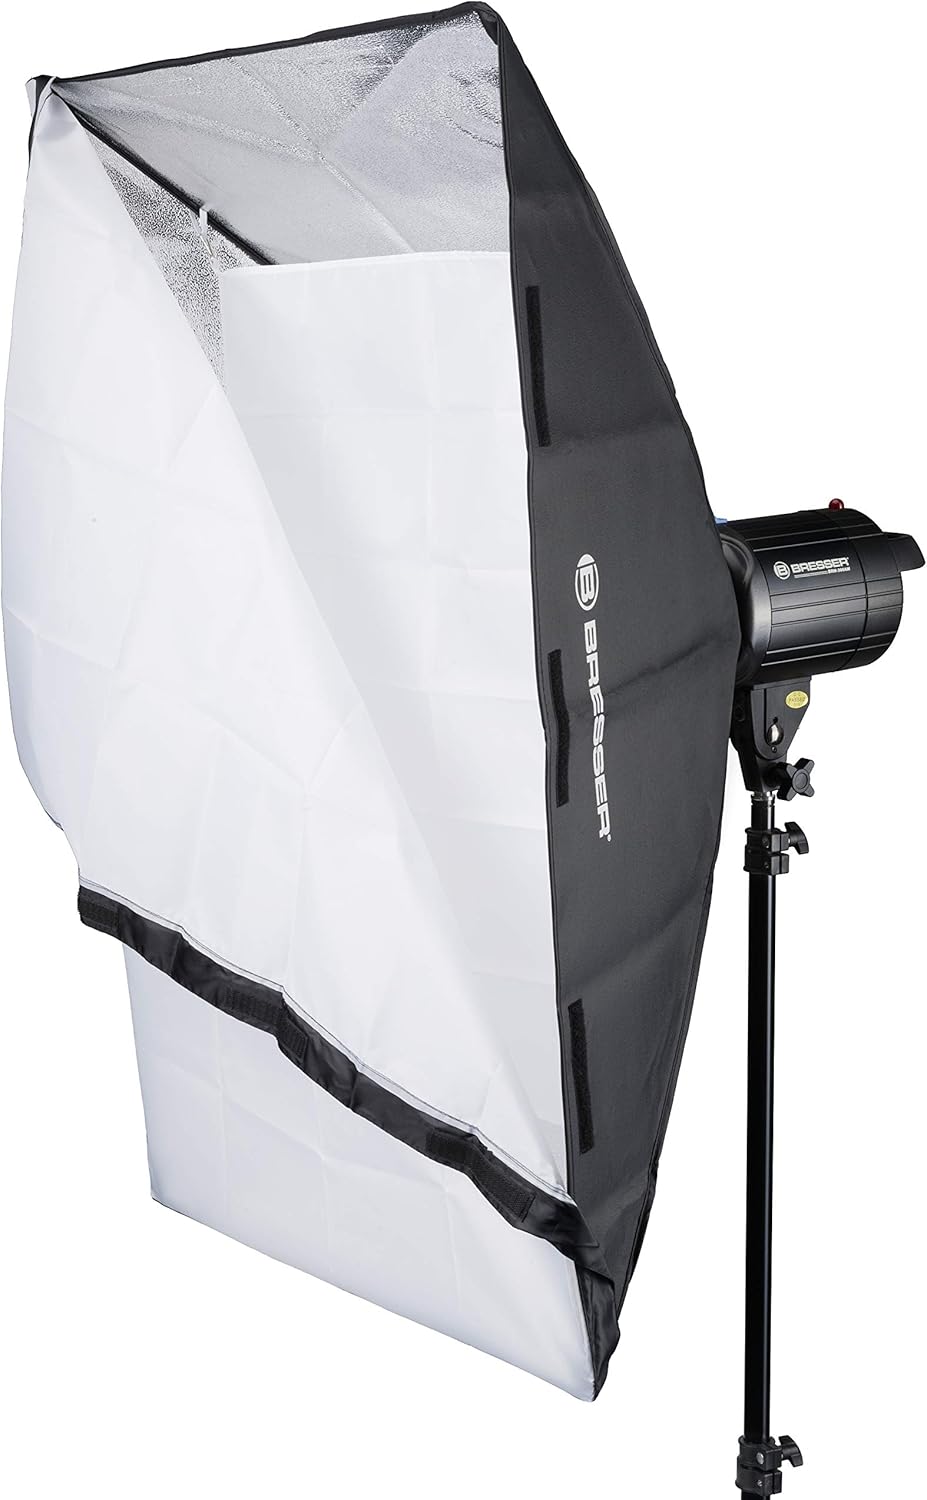
Figur 5.1: Illustration of a softbox being attached to the flash unit via the Bowens-S mount.
- Assemble the softbox rods into the speedring, forming the softbox shape.
- Align the speedring of the softbox with the Bowens-S mount on the flash unit.
- Insert the speedring into the mount and rotate it clockwise until it locks securely into place.
- Attach the inner and outer diffusers to the softbox using the Velcro fasteners.
5.4 Montering af blitzenheden

Figur 5.2: Two BRM-300AM flash units with softboxes mounted on light stands, ready for use.
- Place the flash unit's mounting bracket onto the top spigot of the light stand.
- Tighten the locking knob on the flash unit's bracket to secure it to the stand.
- Adjust the angle of the flash unit using the tilt adjustment knob on the bracket.
6. Betjeningsvejledning
6.1 Tænd og sluk
- Connect the power cable to the flash unit and then to a suitable power outlet.
- Vend hoveddelen MAGT switch on the control panel to the "ON" position. The digital display will illuminate.
- To power off, flip the MAGT switch to the "OFF" position and disconnect the power cable.
6.2 Justering af blitzstyrke
The flash power is adjustable from 1/32 to full power (300W). The digital display shows the power level from 1.0 to 6.0.
- Tryk på + button to increase flash power.
- Tryk på - button to decrease flash power.
6.3 Modellering Lamp Operation
150W modellerings-lamp helps visualize the lighting effect before taking a picture.
- Tryk på LAMP button to toggle the modeling lamp til eller fra.
6.4 Triggering the Flash
The BRM-300AM offers multiple triggering options:
- Synkroniseringskabel: Connect your camera's PC sync port to the flash unit's SYNC port using the provided sync cable.
- Optisk slave: The built-in optical slave cell can trigger the flash when it detects another flash firing. Press the CELLE button to activate/deactivate this function.
- Test knap: Tryk på PRØVE button on the control panel to manually fire a flash.
The flash unit has a fast recycling time of 0.5 to 1.0 seconds, indicated by the audible sound (if enabled) and the display.
6.5 Audible Ready Indicator
The flash unit can emit an audible beep when it has recycled and is ready to fire again.
- Tryk på SUND button to toggle the audible indicator on or off.
7. Vedligeholdelse
7.1 Rengøring
- Tag altid stikket ud af stikkontakten før rengøring.
- Use a soft, dry cloth to wipe the exterior of the flash unit.
- For the flash tube and modeling lamp, use a clean, lint-free cloth. Avoid abrasive cleaners.
7.2 Flash Tube and Modeling Lamp Udskiftning
If the flash tube or modeling lamp needs replacement:
- Ensure the unit is powered off and unplugged, and allow sufficient time for the lamps for at køle ned.
- Carefully remove the old flash tube or modeling lamp.
- Install the new replacement part as described in Section 5.2.
- Use only genuine BRESSER replacement parts to ensure compatibility and safety.
8. Fejlfinding
| Problem | Mulig årsag | Løsning |
|---|---|---|
| Flash unit does not power on. | No power supply; faulty power cable; blown fuse. | Check power connection; try a different outlet; replace fuse (refer to Section 7.2). |
| Blitzen går ikke ud. | Flash not fully recycled; sync cable not connected; optical slave not activated or blocked; flash tube faulty. | Wait for ready indicator; check sync cable connection; ensure CELL is active and sensor is clear; replace flash tube. |
| Modellering lamp lyser ikke. | LAMP button off; modeling lamp defekt. | Tryk på LAMP button; replace modeling lamp. |
| Enheden overopheder. | Excessive continuous use. | The unit has overheat protection. Allow it to cool down before resuming operation. Reduce frequency of flashes. |
9. Specifikationer
| Feature | Detalje |
|---|---|
| Blitzstyrke | 300 Ws (Watt-seconds) |
| Effektjustering | 1/32 to Full Power |
| Guidenummer (GN) | GN56 |
| Genbrugstid | 0.5 - 1.0 sekunder |
| Farvetemperatur | 5300-5600 K |
| Modellering L.amp | 150W Halogen, On/Off switchable |
| Monteringstype | Bowens-S Bayonet |
| Udløsningsmetoder | Sync Cable, Optical Slave, Test Button |
| Overophedningsbeskyttelse | Ja |
| Vægt (pr. Enhed) | Cirka 11.6 kg (for sættet) |
| Modelnummer | F003215 |
| ASIN | B0744GJVYR |
10. Garanti og support
For warranty information and technical support, please refer to the documentation provided with your purchase or visit the official BRESSER webwebsted. Gem din købsbevis i tilfælde af garantikrav.


