1. Introduktion
Thank you for choosing the DIGOO DG-TH8380 Wireless Weather Station. This device provides accurate indoor and outdoor temperature and humidity readings, weather forecasts, time, and an alarm function. Please read this manual carefully to ensure proper setup and operation of your weather station.
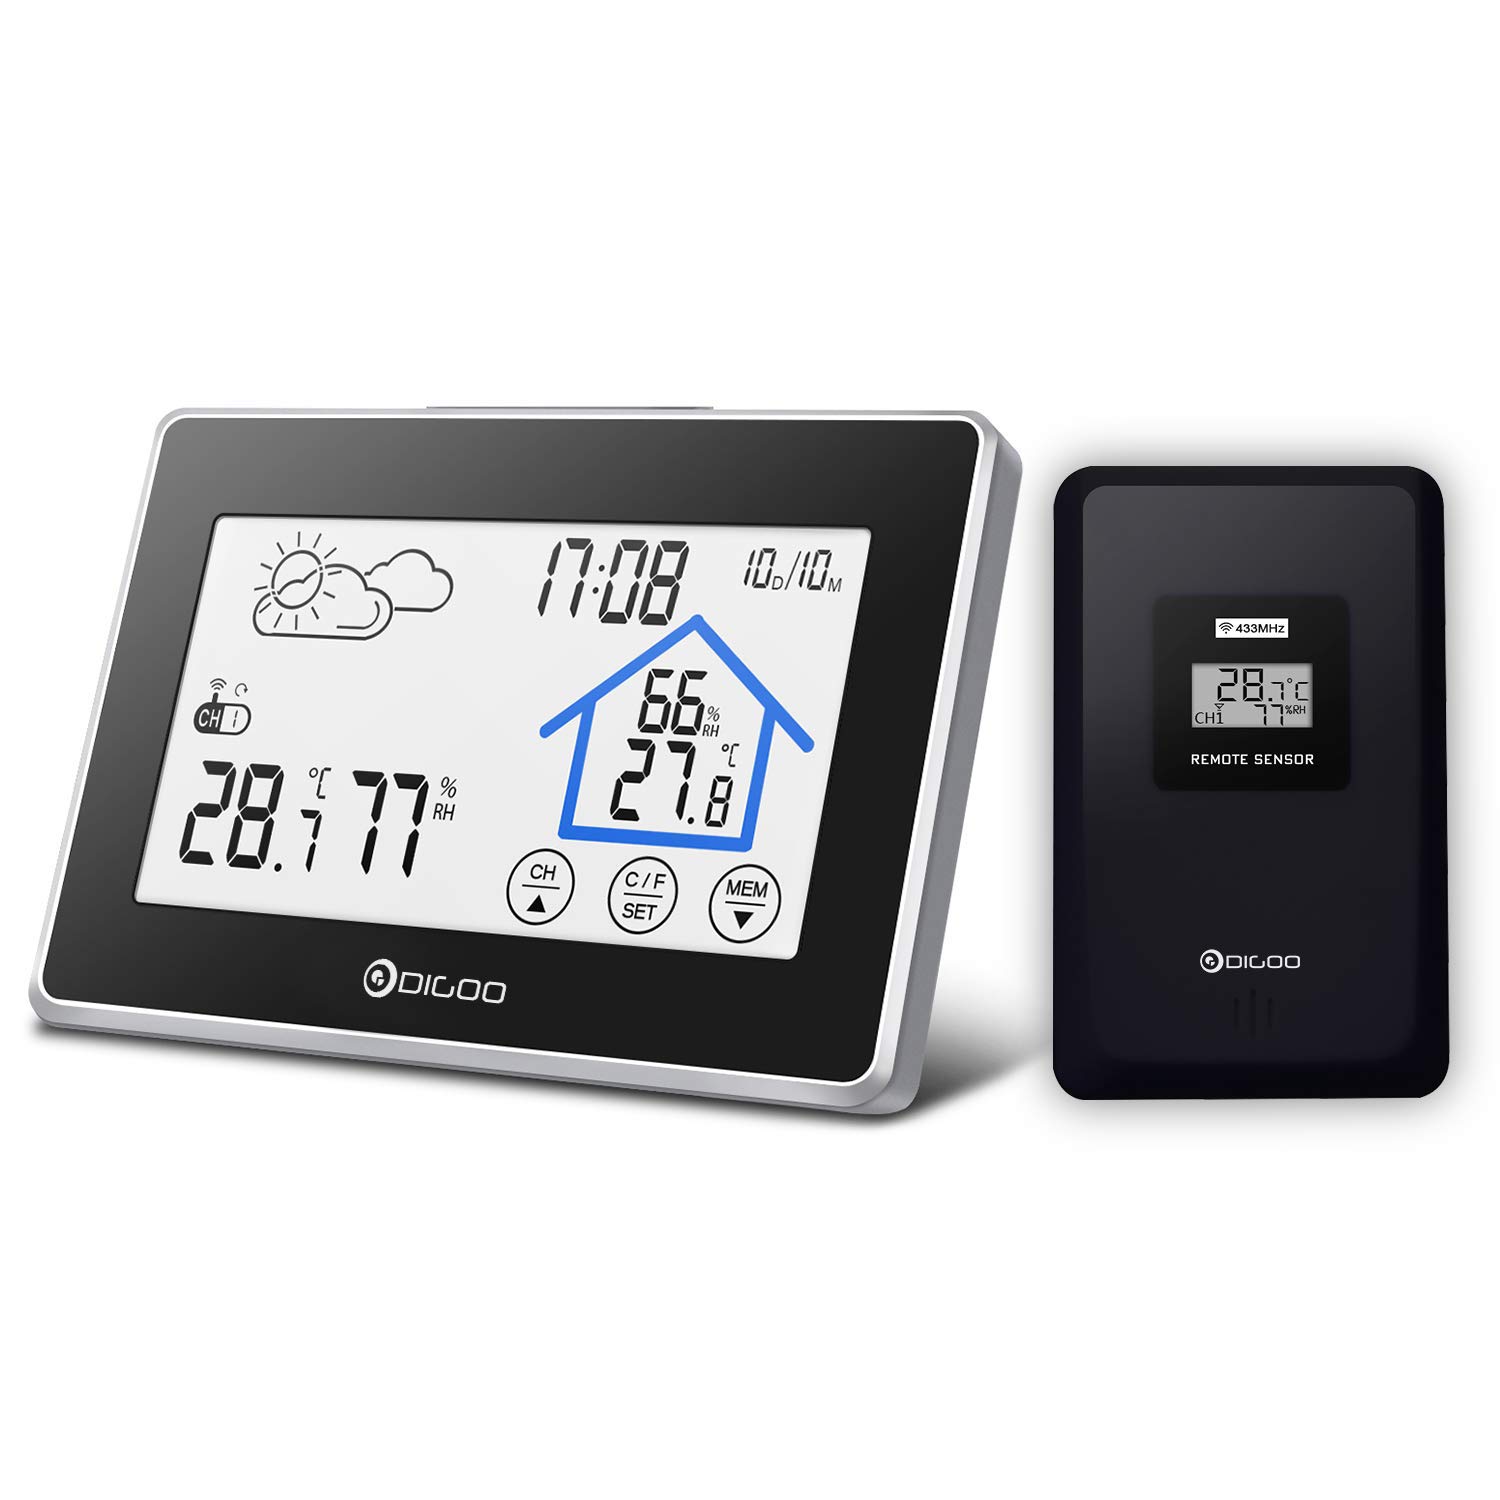
Billede 1.1: The DIGOO DG-TH8380 Wireless Weather Station main unit and its remote outdoor sensor.
2. Produktet er slutview
2.1 Nøglefunktioner
- Multifunction Weather Station Clock with easy-to-use touch screen.
- Displays weather forecasts, temperature, and humidity.
- Time and calendar display.
- Soft, eye-care white backlight for visibility in low light, automatically turns off after 20 seconds.
- Records maximum and minimum temperature/humidity data.
- Low battery indicator for both main unit and remote sensor.
- Supports up to 3 remote outdoor sensors (one included).
2.2 Inkluderede komponenter
- 1 x DIGOO DG-TH8380 Wireless Touch Screen Weather Station (Main Unit)
- 1 x DIGOO DG-TH8380 Wireless Outdoor Sensor
- 1 x engelsk brugervejledning
2.3 Hovedenhedens display og knapper

Billede 2.1: Detaljeret view of the weather station's display and controls, indicating areas for weather icons, time/date, indoor/outdoor temperature and humidity, channel display, backlight button, and touch buttons (CH, C/F SET, MEM).
The main unit features a clear LCD display with various indicators:
- Weather Icon: Displays current weather forecast (Sunny, Partly Cloudy, Cloudy, Rainy).
- Tid og dato: Shows current time and date.
- Indendørs temperatur og luftfugtighed: Readings from the main unit's internal sensor.
- Udendørs temperatur og luftfugtighed: Readings from the remote sensor.
- Kanalvisning: Indicates which remote sensor channel is currently displayed (CH1, CH2, CH3).
- Baggrundslys knap: Activates the soft backlight.
- Touch Buttons (CH, C/F SET, MEM): Used for various settings and functions.
3. Opsætning
3.1 Batteriinstallation
The weather station main unit and remote sensor are battery-powered. Batteries are not included.
- Hovedenhed: Open the battery compartment cover on the back of the main unit. Insert 3 x AAA batteries, ensuring correct polarity (+/-). Close the cover.
- Fjernbetjening: Open the battery compartment cover on the back of the remote sensor. Insert 2 x AAA batteries, ensuring correct polarity (+/-). Close the cover.
Note: It is recommended to insert batteries into the remote sensor first, then the main unit, to ensure proper synchronization.

Billede 3.1: Overview of the weather station's physical features, including dimensions, wall-mount option, table stand, battery compartment, and the remote sensor.
3.2 Sensorsynkronisering
After installing batteries, the main unit will automatically search for the remote sensor signal. This process may take a few minutes. Ensure the remote sensor is within range (up to 328ft / 100m in open air) of the main unit.
If synchronization fails, remove batteries from both units, wait a few seconds, and then reinsert batteries into the remote sensor first, followed by the main unit.
3.3 Multiple Sensors (Optional)
The weather station supports up to three remote sensors. If you have additional sensors, they will automatically be assigned to channels CH2 and CH3 upon synchronization.

Billede 3.2: Illustration of how the weather station can connect to up to three remote sensors (CH1, CH2, CH3) and how to switch between their displays on the main unit.
3.4 Placering
- Hovedenhed: Place the main unit indoors on a flat surface using its integrated stand, or mount it on a wall. Avoid direct sunlight or heat sources.
- Fjernbetjening: Place the remote sensor outdoors in a shaded, dry location, protected from direct rain and sunlight, for accurate readings. Ensure it is within the wireless range of the main unit.
4. Betjeningsvejledning
4.1 Grundlæggende displayinformation
Once set up, the main unit will display:
- Nuværende tidspunkt og dato.
- Indoor temperature and humidity.
- Outdoor temperature and humidity (from the currently selected channel).
- Weather forecast icon.

Billede 4.1: Icons representing the various features of the weather station: Weather, Temperature, Humidity, Alarm, Calendar, Touch Switch, and Night Light (backlight).
4.2 Indstilling af tid og dato
- Tryk og hold på C/F-sæt touch button for 3 seconds to enter time setting mode.
- The setting value will flash. Use the CH or MEM touch buttons to adjust the value.
- Trykke C/F-sæt again to confirm and move to the next setting (e.g., 12/24 hour format, hour, minute, year, month, day).
- After setting the last item, press C/F-sæt for at afslutte indstillingstilstand.
4.3 Valg af temperaturenhed (°C/°F)
Tryk kort på C/F-sæt touch button to switch between Celsius (°C) and Fahrenheit (°F) temperature units.
4.4 Baggrundsbelysning
Press the backlight button located on the top of the main unit to activate the soft white backlight. The backlight will remain on for approximately 20 seconds and then automatically turn off to conserve battery power.

Billede 4.2: The weather station displaying its soft, eye-care backlight, designed for easy viewi mørke omgivelser.
4.5 Maks./min. temperatur- og fugtighedsregistreringer
Tryk kort på MEM touch button to view the maximum temperature and humidity records. Press it again to view the minimum records. Press a third time to return to current readings. The records are reset daily or when batteries are replaced.
4.6 Switching Remote Sensor Channels
If you have multiple remote sensors, briefly press the CH touch button to cycle through the outdoor temperature and humidity readings from CH1, CH2, and CH3.
4.7 Alarm Clock and Snooze Function
The weather station includes an alarm clock with a snooze function. Refer to the detailed instructions below for setting and activating the alarm:
- Indstilling af alarmtidspunkt: In normal time display mode, briefly press the MEM button until the alarm icon appears. Then, press and hold the C/F-sæt button for 3 seconds. The alarm hour will flash. Use CH or MEM at justere, og C/F-sæt for at bekræfte og gå til minutter.
- Aktivering/deaktivering af alarm: In alarm display mode, briefly press the CH button to turn the alarm ON or OFF. An alarm bell icon will appear when activated.
- Snooze-funktion: When the alarm sounds, press the backlight button (on top) to activate the snooze function. The alarm will sound again after approximately 5 minutes. To stop the alarm completely, press any other touch button.
5. Vedligeholdelse
5.1 Udskiftning af batteri
When the low battery indicator appears on the display for either the main unit or the remote sensor, replace the batteries promptly. Use new AAA batteries, ensuring correct polarity. After replacing batteries, the units may need to re-synchronize.
5.2 Rengøring
Clean the weather station and remote sensor with a soft, damp klud. Brug ikke slibende rengøringsmidler eller opløsningsmidler, da disse kan beskadige displayet ellerasing.
5.3 Miljøhensyn
To ensure longevity and accurate readings, avoid exposing the main unit to extreme temperatures, direct sunlight, or high humidity. The remote sensor should be placed in a location protected from direct weather elements but with good air circulation.
6. Fejlfinding
| Problem | Mulig årsag | Løsning |
|---|---|---|
| No display on main unit or sensor. | Batterierne er døde eller isat forkert. | Udskift batterierne med nye, og sørg for korrekt polaritet. |
| Udendørstemperatur/fugtighed vises ikke eller er forkert. | Sensor out of range, interference, or synchronization issue. | Move sensor closer to the main unit. Remove batteries from both units, wait 1 minute, then reinsert into sensor first, then main unit. Avoid placing near large metal objects or electronics. |
| Weather forecast icon does not match actual weather. | The weather station forecasts based on atmospheric pressure changes over 12-24 hours, not real-time conditions. | This is normal operation. The forecast is a prediction, not a current observation. Allow time for the station to learn local pressure patterns. |
| Baggrundsbelysningen virker ikke. | Low batteries or backlight button not pressed correctly. | Replace main unit batteries. Ensure a firm press on the backlight button. |
7. Specifikationer
- Model: DG-TH8380
- Hovedenhedens strøm: 3 x AAA batterier (medfølger ikke)
- Fjernsensorens strøm: 2 x AAA batterier (medfølger ikke)
- Trådløs frekvens: 433 MHz
- Trådløs rækkevidde: Op til 100 meter (328 fod) i fri luft
- Indendørs temperaturområde: 0°C til 50°C (32°F til 122°F)
- Udendørs temperaturområde: -20°C til 60°C (-4°F til 140°F)
- Fugtighedsområde: 20% til 95% RH
- Dimensioner (hovedenhed): Approximately 141mm x 95mm x 24mm (5.55in x 3.74in x 0.87in)
- Farve: Sort
8. Garanti og support
Information regarding specific warranty terms for the DIGOO DG-TH8380 Wireless Weather Station is not available in this manual. For warranty claims, technical support, or replacement parts, please refer to the retailer where the product was purchased or visit the official DIGOO webhjemmeside for kontaktoplysninger til kundeservice.


