1. Introduktion
This manual provides detailed instructions for the safe and efficient operation, installation, and maintenance of your ALORAIR Storm LGR Extreme Commercial Dehumidifier. Please read this manual thoroughly before operating the unit and retain it for future reference.
The ALORAIR Storm LGR Extreme is a high-capacity Low Grain Refrigerant (LGR) dehumidifier designed for commercial, industrial, and water damage restoration applications. It is capable of removing up to 180 pints of water per day at saturation (90°F, 90% Relative Humidity) and 85 PPD at AHAM conditions (80°F, 60% Relative Humidity), covering areas up to 2,300 square feet.
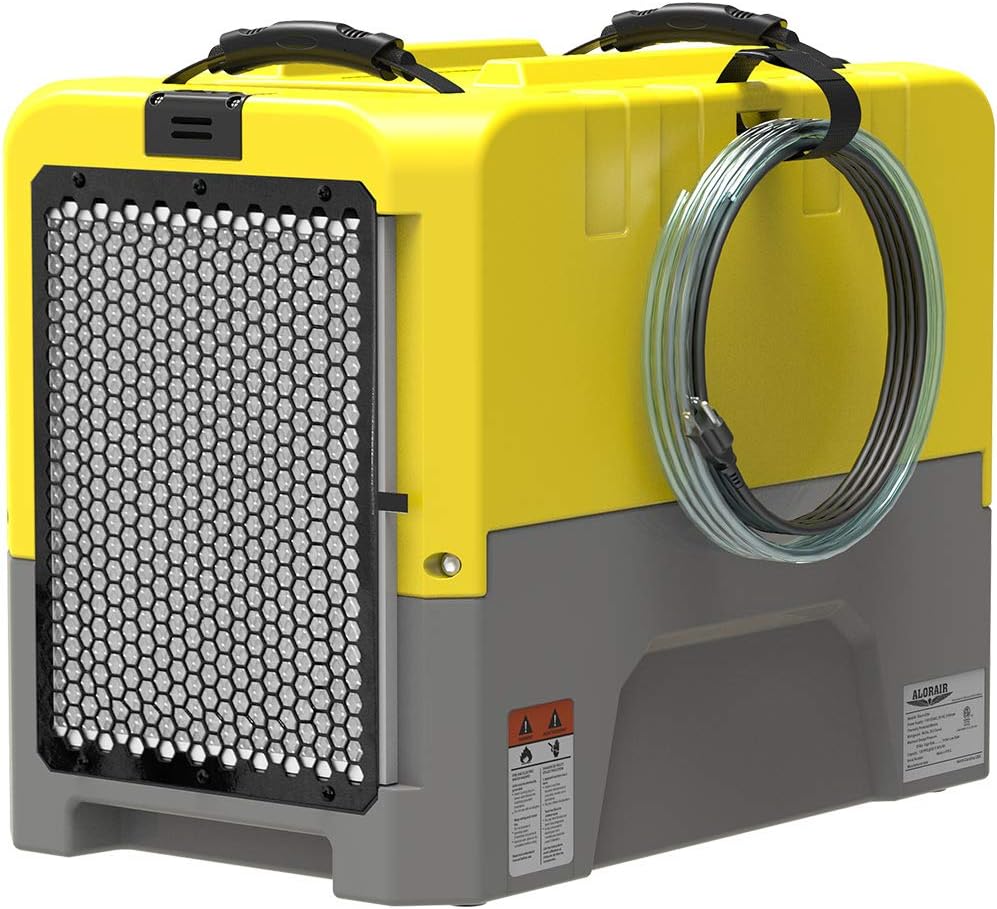
Image 1.1: ALORAIR Storm LGR Extreme Dehumidifier. This image shows the compact, yellow and grey unit with its front air intake grille and a coiled drain hose attached to the side.
Its compact design and built-in pump make it suitable for various environments, including basements, crawl spaces, warehouses, and job sites.
2. Sikkerhedsoplysninger
Overhold altid følgende sikkerhedsforanstaltninger for at mindske risikoen for brand, elektrisk stød eller personskade.
- Læs alle instruktioner før brug af apparatet.
- Sørg for, at strømforsyningen matcher voltage requirements specified on the unit's label.
- Brug ikke enheden med en beskadiget ledning eller stik. Hvis netledningen er beskadiget, skal den udskiftes af producenten eller en kvalificeret servicetekniker.
- Do not block air intake or exhaust openings. Maintain adequate clearance around the unit for proper airflow.
- Stik ikke genstande ind i luftudløbene eller -indtagene.
- Keep the unit away from water sources and wet environments.
- Always unplug the dehumidifier before cleaning, servicing, or moving it.
- Dette apparat er ikke beregnet til brug af personer (inklusive børn) med nedsatte fysiske, sensoriske eller mentale evner, eller mangel på erfaring og viden, medmindre de har fået opsyn eller instruktion i brugen af apparatet af en person, der er ansvarlig for deres sikkerhed.
- Børn skal være under opsyn for at sikre, at de ikke leger med apparatet.
- The unit is designed for commercial use.
3. Opsætning og installation
3.1 Udpakning
- Tag forsigtigt affugteren ud af emballagen.
- Inspect the unit for any shipping damage. Contact your supplier immediately if damage is found.
- Fjern alt emballagemateriale og bortskaf det på en ansvarlig måde.
3.2 Placering
Position the dehumidifier on a stable, level surface. Ensure there is at least 1 foot (30 cm) of clearance around the air intake and exhaust for optimal performance. The unit is designed to be compact and can be placed in tight spaces such as crawl spaces or basements.

Image 3.1: ALORAIR Dehumidifier in various settings. This image illustrates the dehumidifier's versatility, showing it in a commercial warehouse, a crawl space, a basement, and an industrial environment.
3.3 Opsætning af dræning
The Storm LGR Extreme features a built-in condensate pump for automatic drainage. This eliminates the need for manual emptying of a water tank.
- Locate the drain hose connection point on the unit.
- Connect the provided 19.6 ft (6 meter) drain hose securely to the outlet.
- Route the drain hose to a suitable drainage point, such as a sink, floor drain, or outside. The pump can lift water up to 14.7 ft (4.5 meters) vertically.
- Ensure the hose is not kinked or obstructed to allow for continuous drainage.

Image 3.2: Diagram of the built-in condensate pump and drainage system. This illustration shows the internal components of the dehumidifier, highlighting the pump and the path of the drain hose for continuous water removal.
3.4 Stacking for Transport
The unit is designed to be stackable for efficient storage and transportation. Ensure units are securely stacked before moving.

Image 3.3: Stackable design for easy transportation. This image shows multiple dehumidifiers stacked on top of each other, demonstrating their space-saving design for storage and transport.
4. Betjeningsvejledning
4.1 Kontrolpanel overview
The ALORAIR Storm LGR Extreme features an intelligent touch panel for easy operation.

Image 4.1: Easy operation and intuitive display. This image highlights the digital control panel, showing the unit's operational status, inlet temperature, and humidity levels.
4.2 Grundlæggende betjening
- Tilslut og gå: Tilslut netledningen til en passende stikkontakt.
- Tænd: Tryk på MAGT knappen på kontrolpanelet for at tænde enheden.
- Indstil luftfugtighed: Brug SÆT buttons (up/down arrows) to adjust the desired humidity level. The unit will operate until the set humidity is reached.
- Menu navigation: Tryk på MENU button to cycle through various display options and settings.
4.3 Automatiske funktioner
- AUTO ON/OFF: The unit automatically turns on and off to maintain the set humidity level.
- Hukommelsesstart: In case of a power interruption, the unit will automatically restart with the previous settings once power is restored.
- Automatisk afrimning: The dehumidifier features an automatic defrost function to prevent ice buildup on the coils, ensuring efficient operation in cooler conditions. During a defrost cycle, moisture removal may temporarily decrease until the coils are clear.

Image 4.2: Moisture extraction machine features. This image highlights key automatic functions: Auto Operation, Auto Defrost, and Memory Restart, which enhance user convenience and unit efficiency.
4.4 Vis information
The digital display provides real-time operational data:
- GPP (Grains Per Pound): Indicates the moisture content in the air.
- Inlet/Outlet Temperature and Humidity: Shows the conditions of the air entering and exiting the unit.
- Coil Temperature: Displays the temperature of the evaporator coils.
- Kompressor Amps: Current draw of the compressor.
- Total Amps: Total current draw of the unit.
- Job Hours: Resettable timer for tracking operation duration for specific tasks.
- Total Life Hours: Cumulative operational hours of the unit.
5. Vedligeholdelse
Regelmæssig vedligeholdelse sikrer din affugters lange levetid og effektive ydeevne.
5.1 Rengøring/udskiftning af luftfilter
The unit is equipped with a washable MERV-8 air filter designed to capture microscopic airborne particles without significantly impacting airflow.
- Turn off and unplug the dehumidifier before accessing the filter.
- Locate and remove the air filter from its slot.
- Clean the filter by vacuuming or rinsing with warm water. Allow it to dry completely before reinstallation.
- It is recommended to clean the filter monthly and replace it every 3-6 months, depending on usage and environmental conditions.
5.2 Generel rengøring
- Tør ydersiden af enheden af med en blød, damp klæde. Brug ikke slibende rengøringsmidler eller opløsningsmidler.
- Ensure all vents are clear of dust and debris.
5.3 Pumpevedligeholdelse
The built-in pump has a purge button to manually drain the condensate. This can be useful for ensuring the pump is clear or for draining the unit before moving.
- Tryk på PUMPE button on the control panel to initiate a manual drain cycle. The pump will run for approximately 25 seconds.
- Regularly check the drain hose for blockages or kinks.
6. Fejlfinding
This section addresses common issues you might encounter with your dehumidifier.
| Problem | Mulig årsag | Løsning |
|---|---|---|
| Enheden tænder ikke | Ingen strømforsyning Strømkabel beskadiget | Kontroller strømtilslutning og stikkontakt. Inspect power cord for damage; contact service if damaged. |
| Dehumidifier not removing moisture | Luftfilter tilstoppet Stuetemperatur for lav Luftfugtighedsindstillingen er for høj Enhed i afrimningscyklus | Rengør eller udskift luftfilteret. Ensure ambient temperature is within operating range (above 33°F / 1°C). Sænk den ønskede luftfugtighedsindstilling. Allow the unit to complete its automatic defrost cycle. |
| Vandlækage | Afløbsslange bøjet eller blokeret Drain hose not securely connected | Kontroller og fjern eventuelle blokeringer i afløbsslangen. Ensure the drain hose is firmly attached to the unit and directed to a proper drain. |
| Unit displays E4/E5 error code | Refrigerant leak or sensor issue | Turn off the unit and unplug it. Contact customer support for assistance. Do not attempt to repair refrigerant systems yourself. |
| Enheden er støjende | Enheden står ikke på en plan overflade Luftfilter tilstoppet Intern komponent problem | Placer enheden på en stabil, plan overflade. Rengør eller udskift luftfilteret. Hvis støjen fortsætter, skal du kontakte kundesupport. |
For issues not listed here or if problems persist, please contact ALORAIR customer support.
7. Specifikationer
| Feature | Detalje |
|---|---|
| Mærke | ALORAIR |
| Modelnavn | Storm LGR Extreme |
| Affugtningskapacitet (mætning) | 180 pints om dagen |
| Affugtningskapacitet (AHAM) | 85 pints om dagen |
| Dækning af gulvareal | Op til 2,300 kvadratmeter |
| Luftmængde kapacitet | 210 kubikfod pr. minut (CFM) |
| Produktmål (L x B x H) | 22.8 cm x 13.7 cm x 17.3 cm |
| Varens vægt | 64.3 pund |
| Materiale | Polyethylen (PE) |
| Farve | Gul |
| Wattage | 646.3 watt |
| Driftstilstande | Continuous, Timer, Pump Drainage, Auto-Defrost |
| Særlige funktioner | Adjustable Humidity Control, Automatic Defrost, Built-In Pump, Continuous Draining, Digital Display |
| Afløbsslange længde | 19.6 fod |
| Drain Vertical Height | 14.7 fod |
| Øverste temperaturvurdering | 104 grader Fahrenheit |
| Certificeringer | ETL Compliant |

Image 7.1: Product dimensions. This image provides a visual representation of the dehumidifier's length, width, and height measurements.
8. Garanti og support
ALORAIR stands behind the quality of its products. The Storm LGR Extreme dehumidifier comes with a comprehensive limited warranty.
8.1 Limited 5-Year Warranty
- 6 måneders reservedele og arbejdskraft: Includes shipment charges for replacement parts or unit.
- 1 års reservedele og arbejdsløn: Excludes shipment charges for sending the defective product back for repair or replacement.
- 3 års reservedele og arbejdskraftgaranti: Coverage for the refrigeration system only.
- 5-årig kompressor og spole: Specific coverage for these critical components.
For additional warranty information or to initiate a warranty claim, please refer to the official ALORAIR website or contact customer support directly. Ensure you retain your proof of purchase.
8.2 Kundesupport
If you have any questions, require technical assistance, or need to troubleshoot an issue, please contact ALORAIR customer support. Contact details can typically be found on the manufacturer's webwebstedet eller på produktemballagen.


