Indledning
Welcome to the user manual for your Fuvision 16GB 1080P HD Spy Pen Camera Video Recorder. This manual provides detailed instructions on how to set up, operate, and maintain your device. Please read it carefully to ensure proper usage and to maximize the product's functionality.
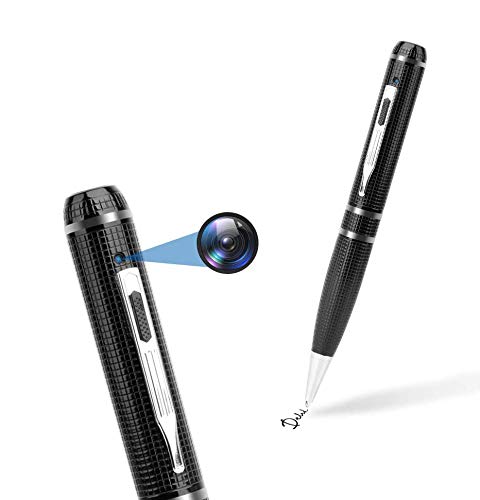
An image showing the Fuvision 16GB 1080P HD Spy Pen Camera, highlighting its discreet design as a functional writing pen.

A person holding the Fuvision Spy Pen Camera, illustrating how its design allows it to be discreetly used as a regular pen.
Pakkens indhold
Kontroller venligst, at alle følgende varer er inkluderet i din pakke:
- Fuvision 16GB 1080P HD Spy Pen Camera
- USB Data/Charging Cable
- 3 x Pen Refills
- Brugervejledning (dette dokument)
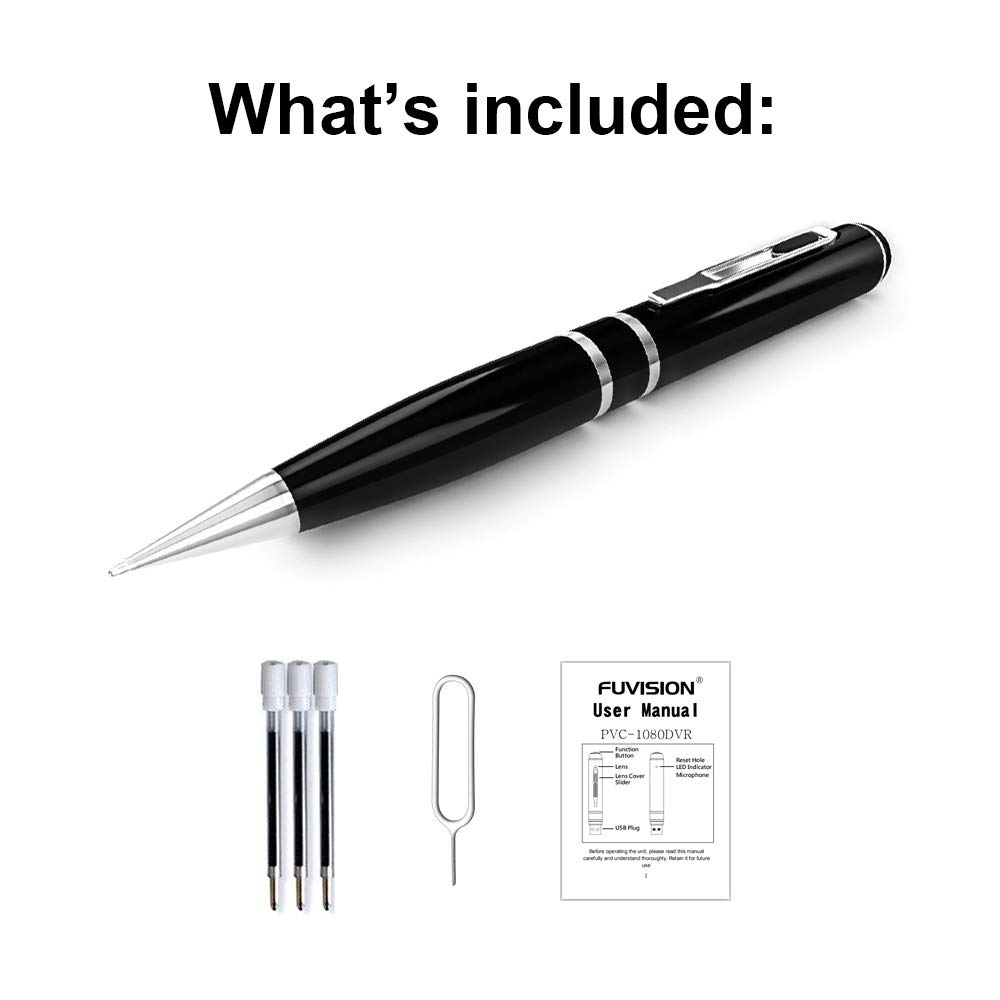
An image displaying all items included in the package: the Fuvision Spy Pen Camera, three ink refills, a USB data/charging cable, and a printed user manual.
Produkt overview og komponenter
Familiarize yourself with the various parts of your Fuvision Spy Pen Camera:

A detailed diagram of the Fuvision Spy Pen Camera, pointing out key components such as the Reset Hole, LED Indicator, USB Plug, Function Button, Lens Cover Slider, and the Camera Lens.

Another diagram illustrating the Fuvision Spy Pen Camera's features, including the ON/OFF button, USB port, HD camera location, and the functional ball-point pen tip.
- Funktionsknap: Used for powering on/off, starting/stopping recording, and switching modes.
- Kameraobjektiv: The hidden lens for video and photo capture.
- LED-indikator: Provides status feedback (power, recording, photo mode).
- USB stik: Located at the top, used for charging and data transfer.
- Nulstil hul: For resetting the device if it becomes unresponsive.
- Ball-Point Pen: Fully functional writing pen.
Opsætning
1. Opladning af enheden
Before first use, fully charge the pen camera. Connect the USB plug of the pen to a computer's USB port or a 5V DC USB wall adapter using the provided USB cable. The charging time is approximately 4 hours. The LED indicator will show charging status (specific LED behavior for charging is not detailed, assume it turns off or changes color when fully charged).
2. Første opstart
After charging, the device is ready for use. The pen has a built-in 16GB memory, so no external memory card installation is required.
Betjeningsvejledning
1. Tænd og sluk
- For at tænde: Press and hold the Function Button on the top for a few seconds until the LED lights up. It will flash purple a few times, then turn off. This indicates the device has started recording. The LED is off during recording to maintain discretion.
- For at slukke: Press and hold the Function Button for a few seconds until the LED flashes purple a few times, then turns off completely.
2. Video Recording Mode
- Start optagelse: When the device is powered on, it automatically begins recording video. The LED will flash purple a few times and then turn off, indicating active recording.
- Stop optagelse: Press the Function Button once quickly. The recording will stop, and a red LED will turn on, indicating the pen is in STANDBY mode.
- Loop-optagelse: The device supports loop recording, which means it will automatically overwrite the oldest files, når hukommelsen er fuld.
3. Fototilstand
- Switching to Photo Mode: From STANDBY mode (red LED on), double-click the Function Button. The red LED will change to blue, indicating the device is now in Photo Mode.
- Tager et billede: In Photo Mode (blue LED on), press the Function Button once. The purple light will blink a few times to confirm a photo has been taken.
- Exiting Photo Mode: Double-click the Function Button again. The device will return to STANDBY mode (red LED on).
4. Tilslutning til en computer
To transfer recorded videos and photos, connect the pen camera to your computer using the provided USB cable. The device will appear as a removable disk drive. It is compatible with Windows XP/2003/Windows7/8/10 and Apple Mac OS X - 10.7 operating systems.
Opretholdelse
1. Almen pleje
- Undgå at tabe enheden eller udsætte den for kraftige stød.
- Hold enheden væk fra vand, fugt og ekstreme temperaturer.
- Store the pen in a cool, dry place when not in use.
2. Rensning
Use a soft, dry cloth to clean the exterior of the pen. Do not use liquid cleaners or solvents, as they may damage the device.
Fejlfinding
Almindelige problemer og løsninger:
- Enheden tænder ikke: Ensure the battery is fully charged. Connect to a power source and charge for 4 hours.
- Recording not starting: Check if the device is powered on correctly (LED flashes purple then turns off). Ensure the battery has sufficient charge.
- Kan ikke oprette forbindelse til computeren: Try a different USB port or a different computer. Ensure the USB cable is securely connected.
- Enheden reagerer ikke: Locate the Reset Hole (refer to Product Overview) and gently press it with a thin object (like a paperclip) to reset the device.
Specifikationer
Detailed technical specifications for the Fuvision 16GB 1080P HD Spy Pen Camera:

Et billedshowasing the clear video quality produced by the Fuvision Spy Pen Camera, indicating its 1080P Full HD resolution with still shot functionality.
| Video opløsning | 1080P (1920x1080) @ 30fps |
| Foto opløsning | JPG 4032x3024 |
| Pixel | 2.0 Mega Pixel CMOS |
| Intern hukommelse | 16 GB |
| Batterilevetid | Approximately 120 minutes continuous recording |
| Optagetilstande | Continuous record, Loop Recording |
| Videoformat | AVI |
| USB interface | 2.0 |
| Opladning Voltage | DC-5V (500mA) |
| Opladningstid | Cirka 4 timer |
| View Vinkel | 65° |
| Operativsystemkompatibilitet | Windows XP/2003/Windows7/8/10, Apple Mac OS X - 10.7 and above |
| Dimensioner | 155 × 14.5 × 14.5 mm (6.1 x 0.57 x 0.57 tommer) |
| Varens vægt | 100 g (0.22 lbs) |
| Strømkilde | Batteridrevet (1 lithium-ion-batteri inkluderet) |
| Anbefalede anvendelser | Motion Detection (feature mentioned in product details, but not detailed in operation) |
Vigtige sikkerhedsoplysninger
- Forsøg ikke at adskille eller modificere enheden.
- Opbevares utilgængeligt for børn.
- Bortskaf batteriet i henhold til lokale regler.
- Use only the provided USB cable for charging and data transfer.


