Indledning
Thank you for choosing the OldShark Dash Cam. This 1080P Full HD dashboard camera is designed to provide reliable and high-quality video recording of your journeys, enhancing driving safety and providing crucial evidence in case of incidents. Equipped with a 3-inch display, 170° wide-angle lens, G-Sensor, and loop recording, it's an essential companion for every driver.
Please read this manual thoroughly before operating the device to ensure proper usage and to maximize its performance and lifespan.
Pakkens indhold
Ved udpakning skal du kontrollere, at alle følgende varer er inkluderet i din pakke:
- OldShark Dash Cam Unit
- Bil oplader
- Sugemontering
- 32 GB Micro SD-kort
- USB datakabel
- Brugervejledning (dette dokument)

Image: All components included in the OldShark Dash Cam package, neatly laid out.
Produktegenskaber
- Ultra HD Video Recording: Captures clear 1080P Full HD video, ensuring detailed footage even in challenging light conditions.
- 170° supervidvinkelobjektiv: Tilbyder et bredt felt af view, minimizing blind spots and capturing more of the road.
- Indbygget G-sensor: Registrerer automatisk pludselige stød eller kollisioner og låser den aktuelle videooptagelse.tage to prevent overwriting, serving as crucial accident evidence.
- Problemfri Loop -optagelse: Overwrites the oldest unlocked footage når hukommelseskortet er fuldt, hvilket sikrer kontinuerlig optagelse uden manuel indgriben.
- 24-timers parkeringsovervågning: Records short video clips when vibrations are detected while the vehicle is parked, offering surveillance even when you're away.
- Super nattesyn: Equipped with F1.6 large aperture, WDR (Wide Dynamic Range), and HDR (High Dynamic Range) technology for enhanced clarity in low-light conditions.
- Nem installation: Simple plug-and-play setup with included suction mount and car charger.
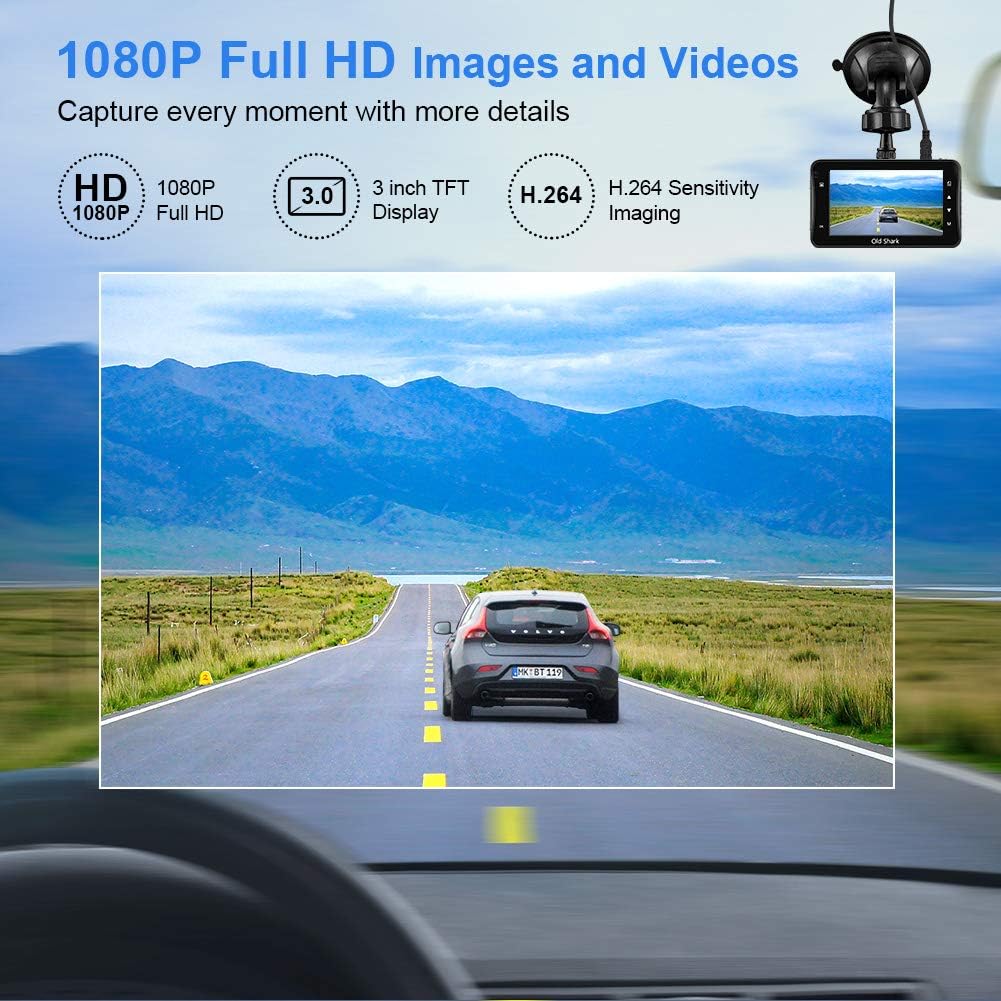
Image: Visual representation of the dash cam's 1080P Full HD video capabilities and display features.

Image: The G-Sensor feature, which automatically locks video footage during an impact to secure accident evidence.

Image: The 24-Hour Parking Monitor feature, which activates recording upon detecting vibrations while parked.

Image: The Super Night Vision capability, demonstrating improved low-light performance with its F1.6 aperture.

Image: The 170° wide-angle lens providing a broad view, med examples af indspillet madtage during day and night.
Opsætningsvejledning
1. Montering af Dash Cam
- Rengør forruden, hvor du har til hensigt at montere dashcam'et. Sørg for, at det er fri for støv og fedt.
- Fastgør sugekopbeslaget til dashcam-enheden.
- Tryk sugekoppen fast mod forruden, og vip håndtaget for at fastgøre den. Placer kameraet for at sikre et klart billede. view af vejen uden at blokere dit udsyn under kørslen.
2. Indsættelse af Micro SD-kortet
- Find Micro SD-kortstikket på siden af dashcam'et.
- Insert the provided 32GB Micro SD card into the slot until it clicks into place. Ensure the card is inserted correctly with the gold contacts facing the back of the camera.
- For optimal performance, it is recommended to format the SD card within the dash cam's settings before first use and periodically thereafter.
3. Tænder
- Tilslut bilopladeren til dashcam'ets strømindgang.
- Sæt den anden ende af bilopladeren i bilens cigarettænderstik.
- The dash cam will automatically power on and begin recording when your vehicle's ignition is turned on. It will also power off automatically when the ignition is turned off.

Image: The OldShark Dash Cam, showing its compact design, the included suction mount for windshield attachment, and the 32GB Micro SD card for storage.
Betjeningsvejledning
Grundlæggende betjening
- Tænd/sluk: The camera powers on/off automatically with the car ignition. You can also manually power it on/off by pressing and holding the Power button.
- Indspilning: Once powered on, the dash cam automatically starts loop recording. A red flashing dot or similar indicator on the screen confirms recording is active.
- Stop optagelse: Press the OK button to stop recording. Press it again to resume.
- Modeskift: Use the Mode button to switch between Video Recording, Still Photo, and Playback modes.
- Afspilning: In Playback mode, use the Up/Down buttons to navigate through recorded files. Press OK to play a selected video.
Menu navigation
- Press the Menu button to access settings.
- Brug Op/Ned-knapperne til at rulle gennem menupunkterne.
- Press OK to select an option or confirm a setting.
- Press Menu again to exit the menu.
Nøglefunktioner
- Loop-optagelse: Set the duration for video segments (e.g., 1, 3, 5 minutes). When the card is full, the oldest unlocked file vil blive overskrevet.
- G-sensor følsomhed: Adjust the sensitivity of the G-Sensor (Low, Medium, High). A higher sensitivity means the camera will lock footage more easily upon detecting bumps or impacts.
- Parkeringsmonitor: Enable this feature to allow the dash cam to automatically record a short video when it detects a vibration while the car is parked and turned off.
- Bevægelsesdetektion: When enabled, the camera will start recording automatically if it detects movement in front of the lens while parked.
- Dato/klokkeslæt Stamp: Ensure the correct date and time are set in the menu for accurate timestamps på dine optagelser.
Opretholdelse
- Rensning: Brug en blød, tør klud til at rengøre kameralinsen og skærmen. Undgå at bruge slibende rengøringsmidler eller opløsningsmidler.
- Vedligeholdelse af SD-kort: Regularly format the Micro SD card (at least once a month) within the dash cam's settings to maintain optimal recording performance and prevent data corruption. Use only high-quality Class 10 or higher Micro SD cards.
- Temperatur: Avoid exposing the dash cam to extreme temperatures (very hot or very cold) for extended periods, as this can affect battery life and component integrity.
- Firmwareopdateringer: Check the official OldShark webTjek regelmæssigt webstedet for tilgængelige firmwareopdateringer for at sikre, at dit dashcam har de nyeste funktioner og fejlrettelser.
Fejlfinding
| Problem | Løsning |
|---|---|
| Dashcam'et tænder ikke. | Ensure the car charger is securely connected to both the dash cam and the vehicle's cigarette lighter. Check if the vehicle's cigarette lighter is receiving power. Try a different power source if available. |
| Optagelsen stopper uventet. | Check if the Micro SD card is full. Format the SD card. Ensure you are using a Class 10 or higher SD card. Reduce G-Sensor sensitivity if it's triggering too often. |
| Video footage er sløret eller uklar. | Clean the camera lens and your car's windshield. Ensure the protective film has been removed from the lens. Check video resolution settings. |
| Dash cam freezes or becomes unresponsive. | Press the reset button (if available, usually a small pinhole) or disconnect and reconnect the power. Format the Micro SD card. |
| Dato og klokkeslæt er forkert. | Go to the system settings menu and manually set the correct date and time. Save the settings. |
Specifikationer
| Feature | Detalje |
|---|---|
| Modelnavn | GS505 |
| Varemodelnummer | A1OS-GS505-T032 |
| Videooptagelsesopløsning | 1080p fuld HD |
| Linsevinkel | 170° vidvinkel |
| Skærmstørrelse | 3 tommer |
| Særlige funktioner | G-Sensor, Loop Recording, Parking Guard, Motion Detection, Auto On/Off, Time Stamp, Screensaver, Night Vision (F1.6 Aperture) |
| Forbindelsesteknologi | USB |
| Monteringstype | Sugemontering |
| Produktdimensioner | 3.46 x 1 x 0.59 tommer |
| Varens vægt | 4.4 ounce |
| Fabrikant | Old Shark |
Garantioplysninger
OldShark products are manufactured with high-quality standards. For specific warranty terms and conditions, please refer to the warranty card included in your product packaging or contact OldShark customer support. The warranty typically covers manufacturing defects for a specified period from the date of purchase.
Gem venligst din købskvittering som købsbevis i tilfælde af garantikrav.
Kundesupport
If you encounter any issues or have questions regarding your OldShark Dash Cam that are not covered in this manual, please do not hesitate to contact our customer support team.
For the most up-to-date contact information and support resources, please visit the official OldShark store on Amazon or their official webwebsted.
Online ressourcer:
- OldShark Amazon Store: Besøg butik


