1. Introduktion
Tak fordi du valgte KOLINK Refractor Midi-Tower computer case. This manual provides essential information for the proper installation, operation, and maintenance of your new PC chassis. Please read this manual carefully before beginning the assembly process to ensure a smooth and safe build.
1.1 Sikkerhedsoplysninger
- Afbryd altid strømforsyningen fra stikkontakten, før du installerer eller fjerner komponenter.
- Brug en antistatisk håndledsrem for at forhindre elektrostatisk udladning (ESD) på følsomme komponenter.
- Handle components with care. Avoid touching pins or circuit boards directly.
- Hold små dele og værktøj væk fra børn.
- Sørg for tilstrækkelig ventilation omkring kabinettet for at forhindre overophedning.
2. Pakkens indhold
Kontroller venligst, at alle følgende varer er til stede i din pakke:
- KOLINK Refractor Midi-Tower Chassis
- Tilbehørsæske (indeholder skruer, afstandsstykker, kabelbindere osv.)
- Brugervejledning (dette dokument)
If any items are missing or damaged, please contact your retailer or KOLINK support.
3. Produktet er slutview
Familiarize yourself with the key features and components of your KOLINK Refractor Midi-Tower.
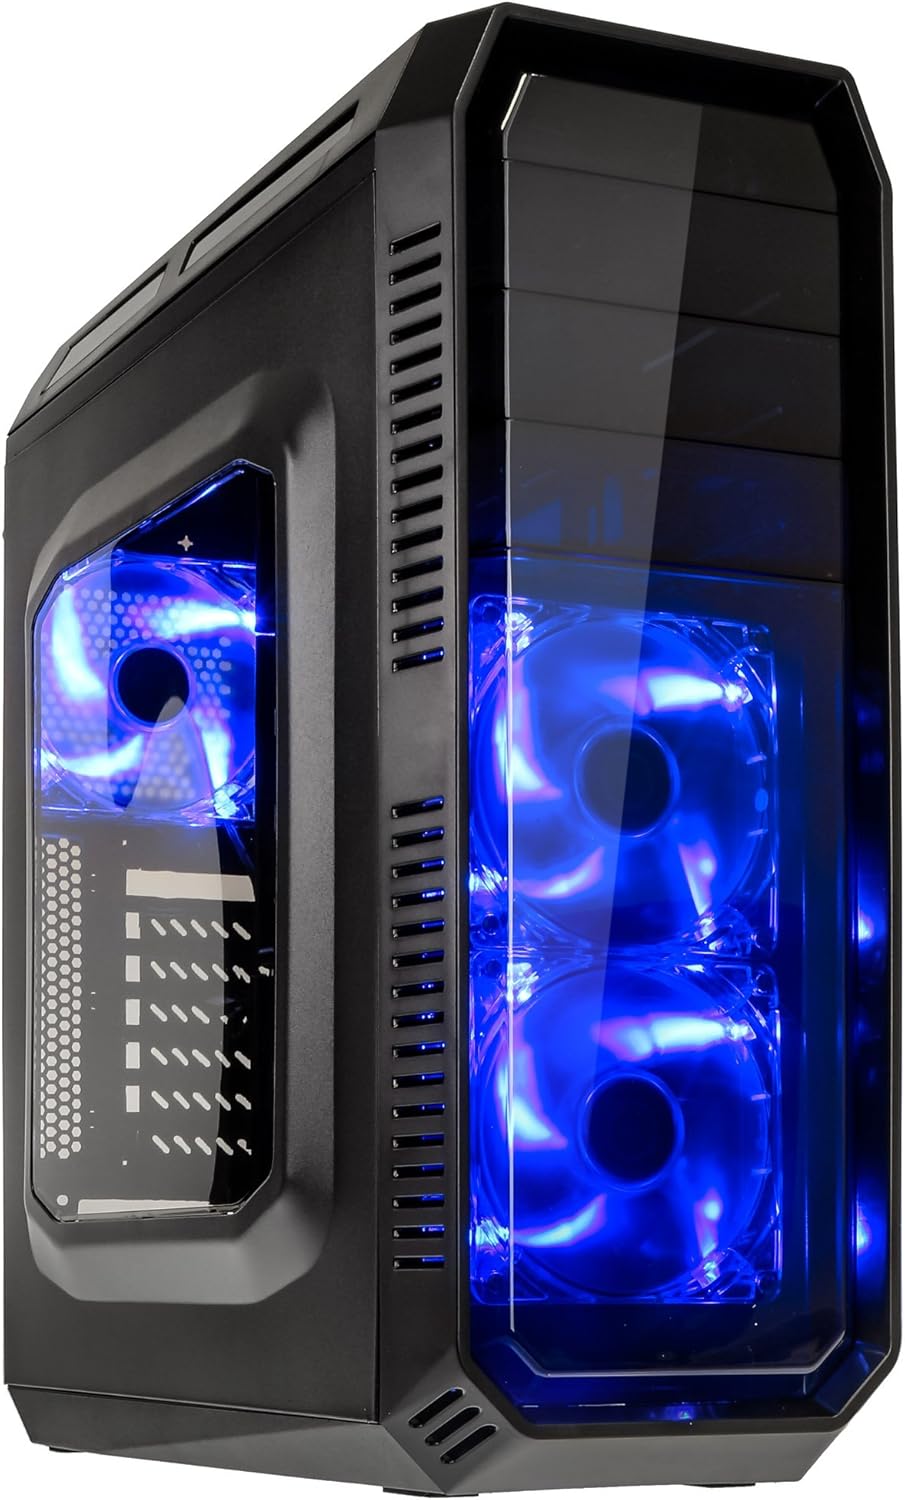
This image displays the KOLINK Refractor Midi-Tower from a front-left perspective, highlighting its sleek black design. The front panel features two pre-installed 120mm blue LED fans, visible through a transparent section, providing both cooling and aesthetic appeal. The left side panel includes a window, allowing visibility of internal components.

A top-front view of the case, illustrating the conveniently located I/O panel on the top. This panel includes two USB 3.0 ports, two USB 2.0 ports, and audio input/output jacks. The top surface also features a mesh area for additional ventilation, contributing to optimal airflow.

This image shows the right side panel of the KOLINK Refractor Midi-Tower. It is a solid black panel, designed for cable management behind the motherboard tray, ensuring a clean and organized interior.

This composite image provides three distinct views of the case. The left panel shows the front with its blue LED fans. The middle panel displays the rear of the case, featuring the motherboard I/O cutout, seven expansion slots, and a 120mm fan mount. The right panel offers a close-up of the top I/O ports, including USB 3.0, USB 2.0, and audio jacks.

A detailed close-up of the top I/O panel. It clearly shows the power and reset buttons, two USB 3.0 ports, two USB 2.0 ports, and the microphone and headphone jacks, providing easy access for peripherals.
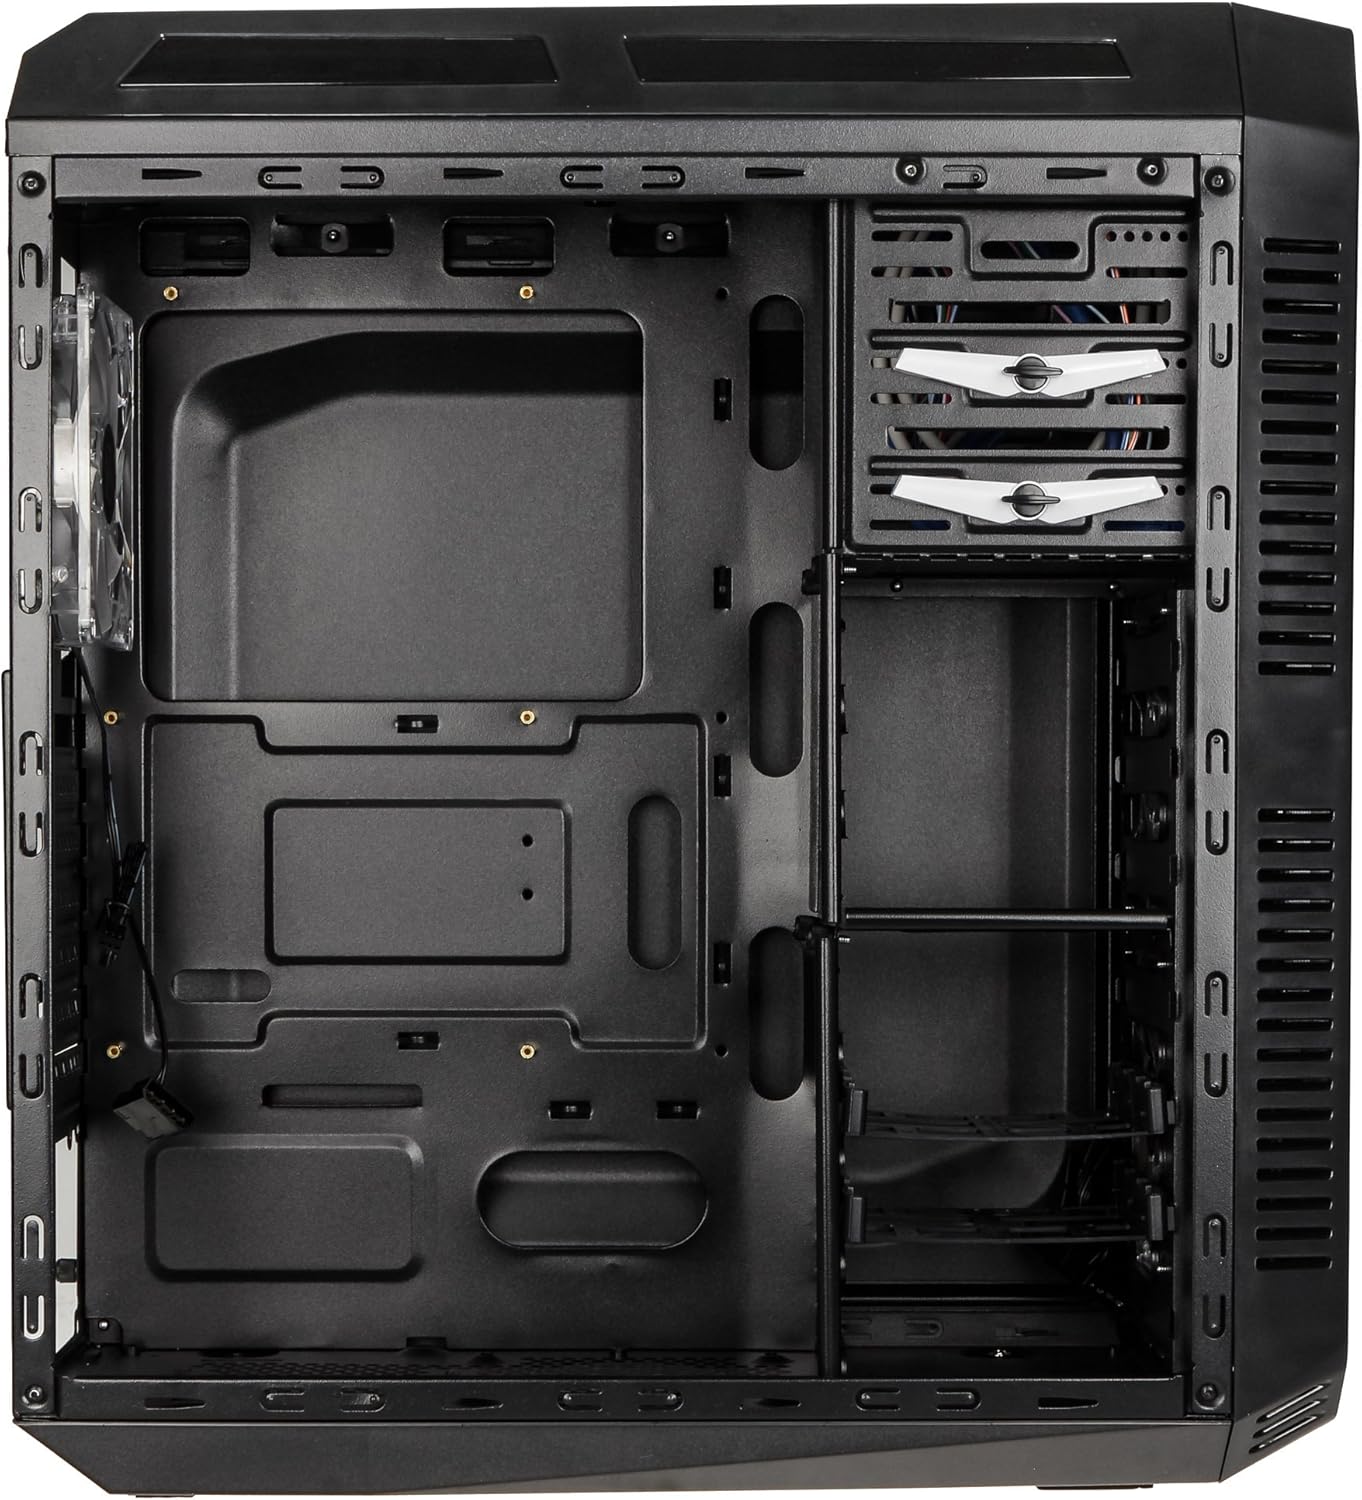
This image presents the interior of the case from the left side, revealing the spacious motherboard tray compatible with ATX motherboards. It features a large cutout behind the CPU area for easy cooler installation and multiple grommeted holes for efficient cable routing.

En intern view from the right side, focusing on the drive bay configuration. The case offers three external 5.25-inch bays and seven internal 2.5/3.5-inch drive bays, providing ample storage expansion options.

A closer look at the internal drive bays, illustrating the design for mounting 2.5-inch or 3.5-inch storage drives. These bays are designed for easy installation and removal of hard drives and SSDs.

Dette billede giver en intern view looking down from the top, showcasing the pre-installed 120mm blue LED fan at the rear for exhaust. The top panel's mesh area for additional fan mounting is also visible, contributing to overall system cooling.
4. Opsætning og installation
Follow these steps to install your computer components into the KOLINK Refractor Midi-Tower.
4.1 Forberedelse af sagen
- Placer etuiet på en flad, stabil overflade.
- Remove the left and right side panels by unscrewing the thumbscrews at the rear of the case and sliding the panels backward.
4.2 Installation af bundkort
- Install the I/O shield that came with your motherboard into the cutout at the rear of the case.
- Ensure the correct motherboard standoffs are installed for your ATX motherboard. Adjust or add standoffs as necessary using the provided accessory kit.
- Placer forsigtigt dit bundkort på afstandsstykkerne, og juster skruehullerne.
- Secure the motherboard with the appropriate screws from the accessory kit.
4.3 Installation af strømforsyning
- Position your ATX power supply unit (PSU) in the designated compartment at the bottom rear of the case.
- Align the PSU with the screw holes at the rear of the case.
- Secure the PSU using the screws provided with your power supply.
4.4 Installation af drev
5.25-inch External Drives:
- Remove the desired 5.25-inch bay cover from the front panel.
- Slide your optical drive or other 5.25-inch device into the bay from the front.
- Secure the drive using the tool-less clips or screws.
2.5/3.5-inch Internal Drives:
- Locate the internal drive bays.
- Mount your 2.5-inch SSD or 3.5-inch HDD into the drive trays.
- Slide the populated drive trays back into the drive cage until they click into place.
4.5 Installation af udvidelseskort
- Fjern de nødvendige dæksler til udvidelsespladserne på bagsiden af kabinettet.
- Insert your graphics card or other PCIe expansion card into the corresponding slot on the motherboard.
- Secure the card with the provided screws.
4.6 Kabelstyring
Utilize the cable routing holes and tie-down points behind the motherboard tray to organize cables. This improves airflow and gives your build a cleaner appearance.
4.7 Fan Installation (Optional)
The case comes with two 120mm blue LED fans pre-installed at the front and one 120mm blue LED fan at the rear. Additional fan mounting locations include:
- Top: 1x 120/140mm fan
- Bottom: 1x 120mm fan (under the PSU)
Install additional fans as needed for optimal cooling, ensuring proper airflow direction.
5. Betjeningsvejledning
5.1 Indledende tænding
- Once all components are installed and cables are connected, replace both side panels.
- Connect your monitor, keyboard, mouse, and other peripherals.
- Connect the power cable to the PSU and then to a wall outlet.
- Press the power button on the top I/O panel to start your system.
5.2 Front Panel I/O Usage
Det øverste I/O-panel giver nem adgang til:
- USB 3.0-porte (x2): Til højhastigheds dataoverførsel med kompatible enheder.
- USB 2.0-porte (x2): Til tilslutning af standard USB-enheder.
- Audio Jacks (Headphone/Microphone): Til tilslutning af headsets eller eksterne lydenheder.
- Power knap: For at tænde/slukke systemet.
- Nulstil knap: For at genstarte systemet.
5.3 LED belysning
The pre-installed front and rear fans feature blue LED lighting, which illuminates when the system is powered on, adding an aesthetic element to your build.
6. Vedligeholdelse
Regular maintenance helps ensure optimal performance and longevity of your computer system.
6.1 Rengøring
- Støvfiltre: The case includes a removable dust filter under the PSU. Regularly remove and clean this filter to prevent dust buildup and maintain airflow.
- Ydre: Tør de udvendige overflader af med en blød, damp klæde. Undgå slibende rengøringsmidler.
- Indre: Periodically use compressed air to remove dust from internal components and fan blades. Ensure the system is powered off and unplugged before cleaning the interior.
6.2 Optimering af luftstrøm
Ensure that the case's ventilation areas (front, top, rear, bottom) are not obstructed. Proper cable management also contributes significantly to unrestricted airflow within the case.
7. Fejlfinding
Dette afsnit omhandler almindelige problemer, du kan støde på.
7.1 Fælles problemer
- Systemet tænder ikke:
- Check if the power cable is securely connected to both the PSU and the wall outlet.
- Sørg for, at strømforsyningskontakten er i 'ON'-positionen.
- Verify that the front panel power button cable is correctly connected to the motherboard.
- Confirm all internal power cables (24-pin ATX, CPU, GPU) are properly seated.
- Ventilatorer der ikke drejer:
- Check if the fan power cables are correctly connected to the motherboard or fan controller.
- Ensure the system is receiving power.
- USB-porte virker ikke:
- Verify that the front panel USB 3.0 and USB 2.0 headers are correctly connected to the motherboard.
- Sørg for, at den enhed, du tilslutter, fungerer korrekt.
- Audio Ports Not Working:
- Check that the front panel audio header (HD Audio) is correctly connected to the motherboard.
- Confirm your audio drivers are installed and up to date.
For further assistance, please refer to your motherboard manual or contact KOLINK support.
8. Specifikationer
Detailed technical specifications for the KOLINK Refractor Midi-Tower.
| Feature | Specifikation |
|---|---|
| Modelnavn | Refractor Midi-Tower |
| Dimensioner (B x H x D) | 190 x 475 x 445 mm (7.5 x 18.7 x 17.5 tommer) |
| Materiale | Steel (body), Plastic (front) |
| Vægt | Ca. 4.8 kg (10.6 lbs) |
| Farve | Sort |
| Formfaktor | Midi-tårnet |
| Bundkort kompatibilitet | ATX |
| External Drive Bays | 3 x 5.25 tommer |
| Interne drevbåse | 7x 2.5/3.5-inch |
| Udvidelsesslots | 7 |
| Forudinstallerede ventilatorer | 2x 120mm (front, blue LED), 1x 120mm (rear, blue LED) |
| Fan Support (Total Possible) | Front: 2x 120mm, Top: 1x 120/140mm, Bottom: 1x 120mm, Rear: 1x 120mm |
| I/O panel | 2x USB 3.0, 2x USB 2.0, 1x Audio In/Out |
| Maksimal grafikkortlængde | 360 mm |
| Maksimal CPU-kølerhøjde | 174 mm |
| PSU-kompatibilitet | Standard ATX (optional) |
| Støvfiltre | Floor (under PSU, removable) |
9. Garanti og support
KOLINK products are manufactured to high-quality standards. This product is covered by a manufacturer's warranty against defects in materials and workmanship. The specific terms and duration of the warranty may vary by region and retailer.
Please retain your proof of purchase for warranty claims. For technical support, warranty inquiries, or to report missing/damaged parts, please contact your point of purchase or visit the official KOLINK webwebsted for supportressourcer.
KOLINK Official Webwebsted: www.kolink.eu (Please note: This is a general link and may not lead directly to a support page for this specific model.)


