1. Introduktion
This manual provides essential information for the installation, configuration, operation, and maintenance of your Cisco Meraki MR42 Wireless Access Point. The MR42 is designed for high-performance, high-density deployments in various environments, offering robust wireless connectivity and cloud-managed simplicity.
2. Produktet er slutview
The Cisco Meraki MR42 is a four-radio, cloud-managed 3x3 MU-MIMO 802.11ac Wave 2 access point. It delivers a maximum 1.9 Gbps aggregate dual-band frame rate with concurrent 802.11ac Wave 2 and 802.11n 3x3:3 MIMO radios. A dedicated third radio provides real-time WIDS/WIPS with automated RF optimization, and an integrated fourth radio supports Bluetooth Low Energy (BLE) scanning and Beaconing functionality. The MR42 is managed entirely via the intuitive, browser-based Meraki Dashboard.

Figur 2.1: Forside view of the Cisco Meraki MR42 Wireless Access Point, showing its sleek white design and indicator light.

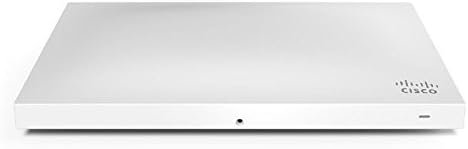
Figur 2.2: Øverst view of the Cisco Meraki MR42, highlighting its minimalist design.
3. Nøglefunktioner
- Three Radios: 2.4GHz and 5GHz for dual-band Wi-Fi, plus a dedicated WIDS/WIPS radio, offering up to 1.9Gbps aggregate throughput.
- Multi-color & Multi-function Status Indicator: Provides visual feedback on device status and connectivity.
- Gigabit Ethernet-port: For high-speed wired network connectivity.
- Layer 7 Traffic Management: Advanced application-aware traffic shaping and prioritization.
- Fleksible monteringsmuligheder: Designed for desktop, ceiling, and wall mounting.
- 802.11ac Wave 2 and 802.11n Capabilities: Supports the latest Wi-Fi standards for enhanced performance.
- 802.3af Compatible: Supports Power Over Ethernet (PoE) for simplified installation.
- Integrated Bluetooth Low Energy (BLE): For location services and IoT applications.
4. Opsætning og installation
Before beginning installation, ensure you have a valid Meraki license for the device. The MR42 requires Power Over Ethernet (PoE) or a 12V DC power adapter (sold separately).
4.1 Pakkens indhold
Verify that your package contains the MR42 Access Point and any included mounting hardware. Power adapters and PoE injectors are typically sold separately.
4.2 Fysisk installation
- Vælg en placering: Select a central location for optimal Wi-Fi coverage. Consider mounting on a ceiling or wall for best performance.
- Montering: Use the provided mounting bracket to secure the MR42 to a wall or ceiling. Ensure it is firmly attached.
- Tilslut Ethernet-kabel: Connect an Ethernet cable from your PoE-enabled switch or PoE injector to the Gigabit Ethernet port on the MR42. This cable will provide both power and data connectivity.
- Tænd: Once connected to a PoE source, the MR42 will power on automatically. Observe the status indicator light for boot-up progress.
Figur 4.1: Side view of the MR42, illustrating the Ethernet port for power and data connection.
4.3 Cloud Configuration
- Access Meraki Dashboard: Log in to your Meraki Dashboard account via a web browser (dashboard.meraki.com).
- Tilføj enhed: Navigate to the 'Network-wide' > 'Add devices' section and add your MR42 by its serial number.
- Assign to Network: Assign the MR42 to an existing network or create a new one.
- Configure SSIDs: Set up your wireless networks (SSIDs), security settings, and other network policies through the Dashboard.
- Monitorstatus: The Dashboard will display the status of your MR42, including connectivity, client count, and performance metrics.
5. Betjeningsvejledning
The Cisco Meraki MR42 is designed for seamless operation once configured through the Meraki Dashboard. All management and monitoring are performed centrally via the cloud.
5.1 Netværksovervågning
Use the Meraki Dashboard to monitor network performance, client activity, and device health. The Dashboard provides real-time insights and historical data for troubleshooting and optimization.
5.2 Trådløs sikkerhed
The MR42 supports various wireless security protocols, including WPA2-Enterprise and Meraki's built-in WIDS/WIPS for intrusion detection and prevention. Configure these settings within the Dashboard to protect your wireless network.
5.3 Layer 7 Traffic Shaping
Leverage the MR42's Layer 7 capabilities to prioritize critical applications, limit bandwidth for non-essential traffic, and ensure optimal user experience. These policies are configured and applied through the Meraki Dashboard.
6. Vedligeholdelse
Regular maintenance ensures the longevity and optimal performance of your MR42 Access Point.
- Firmwareopdateringer: Firmware updates are automatically managed and deployed by the Meraki cloud. Ensure your device has an active internet connection for these updates.
- Rensning: Periodically clean the exterior of the access point with a soft, dry cloth. Do not use liquid cleaners or aerosols.
- Miljøforhold: Ensure the device operates within its specified temperature and humidity ranges to prevent damage.
7. Fejlfinding
If you encounter issues with your MR42, refer to the following common troubleshooting steps:
- No Power/Status Indicator Off: Verify the Ethernet cable is securely connected and the PoE source (switch or injector) is providing power. Check the power adapter if not using PoE.
- Ingen netværksforbindelse: Ensure the Ethernet cable is connected to an active network port. Check network settings in the Meraki Dashboard.
- Dårlig Wi-Fi-ydeevne: Check for potential interference, adjust channel settings in the Dashboard, or consider repositioning the access point.
- Device Not Appearing in Dashboard: Confirm the device has an internet connection and is registered to your Meraki account. Allow a few minutes for the device to connect to the cloud.
- Status Indicator Behavior: Refer to the Meraki documentation for specific indicator light patterns and their meanings (e.g., solid white for connected, blinking for firmware update).
For advanced diagnostics and support, utilize the tools available in the Meraki Dashboard or contact Meraki support.
8. Specifikationer
| Attribut | Værdi |
|---|---|
| Modelnummer | MR42-HW |
| Produktdimensioner | 9.98 x 6.13 x 1.46 tommer |
| Varens vægt | 1.54 pund |
| Standard for trådløs kommunikation | 802.11ac Wave 2 |
| Frekvensbåndsklasse | Dobbeltbånd (2.4 GHz, 5 GHz) |
| Forbindelsesteknologi | Wi-Fi, Ethernet |
| Speciel funktion | Access Point Mode, WPS, WIDS/WIPS, BLE |
| Fabrikant | CISCO SYSTEMER - VIRKSOMHEDER |
| Farve | Hvid |
9. Garanti og support
The Cisco Meraki MR42 is backed by Meraki's standard warranty. For specific warranty terms and conditions, please refer to the official Meraki website or your purchase agreement.
Important Note on Licensing: A Meraki license is required for the operation and cloud management of the MR42. The cost of the license is separate from the hardware purchase. Please be aware that quantity discount prices may be subject to approval from Cisco Meraki, and existing deal registrations may affect order processing. Allow 1-2 days for bulk discount approval.
For technical support, product documentation, and community forums, please visit the official Cisco Meraki support portal. Ensure you have your device's serial number and your Meraki Dashboard login credentials ready when seeking support.


