Indledning
This manual provides comprehensive instructions for the safe and effective use of your Escali DHR1-B Touch Screen Digital Thermometer and Timer. Please read all instructions carefully before operating the device and retain this manual for future reference.

Image: The Escali DHR1-B digital thermometer and timer unit, displaying 'BEEF' and temperature readings, with its stainless steel probe and cord.
Produktegenskaber
The Escali DHR1-B is designed to assist with precise temperature monitoring and timing for various cooking applications. Key features include:
- Stort baggrundsbelyst LCD-display: Provides clear visibility of temperature and timer settings under various lighting conditions.
- Touch Sensitive Controls: Integrated into the display for easy operation and cleaning.
- Oven Safe Stainless Steel Probe: Designed to withstand high temperatures in ovens or grills, suitable for leave-in use.
- Preset Target Cooking Temperatures: Includes pre-programmed temperature alerts for beef, pork, chicken, turkey, veal, lamb, hamburger, and fish, with varying levels of doneness.
- Custom Temperature Setting: Allows users to set their own desired target temperatures.
- Timer & Stopwatch Functions: Counts up or down to a maximum of 99 minutes and 59 seconds.
- Genkald sidste timerindstilling: Quickly access the previous timer setting for repetitive tasks.
- Magnetic Back & Kickstand: Offers versatile placement options, allowing the unit to be attached to metal surfaces or stood upright on a countertop.

Image: A diagram highlighting the features of the Escali DHR1-B, including presets, custom temps, alarm, temperature range, timer, cord, and probe.
Opsætning
- Batteri installation: Open the battery compartment on the back of the unit. Insert two AAA batteries, ensuring correct polarity (+/-). Close the compartment securely.
- Tænd: Slide the ON/OFF switch located on the back of the unit to the 'ON' position. The display will illuminate.
- Probeforbindelse: Insert the stainless steel probe's connector firmly into the port on the side of the main unit. Ensure a secure connection for accurate readings.
- Placering: Utilize the magnetic back to attach the unit to a refrigerator or oven door, or deploy the integrated kickstand for countertop placement.

Billede: Bagsiden view of the Escali DHR1-B unit, showing the battery compartment, ON/OFF switch, and the deployed kickstand.
Betjeningsvejledning
Temperaturovervågning
- Indsæt sonde: Før forsigtigt sonden i rustfrit stål ind i den tykkeste del af maden, og undgå ben eller brusk. Sørg for, at sondespidsen er helt indlejret.
- Select Meat Type (M/M Button): Press the 'M/M' button to cycle through preset meat types (BEEF, PORK, CHICKEN, TURKEY, VEAL, LAMB, HAMBURGER, FISH).
- Select Doneness (M/M Button): After selecting a meat type, continue pressing 'M/M' to cycle through doneness levels (e.g., WELL, MEDIUM, MED-RARE, RARE for beef). The 'ALERT TEMP' display will show the target temperature for the selected doneness.
- Set Custom Temperature (S/T Button): To set a custom target temperature, press the 'S/T' button. The 'ALERT TEMP' will flash. Use the 'M/M' button to adjust the temperature up or down. Press 'S/T' again to confirm.
- Monitor temperatur: The 'COOKING TEMP' display will show the current internal temperature of the food.
- Temperaturalarm: When the 'COOKING TEMP' reaches the 'ALERT TEMP', the unit will sound an alarm. Press any button to silence the alarm.

Image: The Escali DHR1-B thermometer unit positioned next to a roasted chicken, with its probe inserted into the chicken, displaying 'CHICK' and temperature readings.
Timer funktion
- Switch to Timer Mode: Press the 'S/S' button to switch between thermometer and timer modes. In timer mode, the display will show '00:00'.
- Set Countdown Timer: Press the 'M/M' button to set minutes and the 'S/T' button to set seconds. Press 'S/S' to start the countdown. The timer will beep when it reaches zero.
- Start Count-Up Timer: If the timer is at '00:00', press 'S/S' to start counting up.
- Pause/Resume Timer: Press 'S/S' to pause or resume the timer.
- Nulstil timer: While the timer is paused, press and hold 'S/S' to reset it to '00:00'.
- Genkald sidste timerindstilling: In timer mode, press the 'M/M' button to recall the last set countdown time.

Image: The Escali DHR1-B thermometer unit placed on a kitchen countertop, with its probe extending towards a stove, displaying 'BEEF' and temperature readings.
Pleje og vedligeholdelse
- Rengøring af enheden: Tør hovedenheden af med adamp cloth. Do not immerse the unit in water or place it in a dishwasher.
- Rengøring af sonden: The stainless steel probe can be washed with warm, soapy water. Ensure the probe connector is dry before reattaching it to the main unit.
- Opbevaring: Opbevar termometeret og sonden et rent og tørt sted, når de ikke er i brug.
- Udskiftning af batteri: Replace batteries when the display dims or the unit fails to power on. Always use two new AAA batteries.
Fejlfinding
- Enheden tænder ikke: Check battery installation and ensure batteries are new and correctly oriented. If issues persist, replace batteries.
- Unøjagtige temperaturmålinger: Ensure the probe is fully inserted into the thickest part of the food and not touching bone. Verify the probe connection to the main unit is secure.
- Alarmen lyder ikke: Check if the volume setting is enabled (if applicable, though this model typically has a fixed alarm). Ensure the target temperature has been set correctly and reached.
- Visningsproblemer: Hvis displayet er svagt eller flimrer, skal batterierne udskiftes.
Specifikationer
| Modelnummer | DHR1-B |
| Temperaturområde | -4°F til 482°F (-20°C til 250°C) |
| Probe Length | 7.25 tommer (18.4 cm) |
| Ledningslængde | 40 tommer (1 m) |
| Timer rækkevidde | 99 minutes : 59 seconds |
| Inkrementer | 1 sekund |
| Dimensioner (enhed) | 3 x 3 x 1 tommer (ca.) |
| Strømkilde | 2 x AAA batterier (medfølger) |
| Display Type | LCD med baggrundsbelysning |
| Ydermateriale | Plastic (unit), Stainless Steel (probe) |
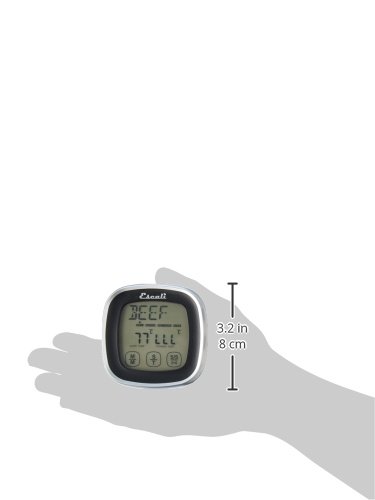
Image: A hand holding the Escali DHR1-B thermometer, illustrating its compact size with measurements of 3.2 inches (8 cm) in height.
Garanti og support
For warranty information, product support, or to inquire about replacement parts, please visit the official Escali webwebstedet eller kontakt deres kundeserviceafdeling. Behold din købskvittering som købsbevis.
Escali is committed to providing quality products and support to its customers.


