1. Introduktion
This manual provides detailed instructions for the installation, operation, and maintenance of your JOOAN 770 HD 720P Wireless IP Camera. Please read this manual thoroughly before using the product to ensure proper functionality and to avoid damage. Keep this manual for future reference.
2. Produktet er slutview
2.1 Pakkens indhold
Bekræft, at alle nedenstående varer er inkluderet i din pakke. Hvis der mangler eller er beskadigede varer, bedes du kontakte kundesupport.
- JOOAN 770 HD 720P Wireless IP Camera (Note: Some variants may be 1080P or have internal model JA-C9E-U)
- Strømadapter
- USB datakabel
- Monteringsbeslag
- Skruepakke (til montering)
- Netværkskabel (Ethernet)
- Brugervejledning (dette dokument)

Image: Contents of the JOOAN 770 HD 720P Wireless IP Camera package, including the camera, power adapter, cables, and mounting hardware.
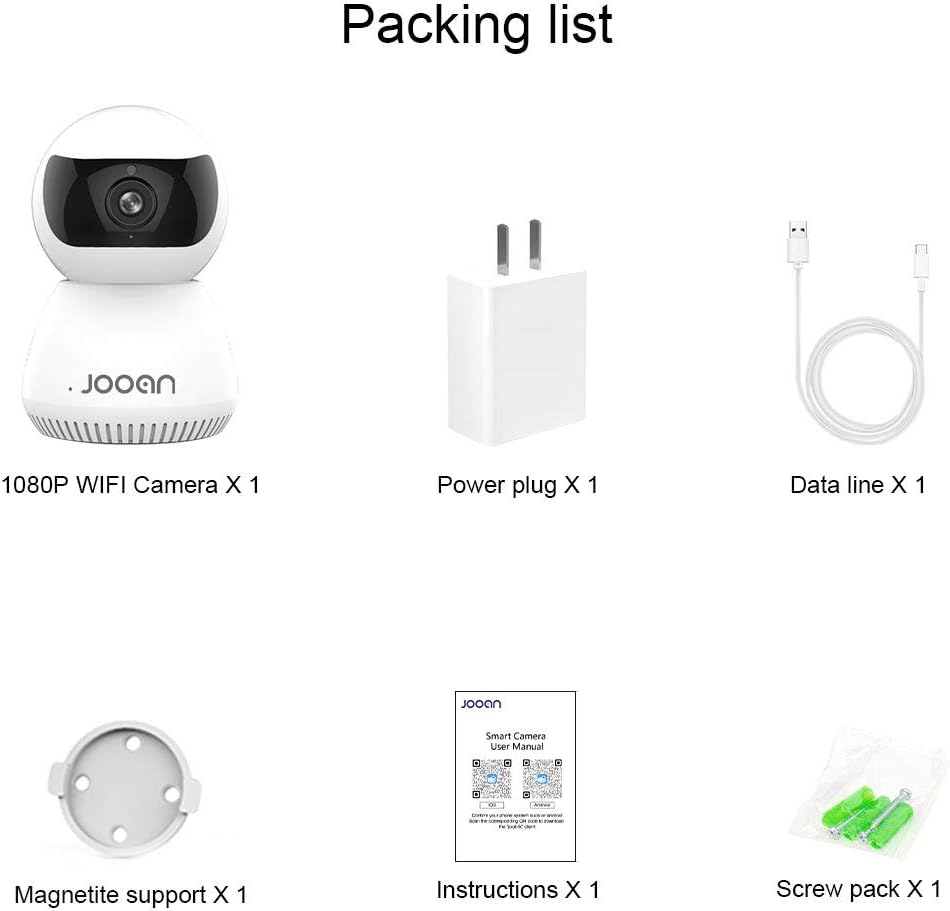
Billede: En detaljeret view of the packing list for a JOOAN WiFi Camera, showing a 1080P camera, power plug, data line, magnetite support, instructions, and screw pack.
2.2 Nøglefunktioner
- HD Video Quality: Captures clear 720P high-definition video. (Note: Some models may support 1080P resolution).
- Trådløs forbindelse: Supports Wi-Fi for flexible placement and easy setup.
- Pan/Tilt-funktionalitet: Tilbyder en bred viewing angle with 355° horizontal rotation and 100° vertical tilt, controllable via the companion application.
- Tovejs lyd: Indbygget mikrofon og højttaler muliggør kommunikation i realtid.
- Nattesyn: Equipped with infrared LEDs for clear monitoring in low-light conditions, up to 35 feet.
- Bevægelsesdetektion: Alerts users to detected movement within the camera's field of view.
- Lokal opbevaring: Supports Micro SD cards up to 128GB for continuous or event-triggered recording.
- P2P Cloud Monitoring: Remote access and monitoring via smartphone (Android & iOS) and computer applications.
- Ethernet-port: Provides an option for wired network connection when Wi-Fi signal is unstable.

Billede: Forside view of the JOOAN 770 HD 720P Wireless IP Camera, showcasing dens kuppeldesign og linse.

Image: A JOOAN camera with speech bubbles indicating two-way audio functionality, allowing communication between the camera's location and a remote user via a smartphone.

Image: A JOOAN camera in a nursery setting, illustrating its infrared night vision capability with red LEDs visible, providing clear monitoring in darkness.
3. Opsætningsvejledning
3.1 Udpakning og første placering
- Fjern forsigtigt alle komponenter fra emballagen.
- Choose a suitable location for your camera. Ensure it is within range of your Wi-Fi network or close to an Ethernet port.
- For optimal performance, place the camera on a stable, flat surface or mount it using the provided bracket and screws.
3.2 Tænd
- Connect the USB data cable to the camera's power input port.
- Sæt strømadapteren i en almindelig stikkontakt.
- The camera will power on, and an indicator light will illuminate, typically blinking to indicate readiness for setup.
3.3 Network Connection (Wi-Fi or Ethernet)
Your camera supports both wireless (Wi-Fi) and wired (Ethernet) connections.
Wi-Fi-forbindelse:
- Ensure your smartphone is connected to the 2.4GHz Wi-Fi network you intend to use for the camera. (5GHz networks are generally not supported).
- Proceed to section 3.4 for app installation and pairing, which will guide you through the Wi-Fi setup process.
Ethernet-forbindelse:
- Connect one end of the provided network cable to the camera's Ethernet port.
- Connect the other end of the network cable to an available LAN port on your router or network switch.
- The camera will automatically attempt to establish a wired network connection.

Billede: Bagside view of the JOOAN camera, highlighting the Ethernet port for wired network connectivity.
3.4 Appinstallation og enhedsparring
- Download the official companion application for JOOAN cameras from your smartphone's app store (e.g., Apple App Store for iOS, Google Play Store for Android). Refer to the quick start guide included in your package for the specific app name or QR code.
- Åbn appen, og opret en ny brugerkonto, eller log ind, hvis du allerede har en.
- Follow the in-app instructions to add a new device. This typically involves scanning a QR code on the camera, or selecting your camera model and following prompts for Wi-Fi configuration (entering your Wi-Fi password).
- Once successfully paired, the camera's indicator light will usually turn solid, and you will see the live video feed in the app.
4. Betjeningsvejledning
4.1 Live View
After successful pairing, open the companion app and select your camera from the device list to view the live video feed. You can switch between standard and high-definition viewing modes if available.
4.2 Panorerings- og vippekontrol
På live view screen within the app, use the directional controls (often a joystick-like interface or swipe gestures) to remotely adjust the camera's horizontal (pan) and vertical (tilt) angles. The camera supports 355° pan and 100° tilt.
4.3 Tovejslyd
To use the two-way audio feature, tap the microphone icon in the app's live view interface. Hold the button to speak, and release to listen. Ensure your phone's microphone permissions are granted to the app.
4.4 Bevægelsesdetektion og advarsler
- Navigate to the camera settings within the app.
- Find indstillingen "Bevægelsesdetektion" eller "Alarmindstillinger".
- Enable motion detection and configure sensitivity levels as desired.
- Set up alert notifications (e.g., push notifications to your phone, email alerts) to be informed when motion is detected.
4.5 Optagelse og opbevaring
Micro SD Card Recording:
- Insert a Micro SD card (up to 128GB, Class 10 or higher recommended) into the camera's SD card slot. Power off the camera before inserting or removing the card.
- In the app settings, format the SD card if prompted.
- Configure recording settings: continuous recording, motion-triggered recording, or scheduled recording.
- Optaget footage kan være viewed and downloaded directly from the app.
Cloud Storage (Optional):
The camera may offer optional cloud storage services. Refer to the app for details on subscription plans and activation.
5. Vedligeholdelse
- Rensning: Brug en blød, tør klud til at rengøre kameralinsen og huset. Undgå at bruge flydende rengøringsmidler eller slibende materialer.
- Softwareopdateringer: Regularly check the companion app for firmware updates. Keeping the camera's firmware updated ensures optimal performance and security.
- Placering: Ensure the camera is not exposed to extreme temperatures, direct sunlight for prolonged periods, or excessive moisture.
- Power Cycle: Hvis kameraet oplever problemer, kan du prøve at tage stikket ud af strømkilden i 10 sekunder og derefter sætte det i igen.
6. Fejlfinding
Dette afsnit omhandler almindelige problemer, du kan støde på. Ved mere komplekse problemer bedes du kontakte kundesupport.
| Problem | Mulig årsag | Løsning |
|---|---|---|
| Kameraet kan ikke oprette forbindelse til Wi-Fi. | Incorrect Wi-Fi password; camera too far from router; 5GHz Wi-Fi network used; router firewall settings. | Verify Wi-Fi password. Move camera closer to router. Ensure you are using a 2.4GHz Wi-Fi network. Check router settings for any restrictions. |
| No live video feed. | Camera offline; poor network connection; app issue. | Check camera's power and network connection. Restart camera and router. Close and reopen the app. Ensure stable internet connection. |
| Tovejslyd virker ikke. | Microphone/speaker muted in app; app permissions not granted; network latency. | Check audio settings in the app. Ensure the app has microphone permissions on your phone. Verify network stability. |
| Bevægelsesdetektionsadvarsler er ikke modtaget. | Motion detection disabled; notification settings incorrect; app running in background. | Enable motion detection in app settings. Check app notification permissions on your phone. Ensure the app is allowed to run in the background. |
| SD card not recording or recognized. | SD card not inserted correctly; card corrupted; unsupported card type/size; card not formatted. | Reinsert SD card. Try a different, compatible SD card (Max 128GB, Class 10). Format the SD card via the app. |
7. Specifikationer
The following are the technical specifications for the JOOAN 770 HD 720P Wireless IP Camera:
| Feature | Detalje |
|---|---|
| Model | 770 (Internal Model: JA-C9E-U) |
| Video opløsning | 720P HD (Some variants may support 1080P) |
| Forbindelse | Wi-Fi (2.4GHz), Ethernet |
| Pan/tilt rækkevidde | Vandret: 355°, Lodret: 100° |
| Strømkilde | Ledningsbaseret elektrisk, 5 volt |
| Opbevaring | Micro SD-kort (maks. 128 GB) |
| Særlige funktioner | Motion Sensor, Two-Way Audio, Infrared Night Vision |
| Kompatible enheder | Smartphone (Android & iOS), Tablet, Computer |
| Materiale | Metal |
| Dimensioner | Cirka 20 x 15.2 x 13.8 cm |
| Vægt | Cirka 679.99 g |

Image: The bottom of a JOOAN Smart Camera, displaying the model number JA-C9E-U and power specifications.
8. Garanti og support
JOOAN products are designed for reliability and performance. For warranty information, please refer to the warranty card included with your product or visit the official JOOAN website. If you encounter any issues or require technical assistance, please contact JOOAN customer support.
Kontaktoplysninger:
- Skype: live:market_491
- E-mail: wendy@qacctv.com


