1. Introduktion
This manual provides essential information for the safe and effective operation, maintenance, and troubleshooting of your Steinel HL 1920 E Heat Gun. Please read these instructions carefully before using the device and keep them for future reference.
Generelle sikkerhedsinstruktioner
- Brug altid passende personlige værnemidler, herunder sikkerhedsbriller og handsker.
- Ensure the work area is well-ventilated to prevent the accumulation of fumes, especially when stripping paint or working with plastics.
- Ret ikke varmepistolen mod mennesker eller dyr.
- Keep flammable materials away from the heat gun and the heated workpiece.
- Allow the heat gun to cool down completely before storing it.
- Never block the air intake or output nozzles.
- Disconnect the power supply before performing any maintenance or when the tool is not in use.
2. Produktet er slutview
The Steinel HL 1920 E Heat Gun is a versatile and practical tool designed for various applications. It features an optimized and balanced center of gravity, allowing for comfortable single-hand operation. With a high-quality finish, the HL 1920 E offers enhanced durability. This powerful heat gun operates at 2000 watts, generating a continuously adjustable temperature range from 80°C to 600°C via a rotary knob. It also provides a 3-stage airflow control (150 / 150-300 / 300-500 l/min). The electronic control system protects the hot air unit from heat accumulation, ensuring a long service life. The HL 1920 E is a precision tool suitable for numerous tasks in home improvement and hobby projects.

Image 2.1: Steinel HL 1920 E Heat Gun, main view.

Image 2.2: Side and front views of the Steinel HL 1920 E Heat Gun.
3. Opsætning
Udpakning og indledende inspektion
- Carefully remove the heat gun from its packaging.
- Inspect the device for any signs of damage that may have occurred during transit. If any damage is found, do not operate the tool and contact your retailer.
- Ensure all components listed in the packaging are present. The package includes 1 heat gun.
Tilslutning til strøm
- Sørg for, at din strømforsyning matcher lydstyrkentage specified on the heat gun's rating label (230 Volts).
- Plug the power cord into a suitable electrical outlet. The cord length is 2.2 meters.
4. Betjeningsvejledning
Power On/Off and Airflow Adjustment
The heat gun features a 3-stage switch for controlling airflow and power:

Image 4.1: Airflow adjustment switch.
- Stilling I: Low airflow (150 l/min) and low heat.
- Stilling II: Medium airflow (150-300 l/min) and medium heat.
- Stilling III: High airflow (300-500 l/min) and high heat.
- To turn off the device, slide the switch to the '0' position.
Temperaturjustering
The temperature can be continuously adjusted from 80°C to 600°C using the rotary knob located at the rear of the device.

Image 4.2: Temperature adjustment dial.
- Rotate the dial clockwise to increase the temperature and counter-clockwise to decrease it.
- Start with a lower temperature setting and gradually increase it as needed for your specific application.
Almindelige applikationer
The Steinel HL 1920 E is suitable for a wide range of tasks:
- Fjernelse af maling: Use the heat gun to soften old paint for easier removal with a scraper.
- Welding Films and Plastics: Apply heat to join or repair plastic materials and films.
- Cable Shrinking: Heat shrink tubing around electrical connections for insulation and protection.
- Thermoforming: Shape plastic materials by applying controlled heat.
- Lodning: For certain soldering tasks requiring hot air.
- Tørring: Speed up drying processes for various materials.
- afrimning: Thaw frozen pipes or locks carefully.
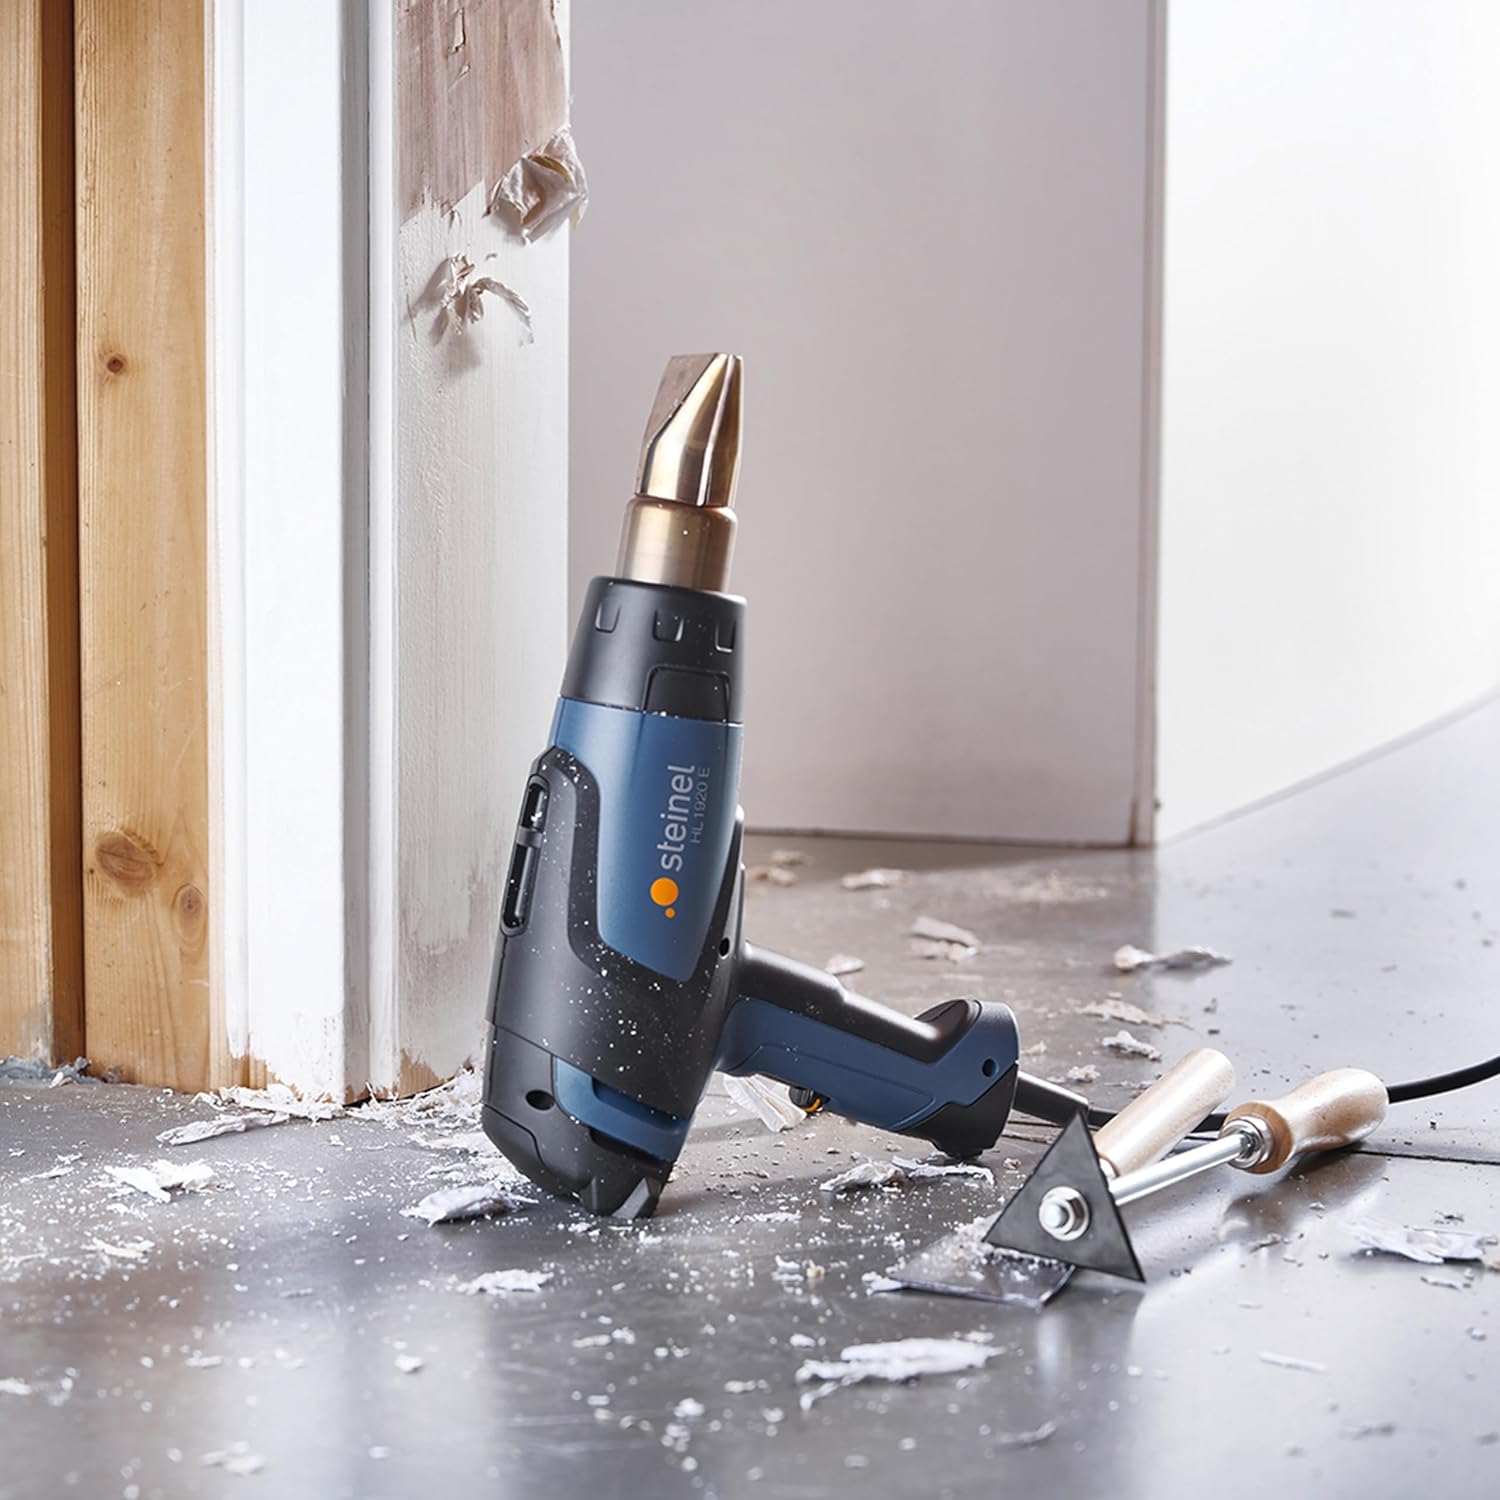
Image 4.3: Paint stripping application.

Image 4.4: Applying heat for car wrapping.

Image 4.5: Cable shrinking application.

Image 4.6: Various applications of the heat gun.
Additional accessories, such as reduction nozzles, a fine dust filter, and HL Scan for on-device temperature detection, are available separately to enhance functionality for professional use.

Image 4.7: Key features and compatibility with reduction nozzles. You can view the product in your space using this Augmented Reality link.
5. Vedligeholdelse
Rensning
- Always disconnect the heat gun from the power supply before cleaning.
- Lad enheden køle helt af.
- Tør ydersiden af varmepistolen af med en blød, tør klud.amp klæde. Brug ikke slibende rengøringsmidler eller opløsningsmidler.
- Ensure the air intake and output nozzles are free from dust and debris. Use compressed air if necessary, but ensure the device is unplugged.
Opbevaring
- Store the heat gun in a dry, safe place, out of reach of children.
- Ensure the device is cool before storing.
6. Fejlfinding
| Problem | Mulig årsag | Løsning |
|---|---|---|
| Varmepistolen tænder ikke. | Ingen strømforsyning; defekt afbryder; beskadiget ledning. | Check power outlet and cord. Ensure switch is in an 'ON' position. If problem persists, seek professional repair. |
| Utilstrækkelig varmeafgivelse. | Temperature setting too low; blocked air intake/output. | Increase temperature setting. Clear any obstructions from air vents. |
| Overophedning og automatisk nedlukning. | Tilstoppede luftventiler; kontinuerlig kraftig brug. | Allow the device to cool down. Clear air vents. Reduce continuous operating time. The electronic control system is designed to protect against heat accumulation. |
For issues not listed here or if troubleshooting steps do not resolve the problem, please contact Steinel customer support or a qualified service technician.
7. Tekniske specifikationer
| Model | Steinel HL 1920 E |
| Modelnummer | 352103 |
| Fabrikant | Steinel |
| Magt | 2000 watt |
| Voltage | 230 volt |
| Temperaturområde | 80°C - 600°C (continuously adjustable) |
| Luftstrøm | 3 stages: 150 / 150-300 / 300-500 l/min |
| Dimensioner (L x B x H) | 25.3 x 8.45 x 20 cm |
| Vægt | 840 gram |
| Ledningslængde | 2.2 meter |
| Komponenter inkluderet | 1 Varmepistol |
| Oprindelsesland | Rumænien |

Image 7.1: Technical drawing with key dimensions.
8. Garanti og support
Steinel products are manufactured to high-quality standards and are subject to strict quality controls. For information regarding warranty terms and conditions, please refer to the warranty card included with your product or visit the official Steinel website. For technical support, spare parts, or service inquiries, please contact your local Steinel dealer or customer service department.
You can visit the official Steinel store for more products and information: Steinel Official Store


