Indledning
The Unika Worktop Budget DIY Jig is designed to assist in accurately cutting worktops for various kitchen installations. Manufactured from durable 12mm hardwearing compact laminate, this jig ensures precise cuts for a professional finish. It is suitable for cutting worktop widths of 300mm, 400mm, 500mm, 600mm, 616mm, and 620mm.

Image: The Unika DIY Worktop Jig, highlighting its compatibility with various worktop widths including 300mm, 400mm, 500mm, 600mm, 616mm, and 635mm.
This jig provides accurate cuts and a simple setup with clear cutting guides. It is engineered to be hardwearing and guaranteed not to warp, ensuring long-term reliability for your DIY projects.
Sikkerhedsoplysninger
Always prioritize safety when using power tools and jigs. Read and understand all instructions before operation. Failure to follow safety guidelines may result in injury or damage to equipment.
- Brug passende personlige værnemidler (PPE), herunder sikkerhedsbriller, høreværn og handsker.
- Ensure your work area is well-lit, clean, and free from obstructions.
- Always secure the worktop and the jig firmly before cutting to prevent movement.
- Keep hands and fingers clear of the router bit during operation.
- Disconnect power tools from the power source before making adjustments or changing accessories.
- Do not operate the jig or router if you are fatigued or under the influence of drugs or alcohol.
- Hold børn og omkringstående væk fra arbejdsområdet.
Pakkens indhold
Kontroller, at alle genstande er til stede ved udpakning:
- 1 x Unika Worktop Budget DIY Jig
- 6 x Nylon Aligning Pegs
- 1 x User Instructions (this manual)
Setup and Requirements
Before using the Unika Worktop Budget DIY Jig, ensure you have the following essential tools and accessories:
- Router: A hand router with a minimum capability of 1600 Watts is required.
- Router Cutter: A 12.7 mm (1/2 inch) router cutter (tungsten carbide recommended) is necessary.
- Guide Bush: A 30 mm guide bush is essential for accurate routing with the jig.
- Clamps: Sufficient clamps to securely hold the jig and worktop in place.

Image: The Unika Worktop Jig, illustrating the requirement for a 1600W router, 1/2" tungsten cutter, and 30mm guide bush for operation.
Jig Placement and Securing
- Position the jig on the worktop according to the desired cut (e.g., straight joint, corner joint, radius end).
- Insert the nylon aligning pegs into the appropriate holes on the jig to match the worktop width.
- Ensure the jig is flush against the worktop edges and securely clamped to prevent any movement during routing.
Betjeningsvejledning
This jig facilitates various types of cuts for worktop installation, including 90° corners, radius ends, and bolt slots.

Image: The Unika Worktop Jig demonstrating its capability for multiple cut types, including left and right joints, radius end facilities, and two bolt slots, suitable for 90° corners on worktops of various widths.
General Routing Procedure
- With the jig securely clamped and the router fitted with the correct cutter and guide bush, set the router's depth of cut.
- Ensure the router bit does not extend too far, preventing damage to the jig or underlying surfaces.
- Start the router and carefully guide it along the designated cutting path of the jig. Maintain a steady, consistent pace.
- For through cuts, it is often recommended to make several shallow passes rather than one deep pass to reduce strain on the router and improve cut quality.
- Once the cut is complete, turn off the router and wait for the bit to stop rotating before lifting the tool.
- Carefully remove the jig and inspect the cut.
Specific Cut Types
- 90° Corner Joints: Use the appropriate template sections for left or right-hand joints. Ensure the worktop pieces are correctly aligned before routing.
- Radius End Facility: The jig includes a template for creating a smooth radius end on worktops.
- Bolt Slots: Utilize the dedicated slots for routing out recesses for worktop connector bolts, ensuring a strong and invisible joint.
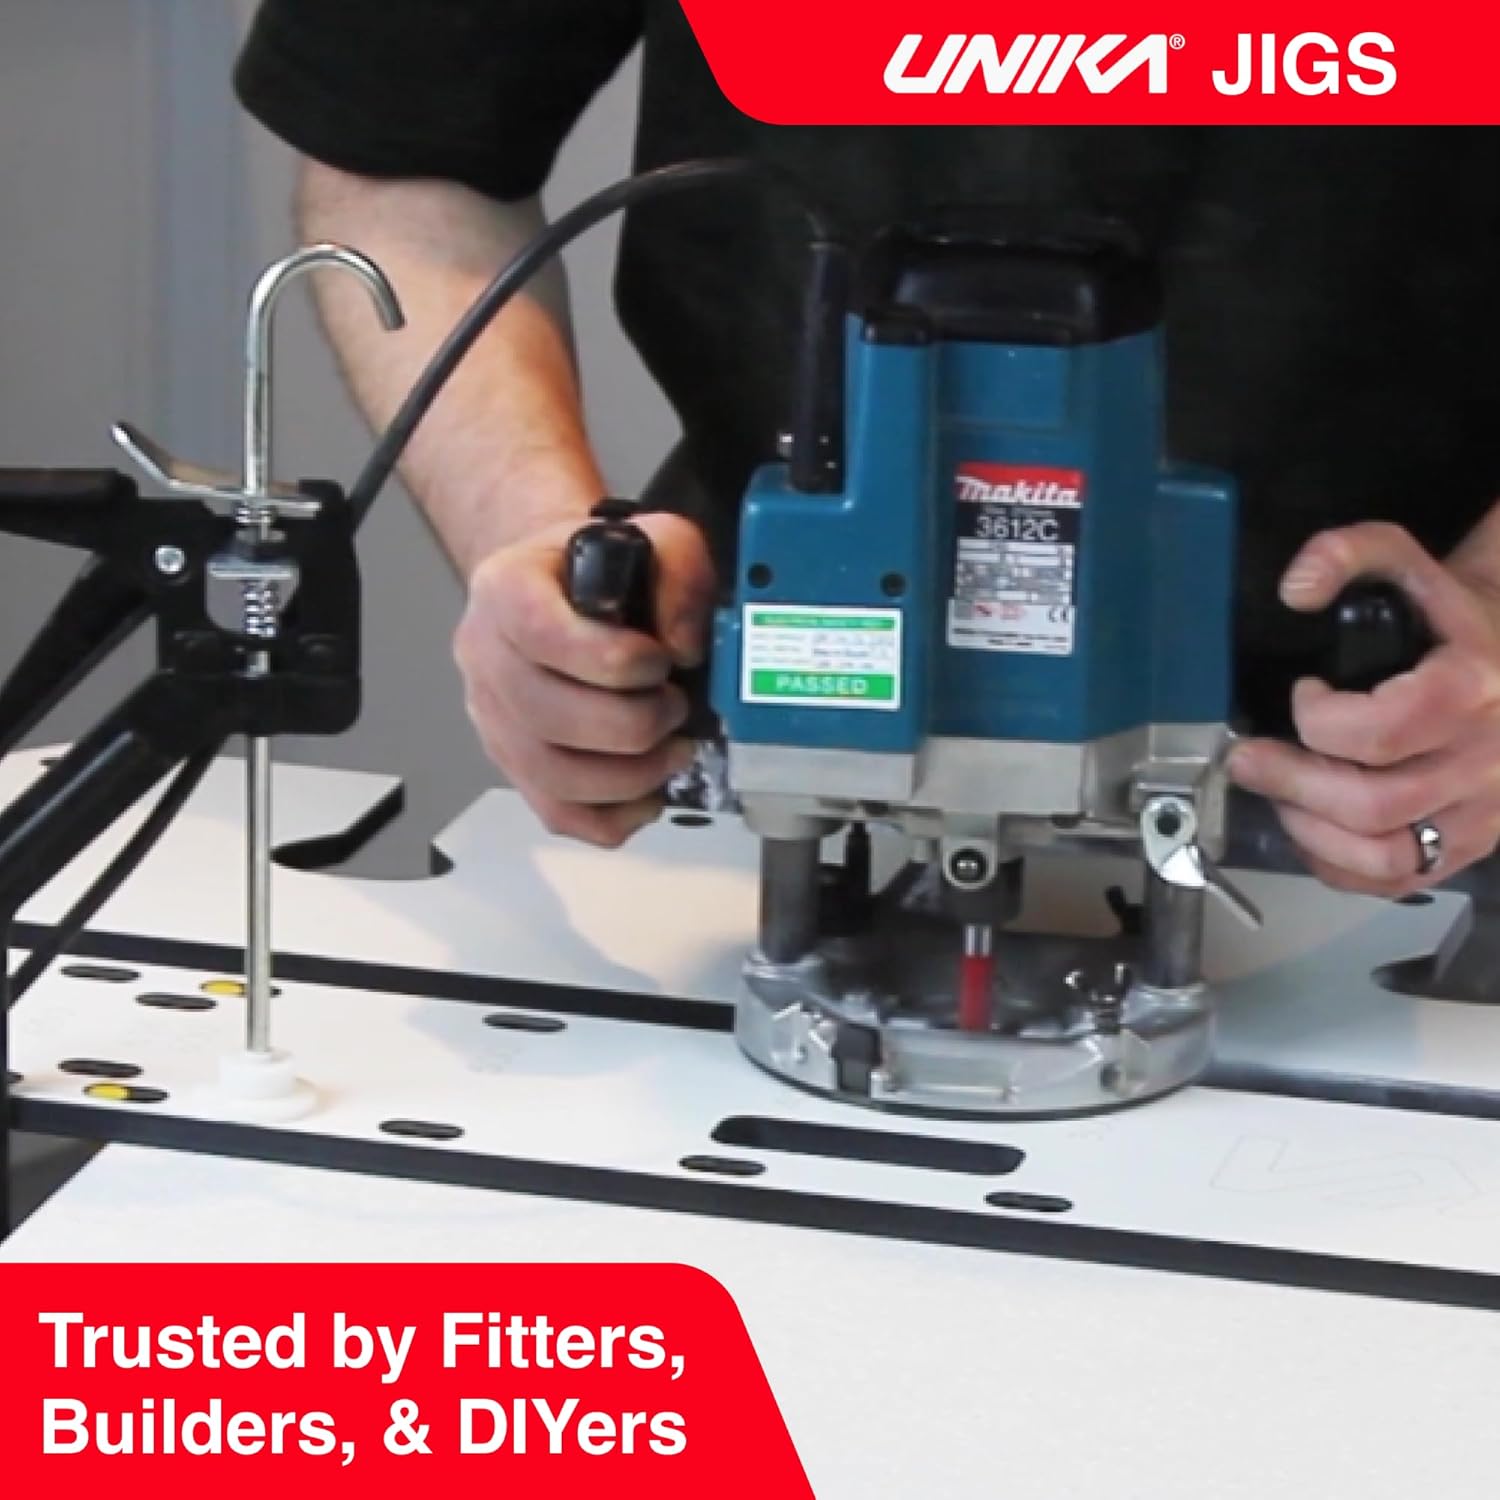
Image: A Unika Worktop Jig being used with a router to cut a worktop, demonstrating the practical application of the tool for precise joinery.
Opretholdelse
Proper maintenance will extend the life and accuracy of your Unika Worktop Budget DIY Jig.
- Rensning: After each use, wipe down the jig with a damp klud til at fjerne støv og snavs. Undgå slibende rengøringsmidler.
- Opbevaring: Store the jig flat in a dry, cool place, away from direct sunlight or extreme temperatures, to prevent warping.
- Inspektion: Periodically inspect the jig for any signs of wear, damage, or warping. Discontinue use if significant damage is observed.
- pegs: Ensure the nylon aligning pegs are clean and undamaged. Replace if necessary.
Fejlfinding
| Problem | Mulig årsag | Løsning |
|---|---|---|
| Unøjagtige snit | Jig not securely clamped; incorrect guide bush/cutter size; router movement. | Ensure jig and worktop are firmly clamped. Verify guide bush and cutter match specifications. Maintain steady router movement. |
| Rough cut edges | Dull router bit; too fast feed rate; incorrect router speed. | Replace or sharpen router bit. Reduce feed rate. Adjust router speed according to material. |
| Jig movement during routing | Utilstrækkelig clamping; pegs not fully engaged. | Use more clamps or ensure existing clamps are tightened. Verify aligning pegs are fully seated. |
Specifikationer
| Feature | Detalje |
|---|---|
| Modelnummer | JIGN199P-AZ |
| Materiale | 12mm Hardwearing Compact Laminate |
| Supported Worktop Widths | 300mm, 400mm, 500mm, 600mm, 616mm, 620mm (and 635mm) |
| Required Router Power | Minimum 1600 Watts |
| Required Router Cutter | 12.7 mm (1/2 tomme) |
| Required Guide Bush | 30 mm |
| Varens vægt | 8.8 pund (ca. 4 kg) |
| Produktdimensioner | 35.43 x 13.78 x 0.79 tommer (ca. 90 x 35 x 2 cm) |
Garanti og support
Specific warranty details for the Unika Worktop Budget DIY Jig are not provided in this manual. Please refer to the retailer or manufacturer's official webwebstedet for de seneste garantioplysninger.
For technical support or inquiries, please contact Unika customer service through their official channels. Contact information can typically be found on the product packaging or the Unika brand webwebsted.


