1. Produktet er slutview
The Rev-A-Shelf 14-inch Tip-Out Plastic Sink Trays are designed to maximize storage efficiency in kitchen, laundry room, or vanity base cabinets. These trays utilize the often-unused space behind false drawer fronts, providing convenient access to small items.
The set includes two durable injection-molded polymer trays: one conventional open tray and one accessory tray featuring a ring holder and soap dish. Self-holding hinges and mounting hardware are provided for installation.
2. Komponenter inkluderet
- 1 x White Open Tray (14"W x 2.13"D x 3.81"H)
- 1 x White Accessory Tray with Ring Holder and Soap Dish (14"W x 2.13"D x 3.81"H)
- 2 x Pairs of Self-Holding Hinges
- Monteringshardware
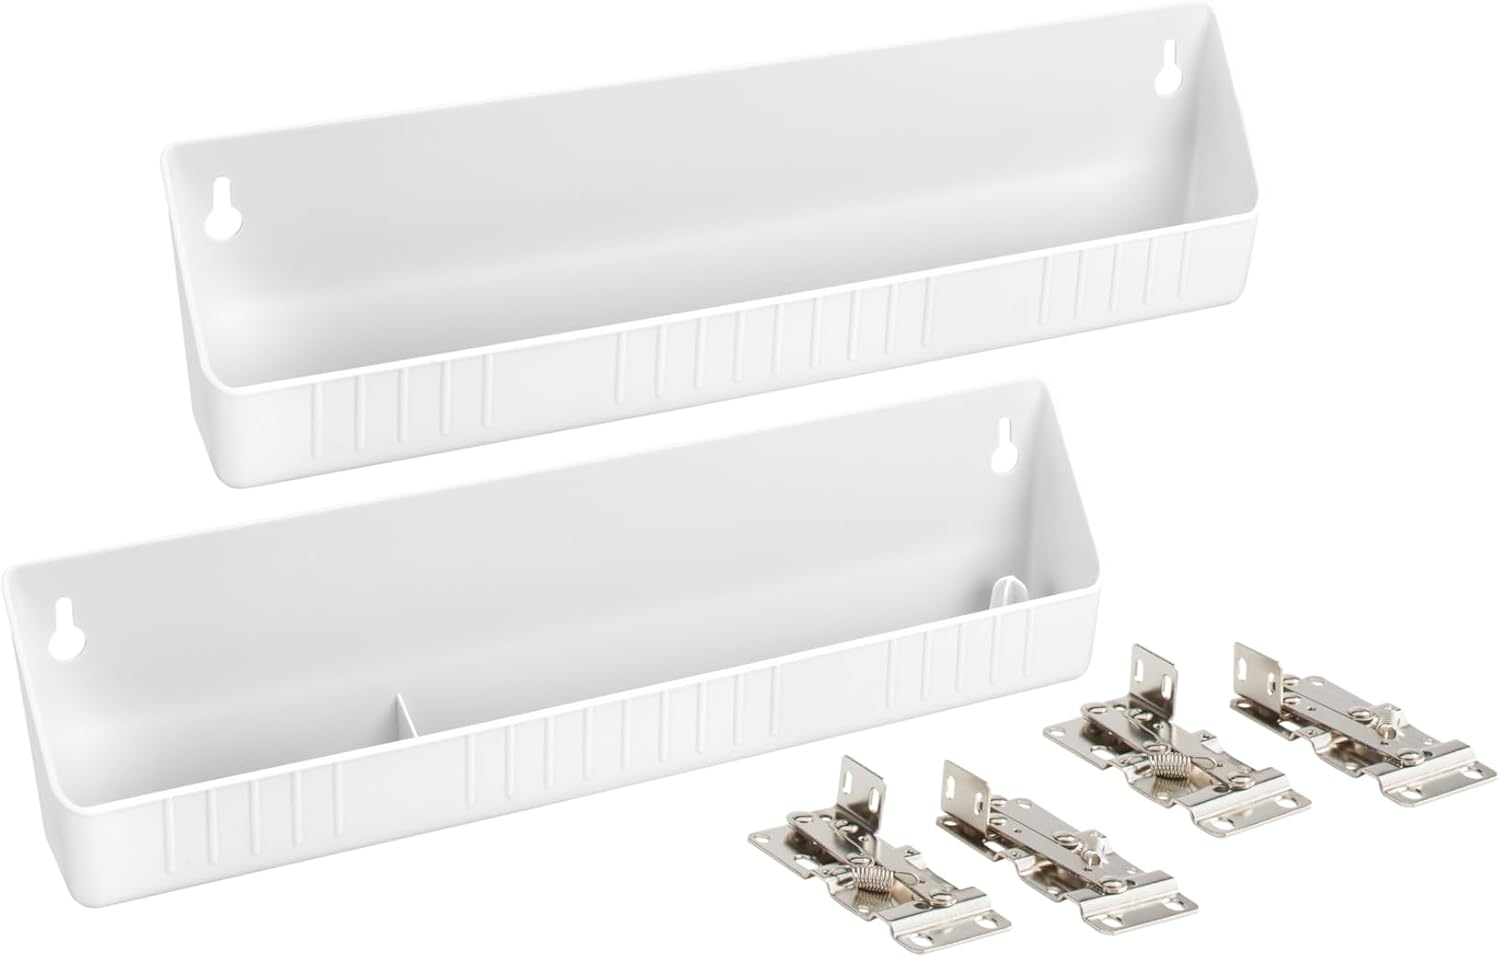
Image 2.1: Contents of the Rev-A-Shelf 14-inch Tip-Out Sink Tray package, showing both trays and hinges.
3. Specifikationer
| Mærke | Rev-A-Shelf |
| Modelnummer | 6572-14-11-52 |
| Farve | Hvid |
| Materiale | Polymer |
| Produktmål (B x D x H) | 14 cm x 2.13 cm x 3.81 cm |
| Varens vægt | 1.05 pund |
| Tåler opvaskemaskine | Ja |
| Montering påkrævet | Ja |

Image 3.1: Detailed dimensions of the tip-out tray and its corresponding hinge mechanism.
4. Installationsvejledning
Installation of the Rev-A-Shelf Tip-Out Trays requires basic tools and can typically be completed within 30 minutes. It is recommended to install these trays before a sink is set, if possible, for easier access.
4.1 Nødvendigt værktøj
- boremaskine
- Blyant
- Skruetrækker
- Målebånd
4.2 Overvejelser før installation
- Ensure a minimum of 2-1/4 inches of clearance between the backside of the cabinet door and the front of the sink basin.
- The cabinet opening width should be 16-1/4 inches or larger for the 14-inch trays.
- Measure your cabinet space carefully, checking for any obstructions like plumbing or existing door hinges.

Image 4.1: Guide for measuring cabinet openings, showing considerations for both framed and frameless cabinet styles.
4.3 Trin-for-trin installation
- Prepare Hinges: Use the provided template or measure to position the hinges correctly. Pre-drill all screw holes for the hinges on the cabinet frame. Insert and remove screws once to ensure smooth installation later. Ensure hinges are not flush with the drawer opening to avoid a gap at the top.
- Mark Cabinet Door: Hold the cabinet door in place and mark the hinge attachment points from inside the cabinet using a pencil. Alternatively, measure precisely.
- Pre-drill Door Holes: Pre-drill holes on the cabinet door at the marked locations. Be careful not to drill through the door.
- Fastgør hængsler til døren: Screw the hinges onto the cabinet door.
- Position Trays: Determine the optimal position for the trays inside the cabinet. A common recommendation is to position the top of the tray approximately 1/8 inch below the top edge of the cabinet opening to prevent interference. Mark the screw locations for the trays.
- Mount Trays: Pre-drill holes for the trays and secure them with screws. Do not overtighten, allowing for slight movement for cleaning.
- Afsluttende samling: With the hinges extended (in the open position), attach the cabinet door with the trays to the cabinet frame using the pre-drilled hinge holes. Tighten all screws securely.

Billede 4.2: Eks.ample of installed tip-out trays in a kitchen cabinet, showing one tray holding a cleaning brush.

Billede 4.3: Endnu en view of installed tip-out trays, with the accessory tray holding a sponge and a small soap dish.

Image 4.4: Overhead perspective of the tip-out trays in use, demonstrating their capacity for sink-side accessories.

Image 4.5: Tip-out trays installed in dark-colored kitchen cabinets, showcasing their versatility with different cabinet finishes.
5. Betjeningsvejledning
To operate the tip-out trays, gently pull the top edge of the false cabinet front forward. The self-holding hinges will allow the tray to pivot outwards and downwards, providing access to the contents. To close, push the false cabinet front back into its original position until it is flush with the cabinet frame.

Billede 5.1: Forside view of the tip-out trays in an open position, revealing stored items.
6. Vedligeholdelse
The polymer trays are designed for easy cleaning. They are dishwasher safe. For general cleaning, wipe with a damp cloth and mild detergent. Avoid abrasive cleaners that may damage the polymer surface.
7. Fejlfinding
7.1 Hinge Rubbing or Sticking
If a hinge rubs or sticks when opening or closing, check the alignment of the hinge and the cabinet door. Ensure all screws are tightened appropriately, but not overtightened, which could cause misalignment. Minor adjustments to screw tightness or hinge position may resolve the issue.
7.2 Tray Not Closing Flush
If the tray does not close flush with the cabinet, verify that no items within the tray are obstructing its movement. Recheck hinge alignment and ensure the cabinet door itself is properly aligned with the cabinet frame.
8. Garantioplysninger
The Rev-A-Shelf 14-inch Tip-Out Plastic Sink Trays come with a limited lifetime warranty. For specific details regarding warranty coverage and claims, please refer to the official Rev-A-Shelf webwebsted eller kontakt kundesupport.
9. Support
For yderligere assistance, teknisk support eller for at forespørge om reservedele, besøg venligst den officielle Rev-A-Shelf Store eller kontakt deres kundeserviceafdeling direkte.


