Indledning
The MSA 48733 Replacement Lug with Screws and Reinforcement Plates is designed to facilitate the quick and secure attachment and removal of welding shields from headwear equipped with quick-release mechanisms. This product enhances safety and efficiency by providing a reliable connection point for essential personal protective equipment.
This manual provides instructions for the proper installation, operation, and maintenance of your MSA 48733 Replacement Lugs.
Pakkens indhold
- Lugs
- Skruer
- Forstærkningsplader
Opsætning og installation
Proper installation of the replacement lugs is crucial for safe and effective use. Follow these steps carefully:
- Identificér monteringspunkter: Locate the designated mounting points on your headwear (e.g., hard hat, safety helmet) where the quick-release lugs are to be installed. These points are typically pre-drilled or marked by the headwear manufacturer.
- Position Reinforcement Plate: Place a reinforcement plate on the inside surface of the headwear, aligning its holes with the mounting points. This plate provides added stability and prevents damage to the headwear material.
- Attach Lug: Position the lug on the outside surface of the headwear, aligning its holes with the mounting points and the reinforcement plate.
- Fastgør med skruer: Insert the provided screws through the lug, headwear, and reinforcement plate. Tighten the screws securely using an appropriate tool. Ensure the lug is firmly attached and does not wobble. Do not overtighten, as this may damage the headwear or the lug.
- Repeat for Second Lug: If installing a pair of lugs, repeat the process for the second lug on the opposite side of the headwear.
- Bekræft installationen: After installation, gently tug on the installed lugs to ensure they are securely fastened and show no signs of looseness.
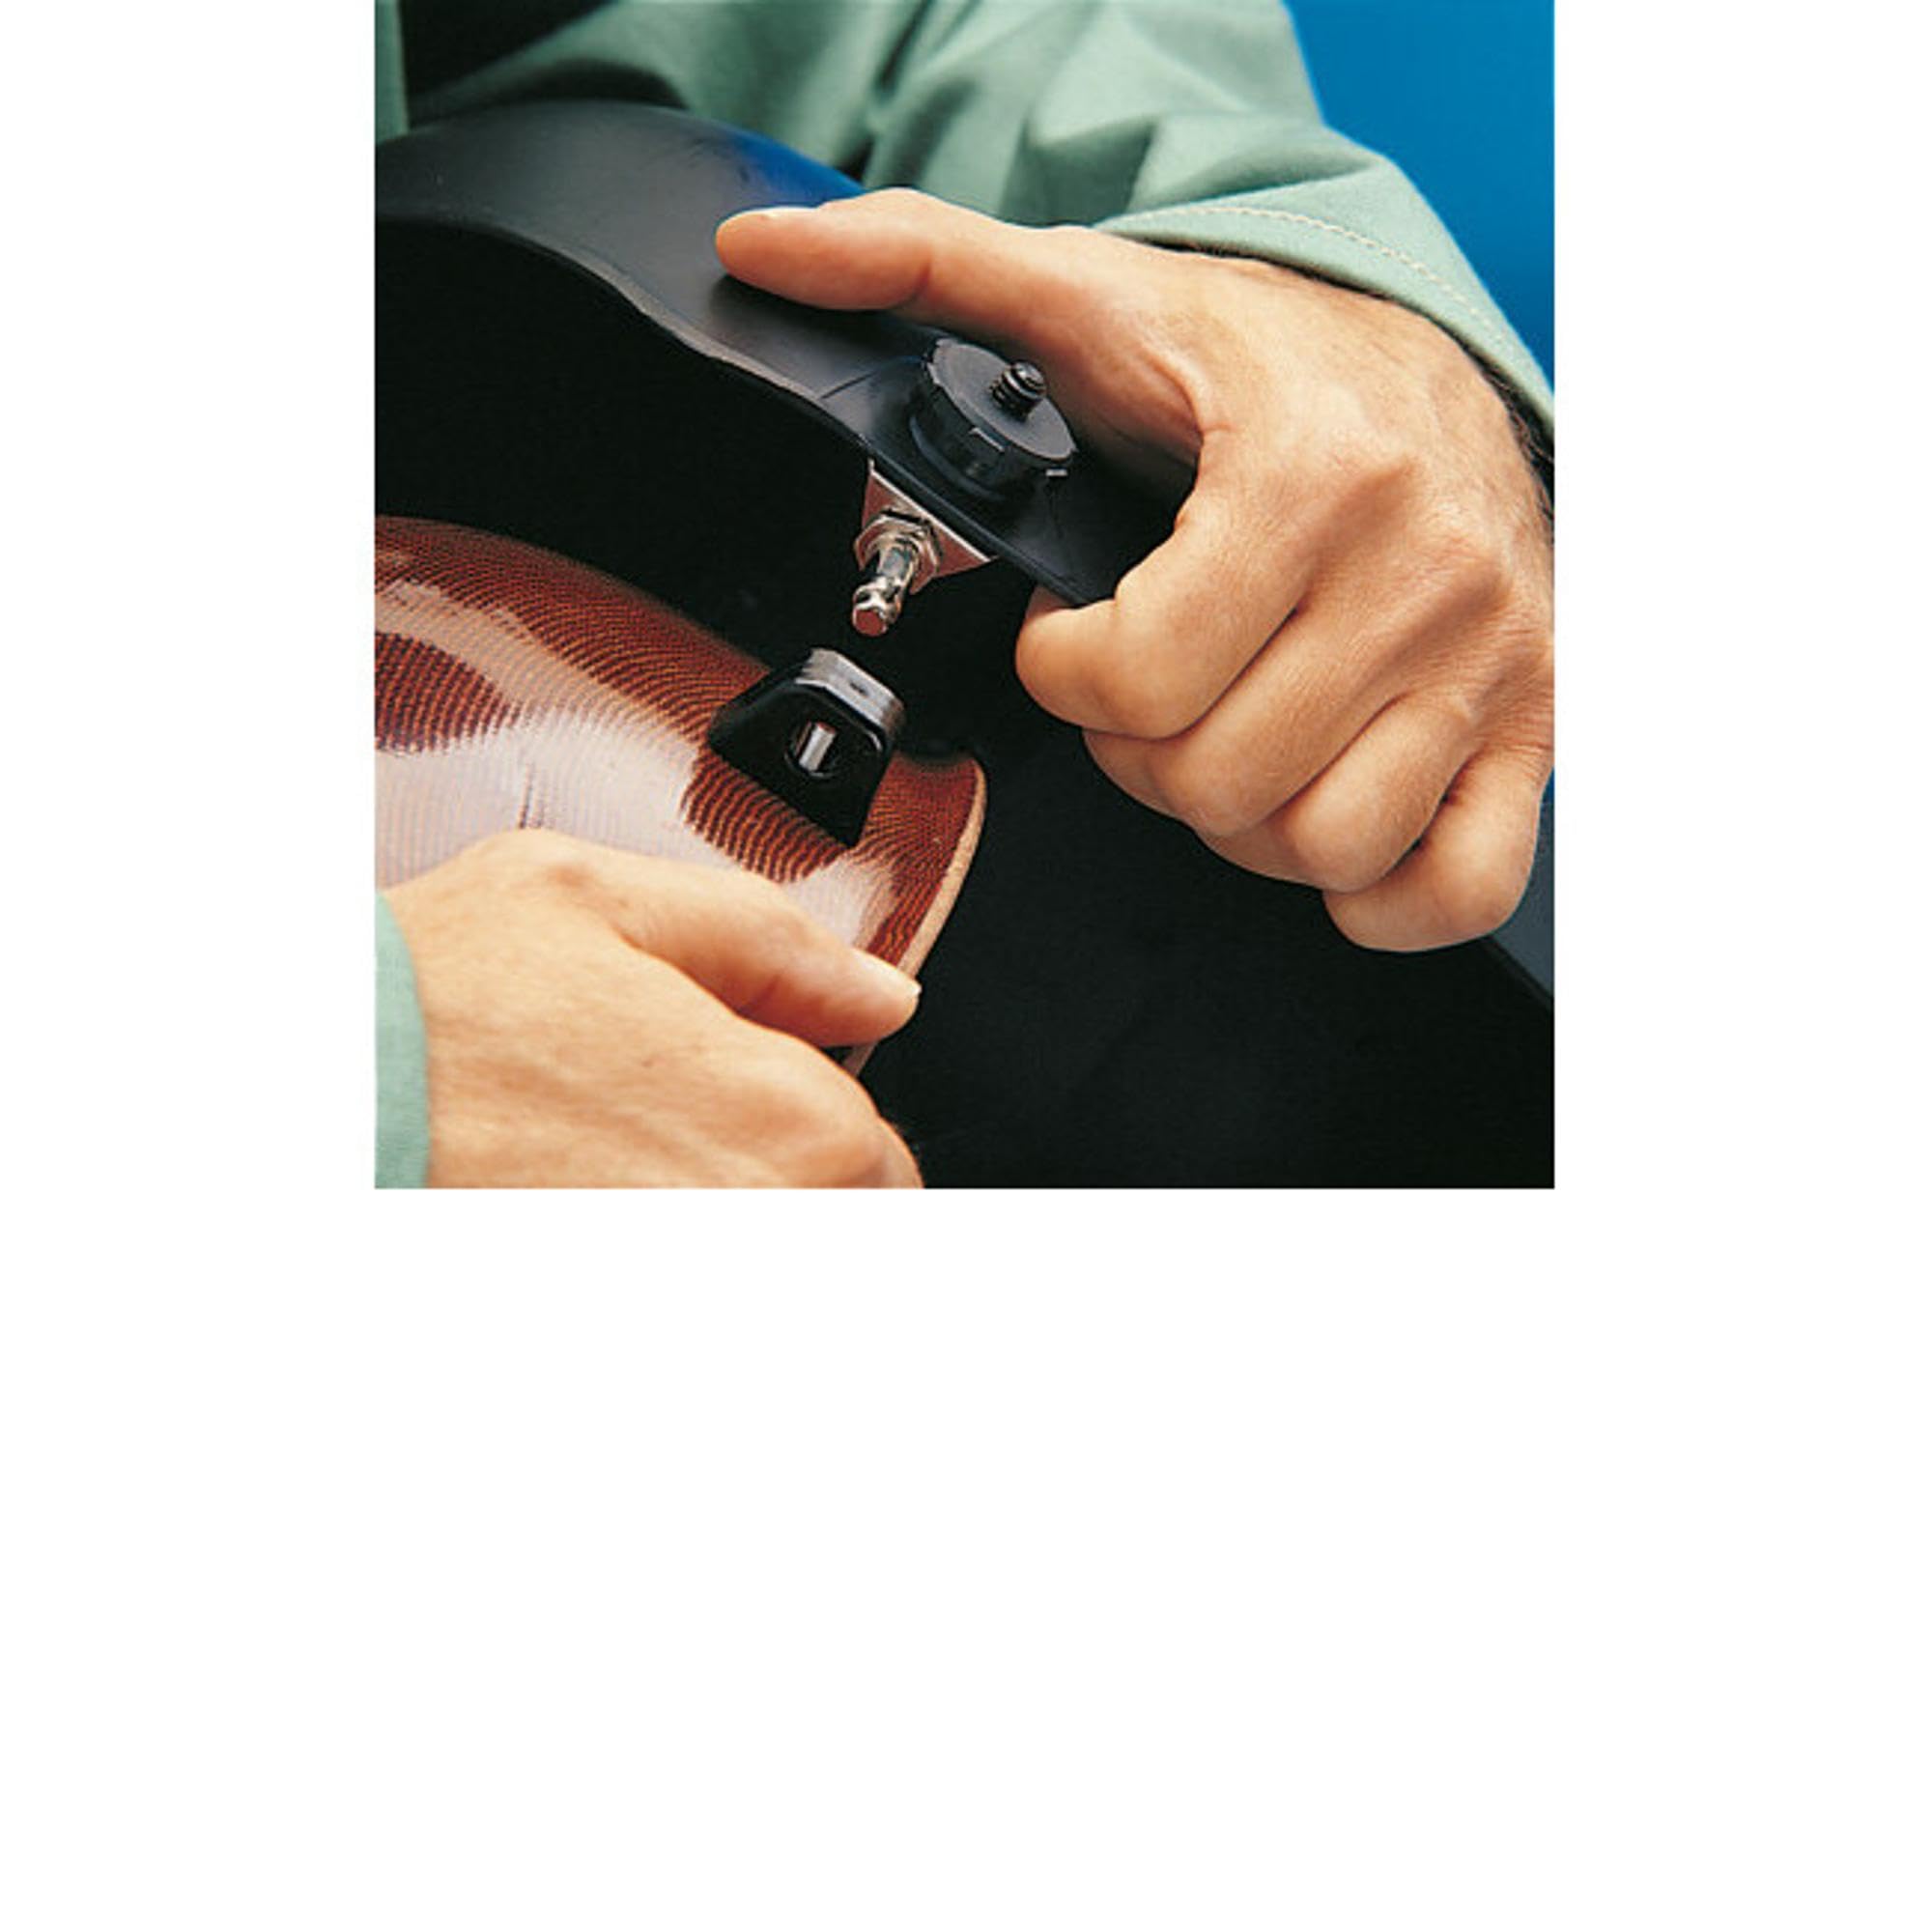
Image: Illustrates the process of attaching the lug to headwear. A person's hands are shown securing the lug with a screw, demonstrating the connection point for a welding shield.
Betjeningsvejledning
Once the MSA 48733 Replacement Lugs are installed on your headwear, they provide a quick-release interface for compatible welding shields.
- Attaching a Welding Shield: Align the quick-release mechanism of your welding shield with the installed lugs. Press the shield firmly onto the lugs until you hear or feel a secure click, indicating that the shield is locked into place.
- Detaching a Welding Shield: To remove the welding shield, activate its quick-release mechanism (refer to your welding shield's manual for specific instructions). Once released, gently pull the shield away from the lugs.
Always ensure the welding shield is securely attached before beginning any work that requires head and face protection.
Opretholdelse
Regular maintenance ensures the longevity and proper function of your MSA 48733 Replacement Lugs.
- Rensning: Clean the lugs periodically with a damp cloth and mild soap. Avoid using abrasive cleaners or solvents, as these can damage the material.
- Inspektion: Before each use, inspect the lugs for any signs of wear, cracks, deformation, or damage. Check that all screws are tight and that the lugs are securely fastened to the headwear.
- Udskiftning: If any part of the lug assembly (lugs, screws, or reinforcement plates) shows signs of significant wear or damage, replace the entire assembly immediately. Do not attempt to repair damaged components.
Fejlfinding
If you encounter issues with your MSA 48733 Replacement Lugs, consider the following:
- Welding Shield Does Not Attach Securely:
- Ensure the lugs are correctly installed and tightened on the headwear.
- Verify that your welding shield is compatible with quick-release lugs.
- Inspect the quick-release mechanism on the welding shield for damage or obstruction.
- Lugs Feel Loose:
- Check and retighten the screws securing the lugs to the headwear.
- Inspect the headwear material around the mounting points for damage or deformation.
- Difficulty Detaching Welding Shield:
- Ensure the quick-release mechanism on the welding shield is fully activated.
- Check for any debris or obstruction preventing smooth release.
If problems persist, contact MSA customer support or a qualified safety equipment technician.
Specifikationer
| Modelnummer | 48733 |
| Produktdimensioner | 4 x 2.5 x 5 tommer (10.16 x 6.35 x 12.7 cm) |
| Varens vægt | 0.02 pund (ca. 9 gram) |
| Materiale | Metal |
| Farve | flerfarvede |
| Connector Type | Hurtig tilslutning |
| Antal stykker | 1 (per unit, includes lugs, screws, plates) |
| Fabrikant | MSA |
Garantioplysninger
Specific warranty details for the MSA 48733 Replacement Lug are not provided in this document. For comprehensive warranty information, please refer to the official MSA Safety Incorporated website or contact MSA customer service directly. Keep your proof of purchase for any warranty claims.
Support og kontakt
For technical assistance, product inquiries, or to report issues, please contact MSA Safety Incorporated:
- Fabrikant Webwebsted: www.msafety.com
- Kundeservice: Refer to the contact section on the official MSA webwebsted for telefonnumre og e-mailsupport.
Always refer to the latest information available on the manufacturer's official channels.


