Indledning
Tak for købetasing the ELECOM Wireless BlueLED Mouse. This manual provides instructions on how to set up, operate, and maintain your mouse, along with troubleshooting tips and product specifications. Please read this manual carefully before use to ensure proper and safe operation.

Figure 1: ELECOM Wireless BlueLED Mouse (Pink)
Dette billede viser toppen view of the ELECOM Wireless BlueLED Mouse in pink. It features a white body with pink accents on the scroll wheel and the bottom edge. The 'Light Control BlueLED Mouse' text is visible on the top surface, along with the ELECOM logo at the bottom.
Opsætning
- Batteri installation:
Open the battery cover on the bottom of the mouse. Insert one AA battery, ensuring the correct polarity (+/-). Close the battery cover securely.
- Modtagerforbindelse:
Locate the micro USB receiver stored inside the mouse's battery compartment. Remove the receiver and plug it into an available USB-A port on your computer (Windows OS or macOS) or PlayStation(R)3.
- Tænd:
Slide the power switch, located on the bottom of the mouse, to the 'ON' position. The battery indicator lamp will briefly light up.
Betjeningsvejledning
Grundlæggende funktioner
- Venstre klik: Press the left button to select items or activate functions.
- Højreklik: Press the right button to open context menus.
- Scrollhjul: Rul hjulet op eller ned for at rulle gennem dokumenter eller web pages. Press the wheel to activate middle-click functions (if supported by software).
Nøglefunktioner

Figure 2: Lightweight Design
This image illustrates the lightweight nature of the mouse, comparing its weight to an S-sized egg, both weighing approximately 50g. The text emphasizes that the mouse is designed for easy operation with light force, reducing fatigue during prolonged use.
This mouse features a lightweight design, weighing approximately 50g, allowing for comfortable operation with minimal effort, reducing fatigue during extended use.
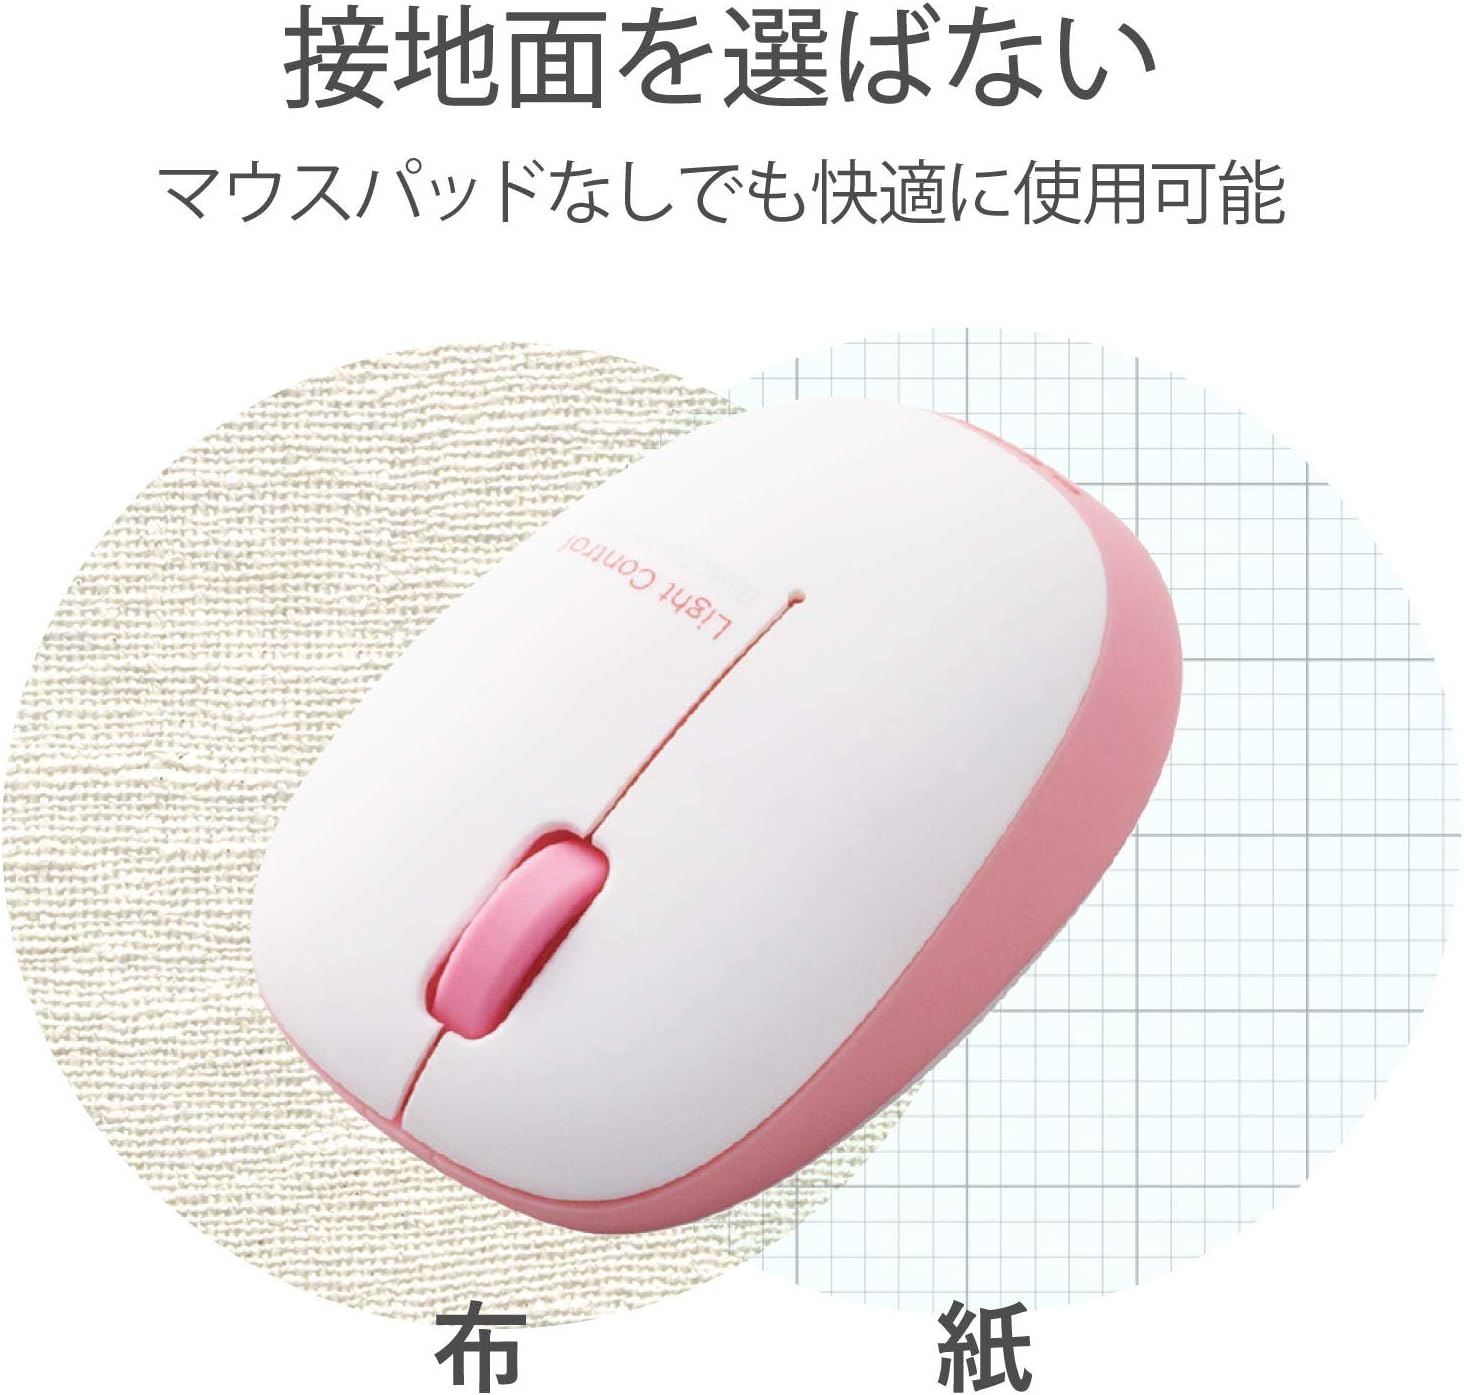
Figure 3: BlueLED Technology
This image demonstrates the versatility of the BlueLED sensor, showing the mouse operating effectively on both a cloth surface and a paper surface, indicating it does not require a specific mouse pad.
The mouse is equipped with a BlueLED sensor. Unlike traditional optical mice that use red light, BlueLED's shorter wavelength allows for more accurate reflection of light even from small irregularities and dust, enabling comfortable use on various surfaces without needing a specific mouse pad.
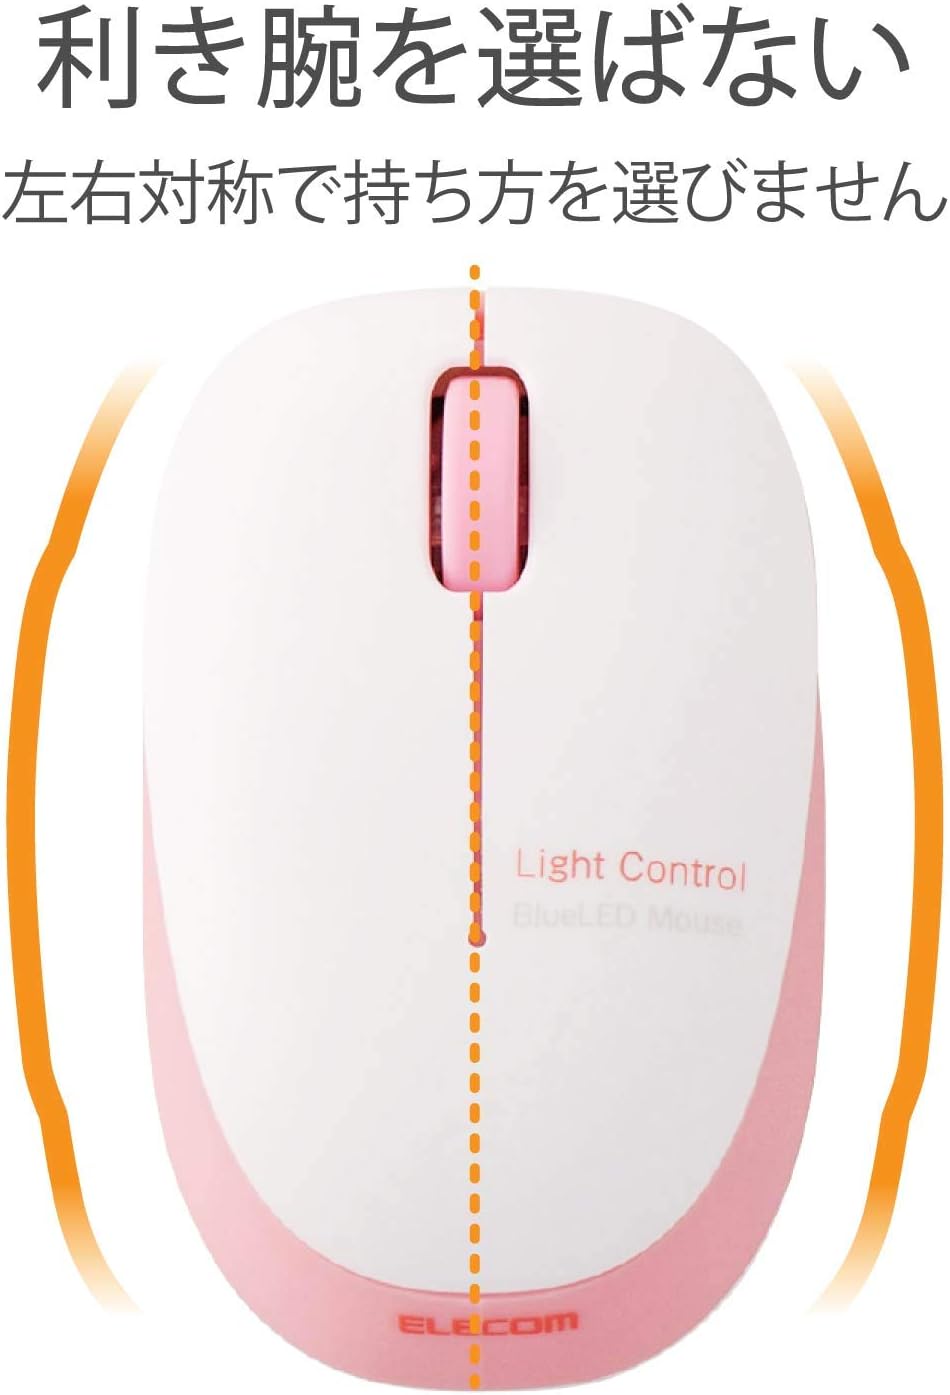
Figure 4: Symmetrical Design
This image highlights the symmetrical design of the mouse, indicated by a central dashed line, emphasizing that its shape is suitable for both left and right-handed users.
The mouse features a symmetrical design, making it comfortable for both left and right-handed users.

Figure 5: 1000 Count Resolution
This image explains the 1000-count resolution, showing a scale of counts from 0 to 4000. It suggests that 1000 counts are ideal for smooth operation in applications like Excel/Word, while lower counts (400-800) are suitable for web browsing and higher counts (2000+) for gaming.
With a resolution of 1000 counts, this mouse provides smooth and precise cursor movement, suitable for various tasks.

Figure 6: OMRON Switch
This image shows a close-up of the OMRON switch used in the mouse, highlighting its internal mechanism. The text indicates that OMRON switches are known for their reliable click feel and durability.
The mouse utilizes OMRON switches, known for their excellent click feel and durability.
The 2.4GHz wireless connection allows for a working range of approximately 10 meters on non-magnetic surfaces and 3 meters on magnetic surfaces like steel desks.
Opretholdelse
- Rensning:
To clean the mouse, gently wipe the surface with a soft, dry cloth. For stubborn dirt, slightly dampen the cloth with water or a mild, non-abrasive cleaner. Do not use harsh chemicals or immerse the mouse in liquid.
- Udskiftning af batteri:
When the battery indicator lamp flashes or the mouse performance degrades, it's time to replace the battery. Follow the battery installation steps in the 'Setup' section.
- Modtageropbevaring:
When transporting the mouse or not using it for an extended period, store the micro USB receiver inside the mouse's battery compartment to prevent loss.
Fejlfinding
| Problem | Mulig årsag | Løsning |
|---|---|---|
| Mouse does not respond. | Afbryderen er slukket. Batteriet er afladet. Receiver is not properly connected. | Slide the power switch to 'ON'. Udskift batteriet. Ensure the receiver is fully inserted into the USB port. Try a different USB port. |
| Markørbevægelsen er uregelmæssig eller hoppende. | Sensoren er snavset. Using on an unsuitable surface (e.g., clear glass). | Clean the sensor lens on the bottom of the mouse with a soft cloth. Use the mouse on a non-reflective, opaque surface. |
| Wireless connection is unstable. | Distance from receiver is too far. Interferens fra andre trådløse enheder. | Reduce the distance between the mouse and the receiver. Move the mouse away from other wireless devices (e.g., Wi-Fi routers, cordless phones). |
Specifikationer
| Feature | Detalje |
|---|---|
| Modelnummer | M-BL20DBPN |
| Farve | Lyserød |
| Forbindelse | Wireless (2.4 GHz frequency band) |
| Interface | USB-A (for receiver) |
| Sensortype | BlueLED Optical |
| Opløsning (DPI) | 1000 tæller |
| Knapper | 3 buttons (Left, Right, Scroll Wheel) |
| Strømkilde | 1 x AA -batteri (inkluderet) |
| Kontinuerlig brugstid | Ca. 10 måneder |
| Wireless Range | Approx. 10m (non-magnetic material), Approx. 3m (magnetic material) |
| Dimensioner (B x D x H) | 9 x 5.6 x 3.2 cm |
| Vægt | 20 g (ekskl. batteri) |
| Kompatibel OS | Windows OS, macOS (with USB port), PlayStation(R)3 |
| Særlige funktioner | Small receiver, Battery indicator lamp |
Garanti og support
This product comes with a manufacturer's warranty. Please refer to the warranty card included in the product packaging for specific terms and conditions. For technical support, product inquiries, or warranty claims, please contact ELECOM customer service through their official webwebstedet eller kontaktoplysningerne i din produktdokumentation.


