1. Introduktion
This manual provides detailed instructions for the setup, operation, and maintenance of your Sungale PF1501 14-Inch Digital Photo Frame. This device is designed to display digital photos, play videos, and play music, offering a versatile way to enjoy your media.
Læs venligst denne manual grundigt, inden du bruger produktet, for at sikre korrekt funktionalitet og for at maksimere din brugeroplevelse.
2. Pakkens indhold
Bekræft, at alle nedenstående varer er inkluderet i din pakke:
- Sungale PF1501 14-Inch Digital Photo Frame
- AC strømadapter
- Fjernbetjening
- Hurtig startvejledning
- Limited Warranty Card
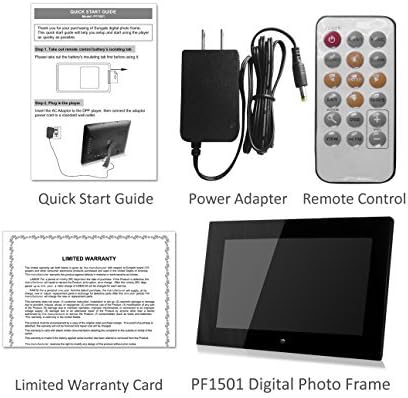
Image 2.1: Included accessories and the digital photo frame.
3. Produktet er slutview
3.1 Foran View

Billede 3.1: Forside view of the digital photo frame.
3.2 bag View og havne

Billede 3.2: Bagside view with labeled ports and controls.
The rear of the frame features various ports and controls for connectivity and operation:
- Funktionstaster: Buttons for navigation and control (Enter, Left, Right, Up, Down, Exit).
- Kan monteres på væggen: Mounting points for wall installation.
- Indbygget højttaler: Til lydafspilning.
- DC 12V strømport: Tilslut vekselstrømsadapteren her.
- Removable Bracket: Stand for desktop placement.
- Power knap: To turn the frame on or off.
- USB-værtsport: Til tilslutning af USB-flashdrev.
- SD/SDHC-kortplads: For inserting SD or SDHC memory cards.
- USB Device Port: Til tilslutning til en computer.
4. Opsætning
4.1 Indledende opstart
- Tilslut strøm: Insert the AC power adapter into the DC 12V Power Port on the back of the frame. Plug the other end into a standard electrical outlet.
- Tænd: Press the Power button located on the back of the frame. The frame will power on and display the initial setup screen or default content.
4.2 Isætning af hukommelseskort eller USB-drev
The frame supports SD/SDHC cards and USB flash drives (up to 32GB). It also has 4GB of internal memory.
- For SD/SDHC-kort: Gently insert an SD or SDHC card into the SD/SDHC Card Slot until it clicks into place. Ensure the card is inserted in the correct orientation.
- Til USB-flashdrev: Insert a USB flash drive into the USB Host Port.
The frame should automatically detect the inserted media and begin displaying content or prompt you to select a source.
4.3 Vægmontering (valgfrit)
The frame can be wall-mounted using the designated mounting points on the rear. Ensure appropriate wall anchors and screws are used for secure installation.
5. Betjeningsvejledning
The digital photo frame can be operated using the function keys on the back or the included remote control.
5.1 Fjernbetjeningsfunktioner
The remote control provides convenient access to all features. Point the remote control directly at the frame's sensor.
5.2 Navigering i menuen
Use the directional buttons (Up, Down, Left, Right) to navigate through menu options. Press the "Enter" button to confirm a selection. The "Exit" button typically returns to the previous screen or the main menu.
5.3 Displaying Photos
The frame supports JPG and BMP photo file formater.
- Vælg kilde: From the main menu, select the desired media source (Internal Memory, SD Card, or USB Drive).
- Choose Photo Mode: Select "Photo" to enter photo display mode.
- Slideshow: The frame can automatically start a slideshow of all photos on the selected source. You can adjust transition effects and interval times in the settings.
- Single Photo Display: Navigate to a specific photo and press "Enter" to display it individually.
- Zoom and Rotate: Use the remote control or function keys to zoom in/out or rotate displayed photos.
5.4 Afspilning af videoer
The frame supports video playback. Note that some users have reported compatibility primarily with .AVI video files.
- Vælg kilde: From the main menu, select the desired media source.
- Choose Video Mode: Select "Video" to enter video playback mode.
- Select Video: Naviger til den ønskede video file and press "Enter" to begin playback.
5.5 Afspilning af musik
The frame can play background music during photo slideshows or as standalone audio.
- Vælg kilde: From the main menu, select the desired media source.
- Choose Music Mode: Select "Music" to enter music playback mode.
- Vælg lyd File: Navigate to the desired audio file and press "Enter" to begin playback.
- Baggrundsmusik: In photo settings, you can enable background music to play during slideshows.
5.6 Calendar and Alarm Clock
Access the calendar and alarm clock functions through the main menu. Follow on-screen prompts to set the date, time, and alarm preferences.
6. Vedligeholdelse
6.1 Rengøring af skærmen
- Turn off and unplug the frame before cleaning.
- Use a soft, lint-free cloth, such as a microfiber cloth, to gently wipe the screen.
- For genstridige pletter, tør letampRengør kluden med vand eller en skærmrengøringsopløsning, der er specielt designet til elektronik. Sprøjt ikke væske direkte på skærmen.
- Avoid using abrasive cleaners, solvents, or alcohol-based solutions, as these can damage the screen surface.
6.2 Generel pleje
- Hold rammen væk fra direkte sollys, varmekilder og overdreven fugt.
- Undgå at tabe rammen eller udsætte den for kraftige stød.
- Do not block the ventilation openings on the back of the frame.
- Unplug the frame during lightning storms or when unused for extended periods.
7. Fejlfinding
If you encounter issues with your digital photo frame, refer to the following common problems and solutions:
| Problem | Mulig årsag/løsning |
|---|---|
| Rammen tændes ikke. |
|
| "File not supported" error or media not displaying. |
|
| Fjernbetjeningen virker ikke. |
|
| Photos are stretched or distorted. |
|
| Slideshow not playing randomly. |
|
8. Specifikationer
| Feature | Detalje |
|---|---|
| Modelnummer | PF1501 |
| Skærmstørrelse | 14 tommer |
| Opløsning | 1366x768 pixels |
| Intern hukommelse | 4 GB |
| Understøttelse af ekstern hukommelse | SD/SDHC Card (up to 32GB), USB Flash Drive (up to 32GB) |
| Understøttede fotoformater | JPG, BMP |
| Understøttede videoformater | Primarily AVI (as reported by users) |
| Lydudgang | 2 Channel Stereo Speakers |
| Produktdimensioner | 13.8 x 1 x 9.5 tommer |
| Varens vægt | 2 pund |
| Farve | Sort |
| Fabrikant | Sungale |
9. Garanti og support
9.1 Begrænset garanti
This product comes with a Limited Warranty. Please refer to the "Limited Warranty Card" included in your package for detailed terms and conditions, including coverage period and claim procedures. Keep your proof of purchase for warranty claims.
9.2 Kundesupport
For technical assistance, troubleshooting beyond this manual, or warranty inquiries, please contact Sungale customer support.
- Fabrikant: Sungale
- Webwebsted: Visit the Sungale Store on Amazon (for generel mærkeinformation)
- Specific contact information (phone, email) may be found on the warranty card or the official Sungale webwebsted.


