1. Introduktion
This manual provides detailed instructions for the proper use and maintenance of your Hytera TC-320U-1 UHF Analog 2-Watt Radio. The TC-320 is a cost-effective business two-way radio designed for reliable communication. It features a robust design, long battery life, and user-friendly operation.
2. Hvad er der i æsken
Carefully unpack your radio and check that all items listed below are present and in good condition. If any item is missing or damaged, please contact your dealer.
- Antenna (AN0460H11)
- Li-ion Battery (1700mAh) (BL1715)
- Switching Power Adapter (PS0602)
- Belt Clip (BC16)
- Nylon Strap (RO01)

Image 2.1: Contents of the Hytera TC-320U-1 package, including the radio, antenna, battery, power adapter, belt clip, and nylon strap.
3. Produktet er slutview
The Hytera TC-320U-1 radio is designed for ease of use and durability. Key features include 16 channel capacity, wide communication range, double injection molding for anti-skid design, and a long-lasting battery with an indicator. The radio also supports switchable high/low power output.
3.1 Radio Controls and Components

Billede 3.1: Forside view of the Hytera TC-320U-1 radio, showing the speaker grille and microphone area.

Billede 3.2: Side view of the Hytera TC-320U-1 radio, highlighting the orange Push-To-Talk (PTT) button.
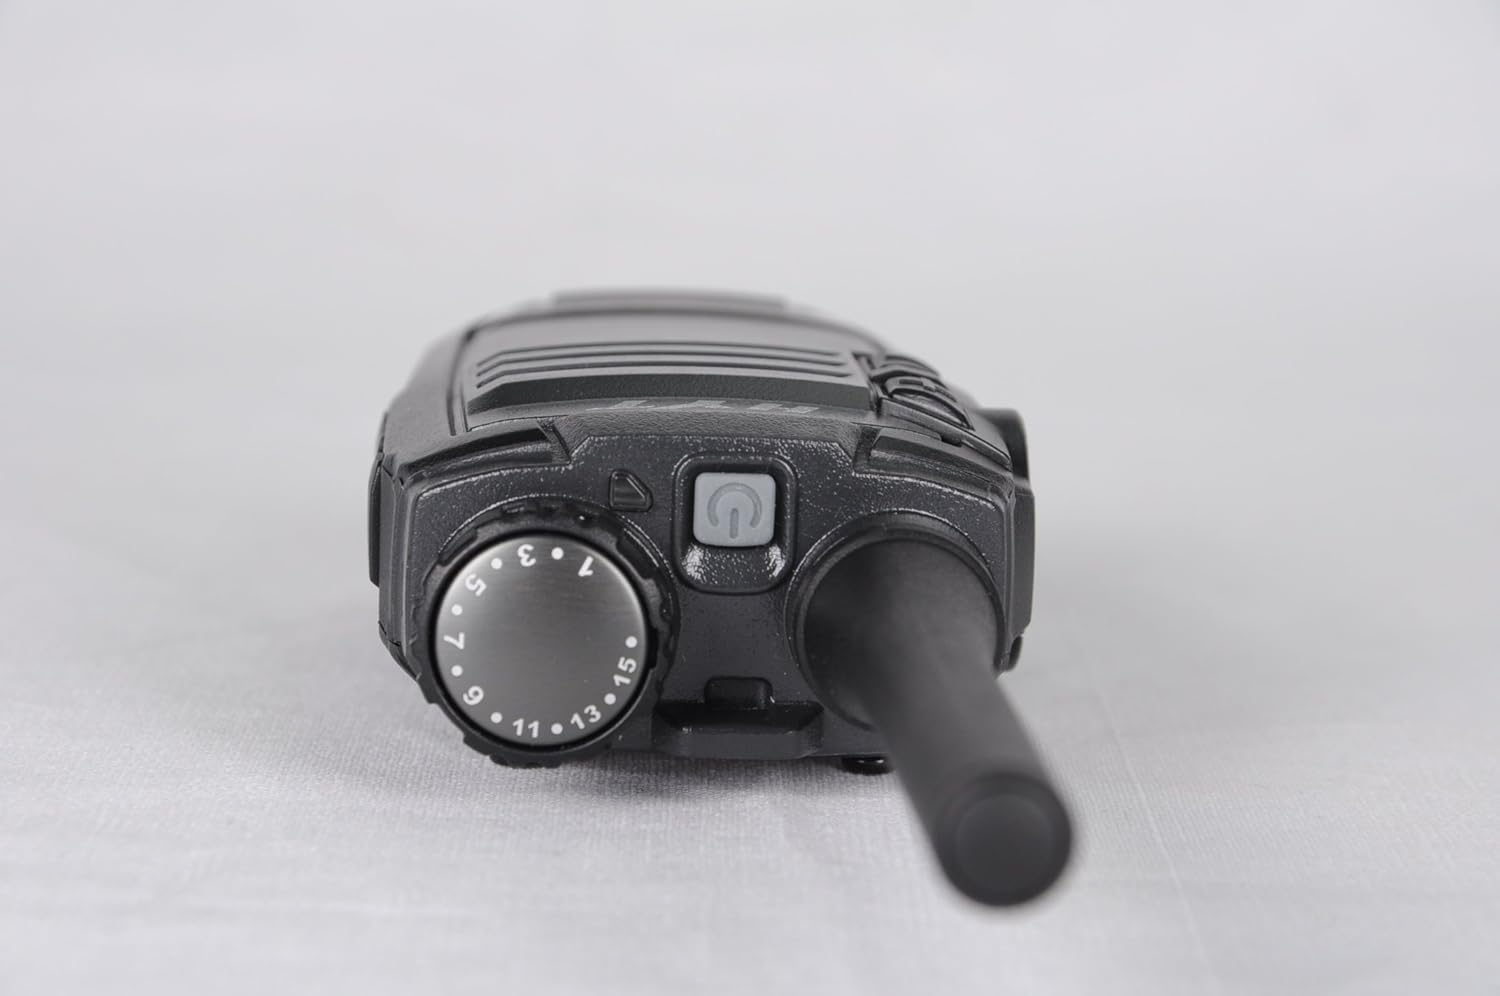
Billede 3.3: Top view of the Hytera TC-320U-1 radio, showing the channel selector knob (numbered 1-16) and the power/volume knob.
4. Opsætning
4.1 Montering af antennen
- Juster antennens gevindskårne ende med antennestikket øverst på radioen.
- Drej antennen med uret, indtil den er sikkert fastgjort. Spænd den ikke for hårdt.
4.2 Installation af batteriet
- Sørg for, at radioen er slukket.
- Juster batteripakken med rillerne på bagsiden af radioen.
- Skub batteripakken opad, indtil den klikker på plads.
- To remove, slide the battery latch (if present) and slide the battery downwards.
4.3 Opladning af batteriet
Before initial use, fully charge the battery. Use only the provided Hytera switching power adapter (PS0602) and charging accessories.
- Tilslut strømadapteren til en stikkontakt.
- Insert the charging cable into the radio's charging port or place the radio in its charging cradle.
- The charging indicator will typically show red during charging and green when fully charged.
4.4 Attaching the Belt Clip and Nylon Strap
- Juster bælteklipsen med skruehullerne på bagsiden af radioen.
- Secure the belt clip with the provided screws.
- Thread the nylon strap through the designated loop on the radio for added security.
5. Betjeningsvejledning
5.1 Tænd/sluk og justering af lydstyrke
Rotate the power/volume knob (located on the top of the radio, see Image 3.3) clockwise to power on the radio. Continue rotating clockwise to increase the volume. Rotate counter-clockwise to decrease volume and fully counter-clockwise to power off the radio.
5.2 Valg af kanal
Rotate the channel selector knob (located on the top of the radio, see Image 3.3) to choose one of the 16 available channels. The selected channel number is indicated on the knob.
5.3 Afsendelse og modtagelse
- Modtager: When the radio receives a signal, the LED indicator will illuminate, and you will hear the audio through the speaker.
- Fremsendelse: To transmit, press and hold the Push-To-Talk (PTT) button on the side of the radio (see Image 3.2). Speak clearly into the microphone, holding the radio approximately 2.5 to 5 cm (1 to 2 inches) from your mouth. Release the PTT button to stop transmitting and return to receive mode.
5.4 High/Low Power Switch
The TC-320U-1 allows you to switch between high and low power output. Refer to your radio's specific controls for the location of this switch, typically a dedicated button or a programmable function. Using low power conserves battery life when communicating over short distances.
6. Vedligeholdelse
6.1 Generel pleje
- Keep the radio dry. Avoid exposure to rain, moisture, or corrosive liquids.
- Udsæt ikke radioen for ekstreme temperaturer.
- Rengør radioens overflade med en blød, damp klæde. Brug ikke skrappe kemikalier eller slibende rengøringsmidler.
- Sørg for, at antenne- og batterikontakterne er rene og fri for snavs.
6.2 Pleje af batterier
- Always use genuine Hytera batteries and chargers.
- Kortslut ikke batteripolerne.
- Smid ikke batterier i ild.
- If the battery is not used for an extended period, store it in a cool, dry place after partially charging it.
7. Fejlfinding
Hvis du støder på problemer med din radio, kan du se følgende almindelige problemer og løsninger:
| Problem | Mulig årsag | Løsning |
|---|---|---|
| Radioen tændes ikke | Battery is depleted or not installed correctly | Oplad batteriet, eller sæt det sikkert i igen. |
| Kan ikke sende eller modtage | Incorrect channel selected; out of range; antenna loose | Bekræft kanalvalg; flyt tættere på andre radioer; kontroller antenneforbindelsen. |
| Lav lydstyrke | Volume set too low; speaker obstructed | Increase volume; clear any obstructions from the speaker. |
| Kort kommunikationsrækkevidde | Low power mode selected; environmental obstructions | Switch to high power mode; move to an open area. |
8. Specifikationer
The following table outlines the technical specifications for the Hytera TC-320U-1 radio:
| Feature | Specifikation |
|---|---|
| Modelnummer | TC-320 |
| Frekvensområde | UHF 400-470MHz |
| Antal kanaler | 16 |
| Kanalafstand | 25/12.5 kHz |
| Udgangseffekt | 2 watt |
| Batteritype | 1 Lithium Ion (1700mAh) |
| Voltage | 3.8 volt (DC) |
| Produktdimensioner | 5.91 x 1.57 x 1.57 tommer |
| Varens vægt | 0.71 ounces (20 gram) |
| Maksimal talerækkevidde | 2 miles (omtrentlig, varierer efter terræn) |
| Vandmodstandsniveau | Ikke vandafvisende |
9. Garantioplysninger
The Hytera TC-320U-1 radio comes with a 2 års producentgaranti. Please retain your proof of purchase for warranty claims. For specific terms and conditions, refer to the warranty card included with your product or contact Hytera customer service.
10. Support
For further assistance, technical support, or service inquiries regarding your Hytera TC-320U-1 radio, please contact your authorized Hytera dealer or visit the official Hytera webhjemmeside for kontaktoplysninger og ressourcer.


