Indledning
This manual provides detailed instructions for the setup, operation, maintenance, and troubleshooting of your AmScope B120C-E1 Digital Binocular Compound Microscope. Please read this manual thoroughly before using the microscope to ensure proper function and longevity of the instrument.
Produkt overview
The AmScope B120C-E1 is a versatile digital binocular compound microscope designed for advanced observation and imaging. It features a Siedentopf binocular head, a mechanical 3D stage, LED illumination, and a 1.3MP USB camera for digital capture.

Figure 1: AmScope B120C-E1 Digital Binocular Compound Microscope. This image shows the complete microscope unit, highlighting its binocular head, objective lenses, mechanical stage, and base with illumination controls.
Nøglefunktioner
- Forstørrelsesindstillinger: Six widefield magnification settings: 40x, 100x, 250x, 400x, 1000x, and 2500x.
- Binocular Head: 30-degree inclined, 360-degree swiveling Siedentopf binocular head for comfortable viewing.
- Stage: Robust 3D double-layer mechanical stage for precise samppositionering.
- Fokusering: Coaxial coarse and fine focusing system for accurate adjustments.
- Belysning: Powerful single-bulb LED illumination with variable intensity dimmer.
- Kondensator: Abbe condenser with iris diaphragm and color filter for optimized lighting.
- Digitalt kamera: 1.3MP USB digital camera with advanced software for configuration, processing, and measurement, compatible with Windows XP/Vista/7/8/10.
Pakkens indhold
Ved udpakning skal det kontrolleres, at alle komponenter er til stede og ubeskadigede. Standardpakken indeholder:
- AmScope B120C-E1 Microscope Body
- Siedentopf Binocular Head
- WF10x Eyepieces (pair)
- WF25x Eyepieces (pair) - (Note: Based on image 61VFuTyeYGL, WF25X eyepieces are shown separately, implying they might be included or optional)
- Objective Lenses: 4x, 10x, 40x, 100x (oil)
- 1.3MP USB Digital Camera
- USB kabel
- Software CD
- Immersionsolie
- Støvdæksel
- Strømledning
Opsætning
1. Udpakning og placering
- Fjern forsigtigt alle komponenter fra emballagen. Gem den originale emballage til senere transport eller opbevaring.
- Place the microscope on a stable, level surface, away from direct sunlight, excessive heat, dust, and vibrations.
- Ensure adequate space around the microscope for operation and ventilation.
2. Assembling the Microscope
- Attach the Binocular Head: Loosen the head locking screw on the top of the microscope body. Gently insert the binocular head into the top port, aligning the keyway, and tighten the locking screw.
- Insert Eyepieces: Remove the protective caps from the eyepiece tubes and insert the WF10x eyepieces. If using the WF25x eyepieces, insert those instead.
- Install Objective Lenses: Rotate the revolving nosepiece until the lowest power objective (4x) is positioned over the stage. Screw the objective lenses into the nosepiece in increasing order of magnification (4x, 10x, 40x, 100x).
- Tilslut strøm: Plug the power cord into the microscope's power input and then into a suitable electrical outlet (110V AC).

Figure 2: Microscope head and objective lenses. This image illustrates the binocular head with eyepieces and the revolving nosepiece with objective lenses attached, ready for use.
3. Digital Camera Setup
- Installer software: Insert the provided software CD into your computer's CD/DVD drive and follow the on-screen instructions to install the camera software. Ensure your operating system is compatible (Windows XP/Vista/7/8/10).
- Tilslut kamera: Remove one of the eyepieces and insert the 1.3MP USB digital camera into the eyepiece tube. Connect the camera to your computer using the supplied USB cable.
- Start software: Open the installed camera software. The software should automatically detect the camera. Adjust settings as needed for live viewing og billedoptagelse.

Figure 3: Microscope connected to a laptop via the digital camera. This image demonstrates the digital camera inserted into one of the eyepiece tubes and connected to a laptop, displaying a magnified image on the screen.
Betjeningsvejledning
1. Power On and Illumination
- Tænd for hovedafbryderen, der er placeret på bunden af mikroskopet.
- Adjust the illumination intensity using the dimmer control knob to achieve comfortable and clear viewing.
2. Preparing a Specimen
- Place a prepared microscope slide onto the mechanical stage, fastgør den med s'ettage klip.
- Brug stage control knobs to center the specimen directly under the objective lens.
3. Fokusering og forstørrelse
- Start with the lowest power objective (4x) in position.
- Look through the eyepieces and use the coarse focus knob to bring the specimen into approximate focus.
- Use the fine focus knob for precise focusing.
- Adjust the interpupillary distance (distance between eyepieces) and diopter setting on the left eyepiece for comfortable binocular viewing.
- To increase magnification, rotate the revolving nosepiece to the next objective lens (e.g., 10x, 40x). Re-focus using only the fine focus knob.
- For 100x objective, apply a small drop of immersion oil directly onto the slide over the area to be viewed. Lower the 100x objective into the oil until it makes contact. Focus carefully using the fine focus knob.

Figure 4: Microscope with 100x objective lens engaged. This image shows the 100x objective lens positioned over the stage, indicating readiness for oil immersion viewing.
4. Adjusting Illumination and Contrast
- Iris diafragma: Adjust the iris diaphragm lever on the Abbe condenser to control the amount of light reaching the specimen and improve contrast.
- Condenser Height: Use the condenser adjustment knob to raise or lower the condenser for optimal illumination.
- Color Filter: Insert a color filter into the filter holder below the condenser if desired for specific viewbetingelser.
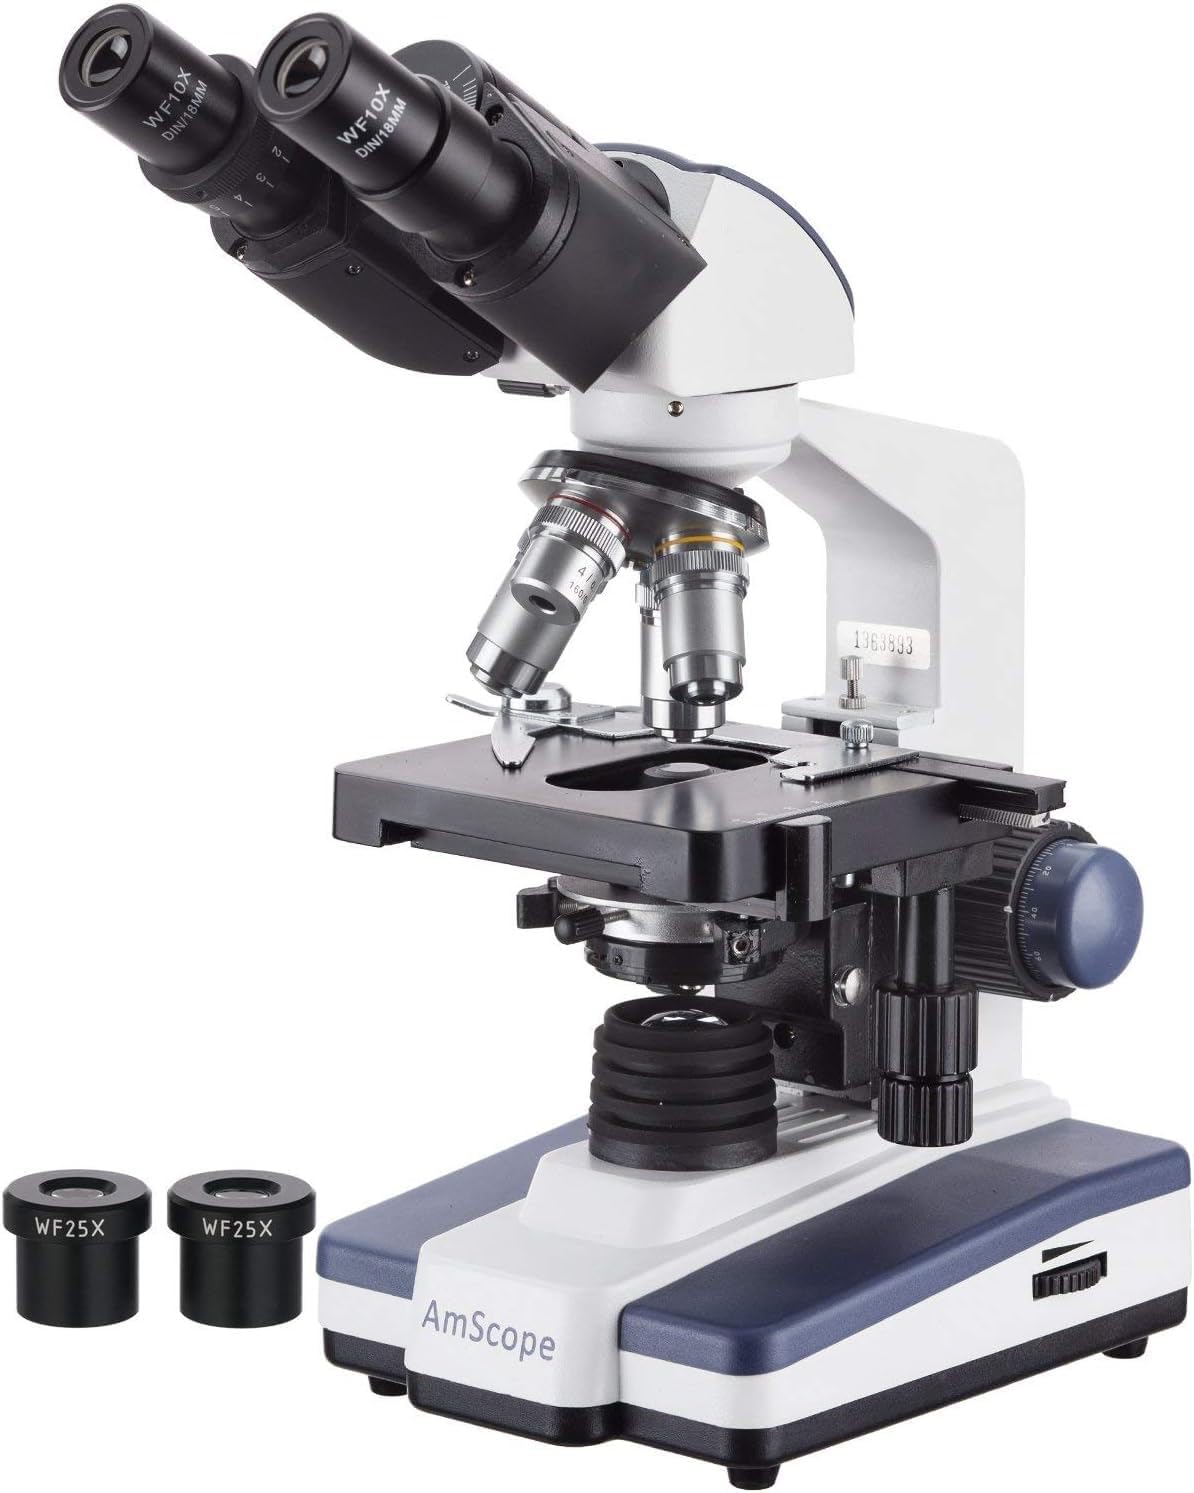
Figure 5: Microscope with WF25x eyepieces. This image displays the microscope with the higher magnification WF25x eyepieces, which can be used to achieve the maximum 2500x magnification.
5. Brug af digitalkameraet
Once the camera is connected and software installed, you can:
- Levende View: Observe the magnified image directly on your computer screen.
- Optag billeder: Use the software's capture function to take still photographs of your observations.
- Optag videoer: Optag video footage of dynamic processes or observations.
- Mål: Utilize the software's measurement tools for precise analysis of specimens.
Video 1: Eks.ample of microscopic observation. This video demonstrates the kind of live view and recording capabilities possible with the AmScope B120C-E1's digital camera, showing protists in stagnant vand.
Opretholdelse
1. Rensning
- Optiske komponenter: Use a soft, lint-free lens paper or cotton swab lightly moistened with lens cleaning solution to clean objective lenses and eyepieces. Avoid touching optical surfaces with bare hands.
- Legeme: Tør mikroskophuset af med en blød kludamp klæde. Brug ikke skrappe kemikalier eller slibende rengøringsmidler.
- Immersionsolie: After using the 100x oil immersion objective, always clean the objective lens and the slide immediately with lens paper and cleaning solution to prevent oil from hardening.
2. Opbevaring
- When not in use, cover the microscope with the provided dust cover to protect it from dust and debris.
- Store the microscope in a cool, dry place, away from direct sunlight and extreme temperatures.
- Ensure the 4x objective is in position and the stage is lowered before covering.
3. Udskiftning af pære
The microscope uses an LED illumination system. While LEDs have a long lifespan, if replacement is ever needed, consult a qualified technician or the manufacturer's support for specific instructions and compatible parts.
Fejlfinding
| Problem | Mulig årsag | Løsning |
|---|---|---|
| Ingen belysning | Power cord not connected; Power switch off; Dimmer set to minimum; LED bulb failure. | Check power connection; Turn on power switch; Increase dimmer intensity; Contact support for bulb replacement. |
| Image unclear/blurry | Incorrect focusing; Objective lens dirty; Eyepieces dirty; Slide upside down; Condenser not adjusted. | Use fine focus; Clean lenses; Ensure slide is correct side up; Adjust condenser and iris diaphragm. |
| Dark field of view | Iris diaphragm closed; Condenser too low; Low illumination intensity; Objective not fully clicked into place. | Open iris diaphragm; Raise condenser; Increase dimmer intensity; Rotate nosepiece until objective clicks into position. |
| Digital camera not detected | USB cable loose; Software not installed or running; Driver issue. | Ensure USB cable is securely connected; Install/reinstall software; Check device manager for driver issues. |
| Dust spots in view | Dust on eyepiece, objective, or slide. | Clean eyepieces and objectives; Clean slide. |
Specifikationer
- Model: B120C-E1
- Mikroskoptype: Binocular Compound
- Hoved: 30-degree inclined 360-degree swiveling Siedentopf
- Okularer: WF10x, WF25x
- Objektive linser: Achromatic DIN 4x, 10x, 40x (spring), 100x (spring, oil)
- Total forstørrelse: 40x-2500x
- Næsestykke: Revolving Quadruple
- Stage: 3D Double Layer Mechanical Stage (130mm x 130mm)
- Fokusering: Coaxial Coarse & Fine Focus Knobs
- Kondensator: NA1.25 Abbe Condenser with Iris Diaphragm
- Belysning: Variable Intensity LED (110V AC)
- Digitalt kamera: 1.3MP USB (1280x1024 pixels)
- Kamerakompatibilitet: Windows XP/Vista/7/8/10
- Dimensioner: Cirka 42 x 30 x 23 cm
- Vægt: Cirka 4.4 kg (9.7 lbs)
- Materiale: Metal
Garanti og support
For warranty information, technical support, or service inquiries, please contact AmScope directly. Refer to the official AmScope webwebstedet eller dokumentationen, der fulgte med dit køb, for at få de seneste kontaktoplysninger og garantivilkår.
Online ressourcer: For additional support and software downloads, you may visit the official AmScope download page: https://www.amscope.com/download/


