1. Introduktion
This instruction manual provides essential information for the proper installation, use, and maintenance of the 3M Peltor P3EV/2 Hard Hat Adapter for Visors. This adapter is designed to securely attach various 3M Peltor visors to compatible hard hats, offering enhanced face protection in industrial and occupational environments. Please read this manual thoroughly before installation and use to ensure optimal performance and user safety.
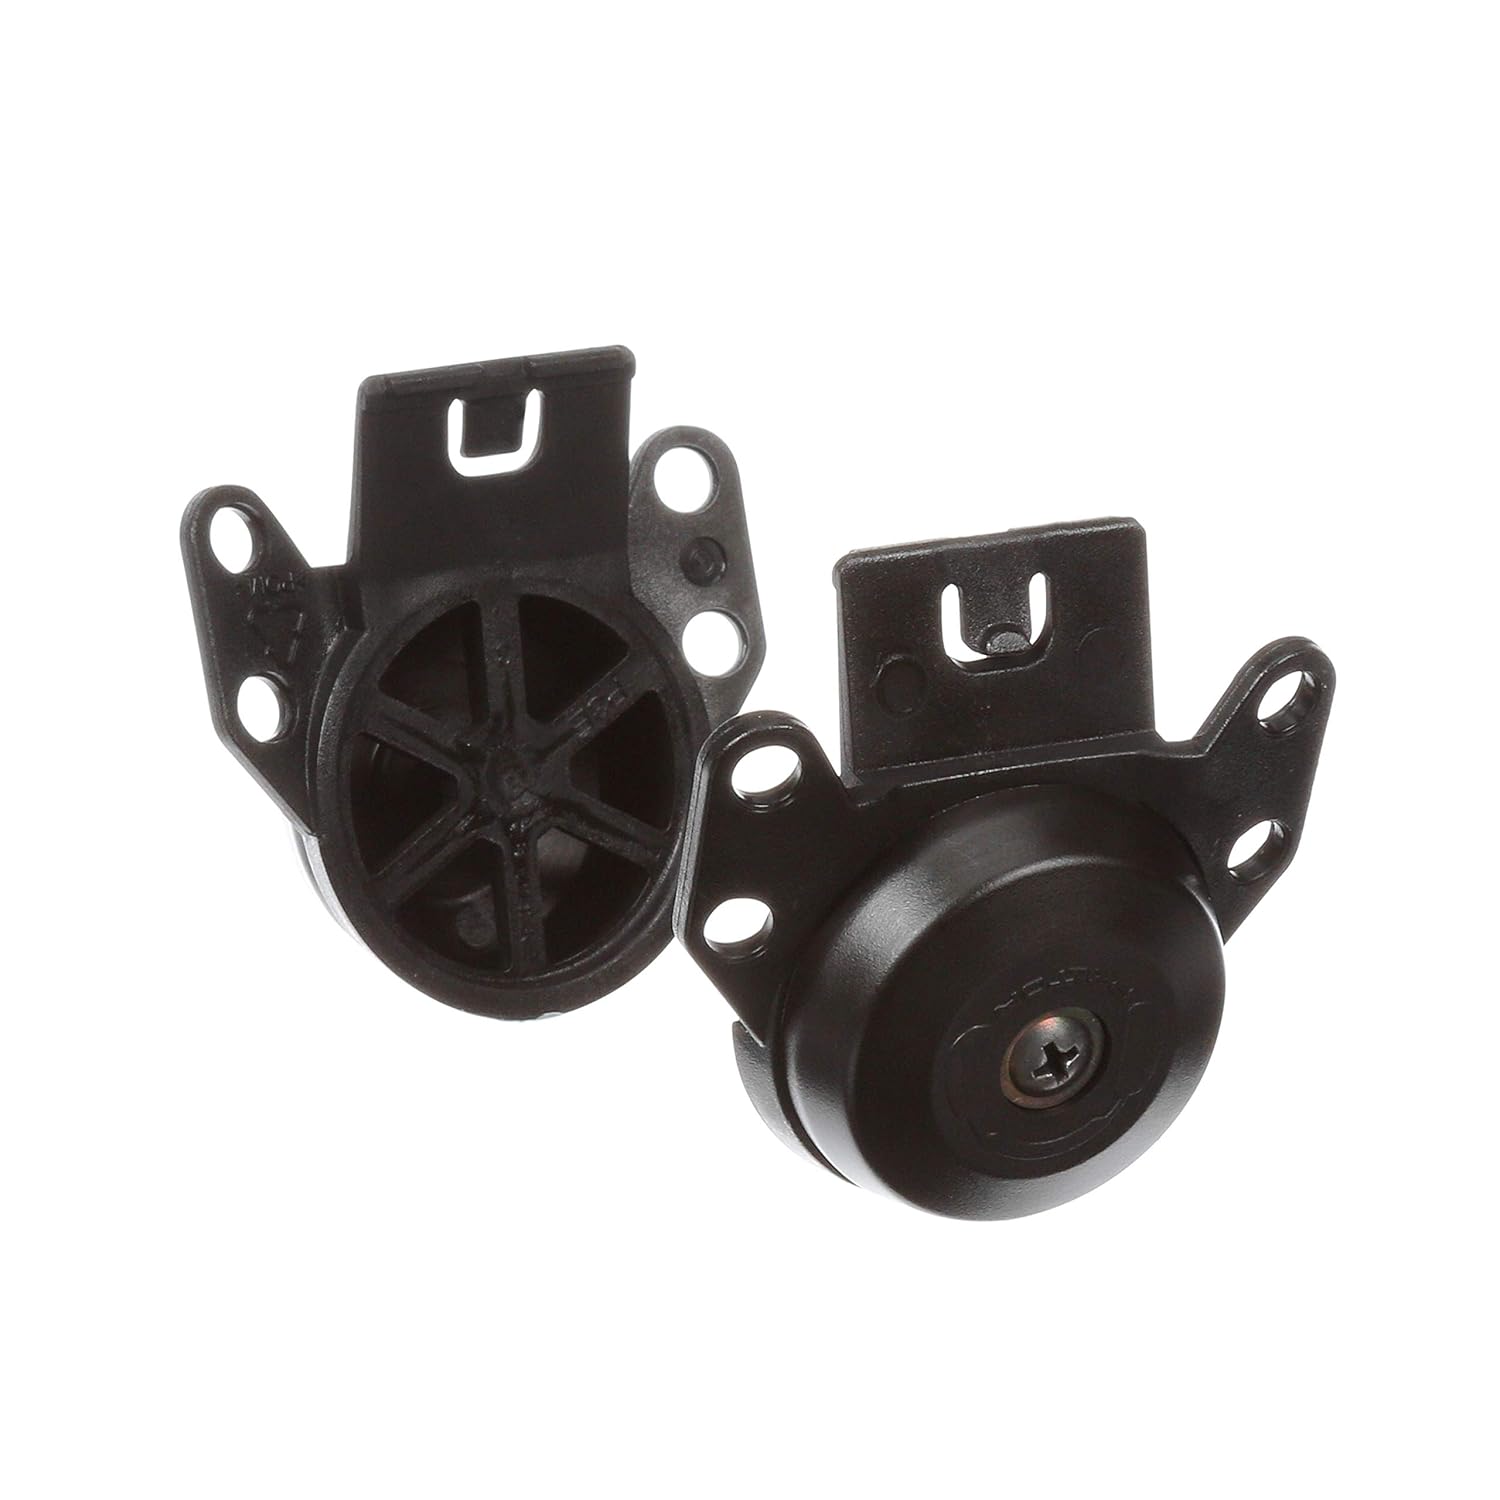
2. Produktet er slutview
The 3M Peltor P3EV/2 Hard Hat Adapter is a component designed to integrate face protection visors with head protection hard hats. It features a robust design for secure attachment and compatibility with a range of 3M Peltor visors. The adapter mechanism allows for easy attachment and detachment of visors, as well as adjustment for user comfort and protection.

3. Sikkerhedsoplysninger
Always follow all safety guidelines provided with your hard hat and visor. The P3EV/2 adapter is intended to be used with compatible 3M Peltor products. Misuse or modification of the adapter may compromise its protective capabilities and void any warranties. Inspect the adapter for damage before each use. Do not use if cracks, deformation, or other signs of wear are present. Replace damaged components immediately.
- Ensure the adapter is securely attached to the hard hat and the visor is securely attached to the adapter.
- Do not modify the adapter.
- Use only genuine 3M Peltor replacement parts.
- This adapter does not provide impact protection on its own; it facilitates the use of a protective visor.
4. Opsætning og installation
Follow these steps to properly install the 3M Peltor P3EV/2 Hard Hat Adapter and a compatible visor.
4.1 Attaching the Adapter to a Hard Hat
- Identify the accessory slots on the sides of your compatible hard hat. These are typically located near the temples.
- Align the attachment clips of the P3EV/2 adapter with the hard hat slots. The adapter is designed to fit snugly into these slots.
- Press the adapter firmly into the slots until you hear or feel a click, indicating it is securely locked in place. Ensure both sides of the adapter are equally secured.
- Gently pull on the adapter to confirm it is firmly attached and does not wobble.
4.2 Attaching a Visor to the Adapter
- With the adapter securely mounted on the hard hat, take your compatible 3M Peltor visor.
- Align the visor's attachment points with the corresponding slots or pins on the P3EV/2 adapter.
- Carefully push the visor into place until it clicks or locks onto the adapter. Ensure both sides of the visor are properly engaged.
- Test the visor's movement by raising and lowering it to ensure smooth operation and secure attachment.
5. Betjeningsvejledning
Once the visor is attached to the hard hat via the P3EV/2 adapter, it can be easily adjusted for use.
- Raising the Visor: To move the visor out of your field of vision, gently push it upwards until it locks into an elevated position.
- Lowering the Visor: To bring the visor down for face protection, gently pull it downwards until it covers your face. Ensure it is fully lowered for maximum protection.
- Justering af pasform: Some visors may allow for minor adjustments in angle or tension. Refer to your specific visor's manual for detailed adjustment instructions.
6. Vedligeholdelse
Proper maintenance extends the life of your P3EV/2 adapter and ensures continued safety.
- Rensning: Clean the adapter with mild soap and water. Avoid harsh chemicals or abrasive cleaners, as these can damage the material. Rinse thoroughly and air dry.
- Inspektion: Regularly inspect the adapter for any signs of wear, cracks, deformation, or damage to the attachment points. Pay close attention to the hard hat clips and visor attachment mechanism.
- Opbevaring: Store the adapter and visor in a clean, dry place away from direct sunlight and extreme temperatures when not in use.
- Udskiftning: Replace the adapter immediately if any damage is found or if it no longer securely attaches to the hard hat or visor.
7. Fejlfinding
| Problem | Mulig årsag | Løsning |
|---|---|---|
| Adapter does not attach securely to hard hat. | Incorrect alignment; hard hat slots are incompatible; adapter or hard hat slots are damaged. | Ensure correct alignment and firm pressure during installation. Verify hard hat compatibility. Inspect for damage and replace components if necessary. |
| Visor does not attach securely to adapter. | Incorrect alignment; visor attachment points are incompatible; adapter or visor attachment points are damaged. | Ensure correct alignment and firm pressure. Verify visor compatibility. Inspect for damage and replace components if necessary. |
| Visor does not stay in raised or lowered position. | Worn or damaged adapter mechanism; incorrect visor attachment. | Re-check visor attachment. Inspect the adapter's pivot points for wear or damage. Replace the adapter if the mechanism is faulty. |
If you encounter issues not listed here or if solutions do not resolve the problem, contact 3M customer support.
8. Specifikationer
- Modelnummer: P3EV/2-10
- Produktdimensioner: 9 x 6.62 x 4.75 tommer
- Produktvægt: Cirka 0.01 ounce
- Fabrikant: 3M
- Kompatibilitet: Designed for use with compatible 3M Peltor hard hats and visors.
9. Garanti og support
3M products are manufactured to high standards. For specific warranty information, please refer to the documentation included with your purchase or visit the official 3M website. For technical support, replacement parts, or further assistance, please contact 3M customer service through their official channels.
Kontaktoplysninger: Besøg venligst www.3m.com for support and contact details.