1. Introduktion og produktoversigtview
The Scheppach BTS800 is a versatile combination belt and disc sander designed for various finishing tasks on wood and wood-like materials. Its robust construction and powerful motor ensure efficient and precise sanding results for both hobbyists and professionals.
Nøglefunktioner omfatter:
- Powerful 370W induction motor for quiet and efficient operation.
- Horizontal and vertically adjustable sanding belt for increased application possibilities.
- Tilting sanding table for angled work.
- Solid cast iron construction providing stability and allowing for sufficient bearing pressure.
- Sanding plate with hook and loop fastening for quick and easy sanding disc changes.

Figur 1.1: Overview of the Scheppach BTS800 Belt and Disc Sander, showcasing dens kompakte design og nøglekomponenter.
2. Sikkerhedsinstruktioner
Always prioritize safety when operating power tools. Failure to follow these instructions may result in serious injury or damage to the machine.
- Personligt beskyttelsesudstyr (PPE): Always wear safety glasses, hearing protection, and a dust mask. Due to significant dust generation, consider a full dust extraction system.
- Arbejdsområde: Sørg for, at dit arbejdsområde er rent, godt oplyst og fri for rod. Hold børn og tilskuere væk.
- Tøj: Undgå løstsiddende tøj, smykker eller langt hår, der kan sætte sig fast i bevægelige dele.
- Strømtilslutning: Ensure the power supply matches the machine's requirements. Disconnect power before making adjustments, changing accessories, or performing maintenance.
- Sikkert arbejdsemne: Always secure the workpiece firmly. Do not attempt to sand small pieces that cannot be safely held.
- Bevar kontrol: Keep a firm grip on the workpiece. Be aware of kickback potential.
- Støvopsamling: Connect the sander to a dust collection system to minimize airborne dust, which can be a health hazard and fire risk.
- Maskinens stabilitet: The machine is heavy and designed for stability. Ensure it is placed on a stable, level surface.
- Never Bypass Safety Features: Do not remove or modify any safety guards or features, such as the stop on the top sanding belt.
3. Komponenter og funktioner
Familiarize yourself with the main components of your BTS800 sander:
- Slibebånd: Used for linear sanding operations.
- Sanding Disc: Used for disc sanding operations, often with a tilting table.
- Work Table (Disc Sander): Adjustable table for supporting workpieces during disc sanding.
- Geringsmåler: For precise angle sanding on the disc.
- Belt Tension Lever: For adjusting and releasing belt tension.
- Tracking Adjustment Knob: For ensuring the belt runs true.
- Tænd/sluk-knap: Hovedstrømstyring.
- Støvport: Connection point for dust extraction.

Figure 3.1: Illustrates the adjustable work table (0°-45°) for the disc sander and the horizontal/vertical adjustability of the sanding belt, enhancing the machine's versatility.
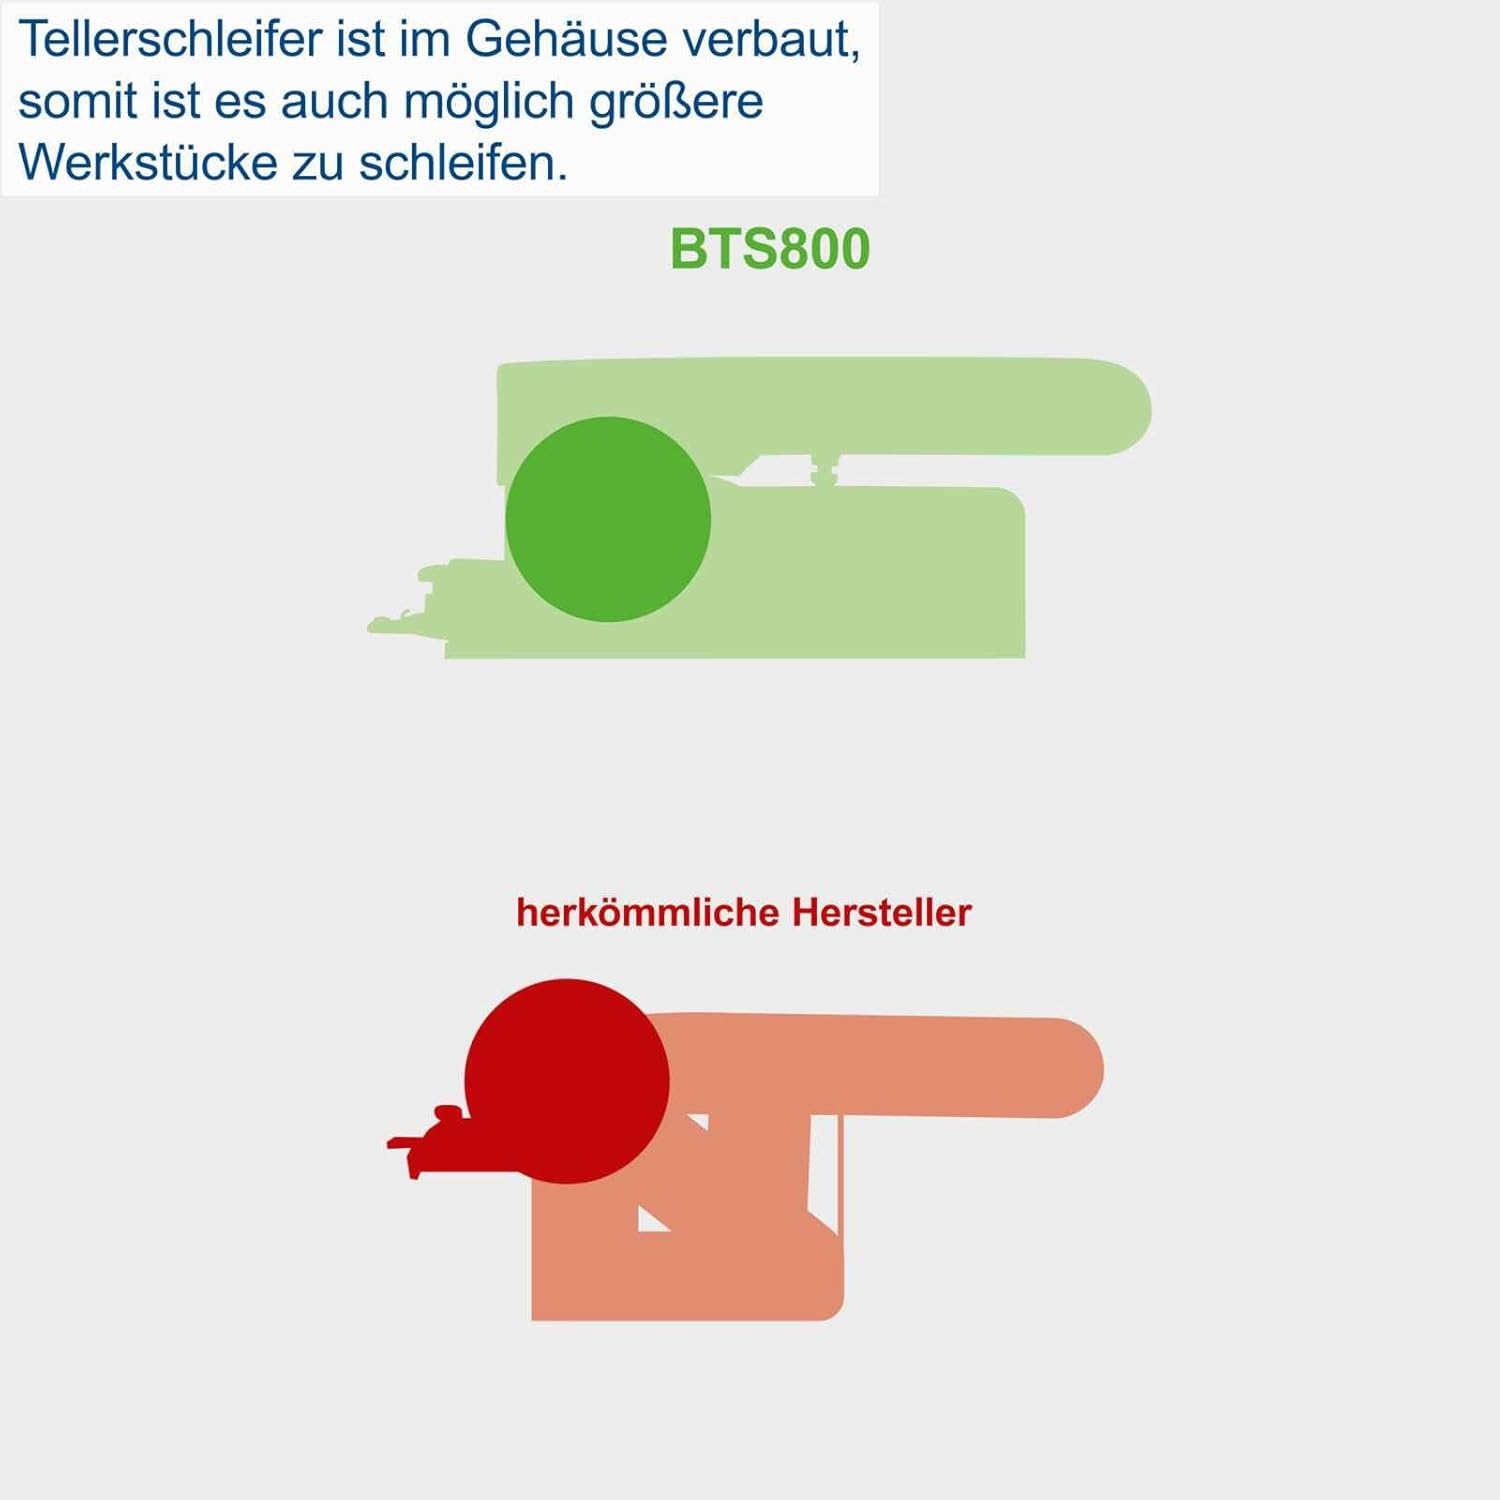
Figure 3.2: Shows how the disc sander is integrated into the BTS800 housing, allowing for sanding of larger workpieces compared to conventional designs.
4. Opsætning og montering
The Scheppach BTS800 comes largely pre-assembled. Follow these steps for final setup:
- Udpakning: Carefully remove the sander and all accessories from the packaging. Inspect for any shipping damage.
- Placering: Position the sander on a sturdy, level workbench. The heavy cast iron base provides stability, but securing it to the workbench with bolts (not included) is recommended for permanent setups.
- Attach Work Table: Secure the work table for the disc sander using the provided fasteners. Ensure it is properly aligned and can tilt smoothly.
- Install Miter Gauge: Insert the miter gauge into its slot on the work table.
- Støvopsamling: Connect a suitable dust extraction system to the dust port. This is crucial for maintaining a clean work environment and prolonging the life of the machine.
- Strømtilslutning: Sæt netledningen i en jordet stikkontakt.
5. Betjeningsvejledning
5.1. Generel drift
- Before starting, ensure all adjustments are tight and the workpiece is ready.
- Turn on the sander using the On/Off switch. Allow the motor to reach full speed before applying the workpiece.
- Apply light, even pressure when sanding. Excessive pressure can overload the motor, reduce sanding efficiency, and damage the workpiece or abrasive.
- Move the workpiece smoothly across the abrasive surface to ensure even material removal and prevent burning.
- Always sand with the rotation of the disc or the direction of the belt.
5.2. Using the Belt Sander
The belt sander can be used in both horizontal and vertical orientations.
- Vandret position: Ideal for sanding edges, ends, and small flat surfaces. The top stop ensures safe operation and prevents the workpiece from flying off.
- Lodret position: Useful for contour sanding, shaping, and working on larger pieces. Adjust the belt angle by loosening the locking mechanism and pivoting the belt assembly.

Figure 5.1: Demonstrates sanding a large flat surface using the belt sander in its horizontal configuration, highlighting its capability for effective material removal.

Figure 5.2: Shows the belt sander adjusted to a vertical position, allowing for sanding of a wooden block, which expands the range of applications.
5.3. Using the Disc Sander
The disc sander is excellent for creating smooth curves, chamfers, and precise angles.
- Bordjustering: The disc sander's work table can be tilted from 0° to 45° for bevel sanding. Loosen the locking knob, set the desired angle using the scale, and re-tighten.
- Geringsmåler: Use the miter gauge to guide your workpiece for accurate angle sanding.
- Always sand on the downward rotating side of the disc to prevent the workpiece from being thrown upwards.

Figure 5.3: Illustrates the use of the disc sander with the work table tilted to an angle (0°-45°), enabling precise bevel and angle sanding.
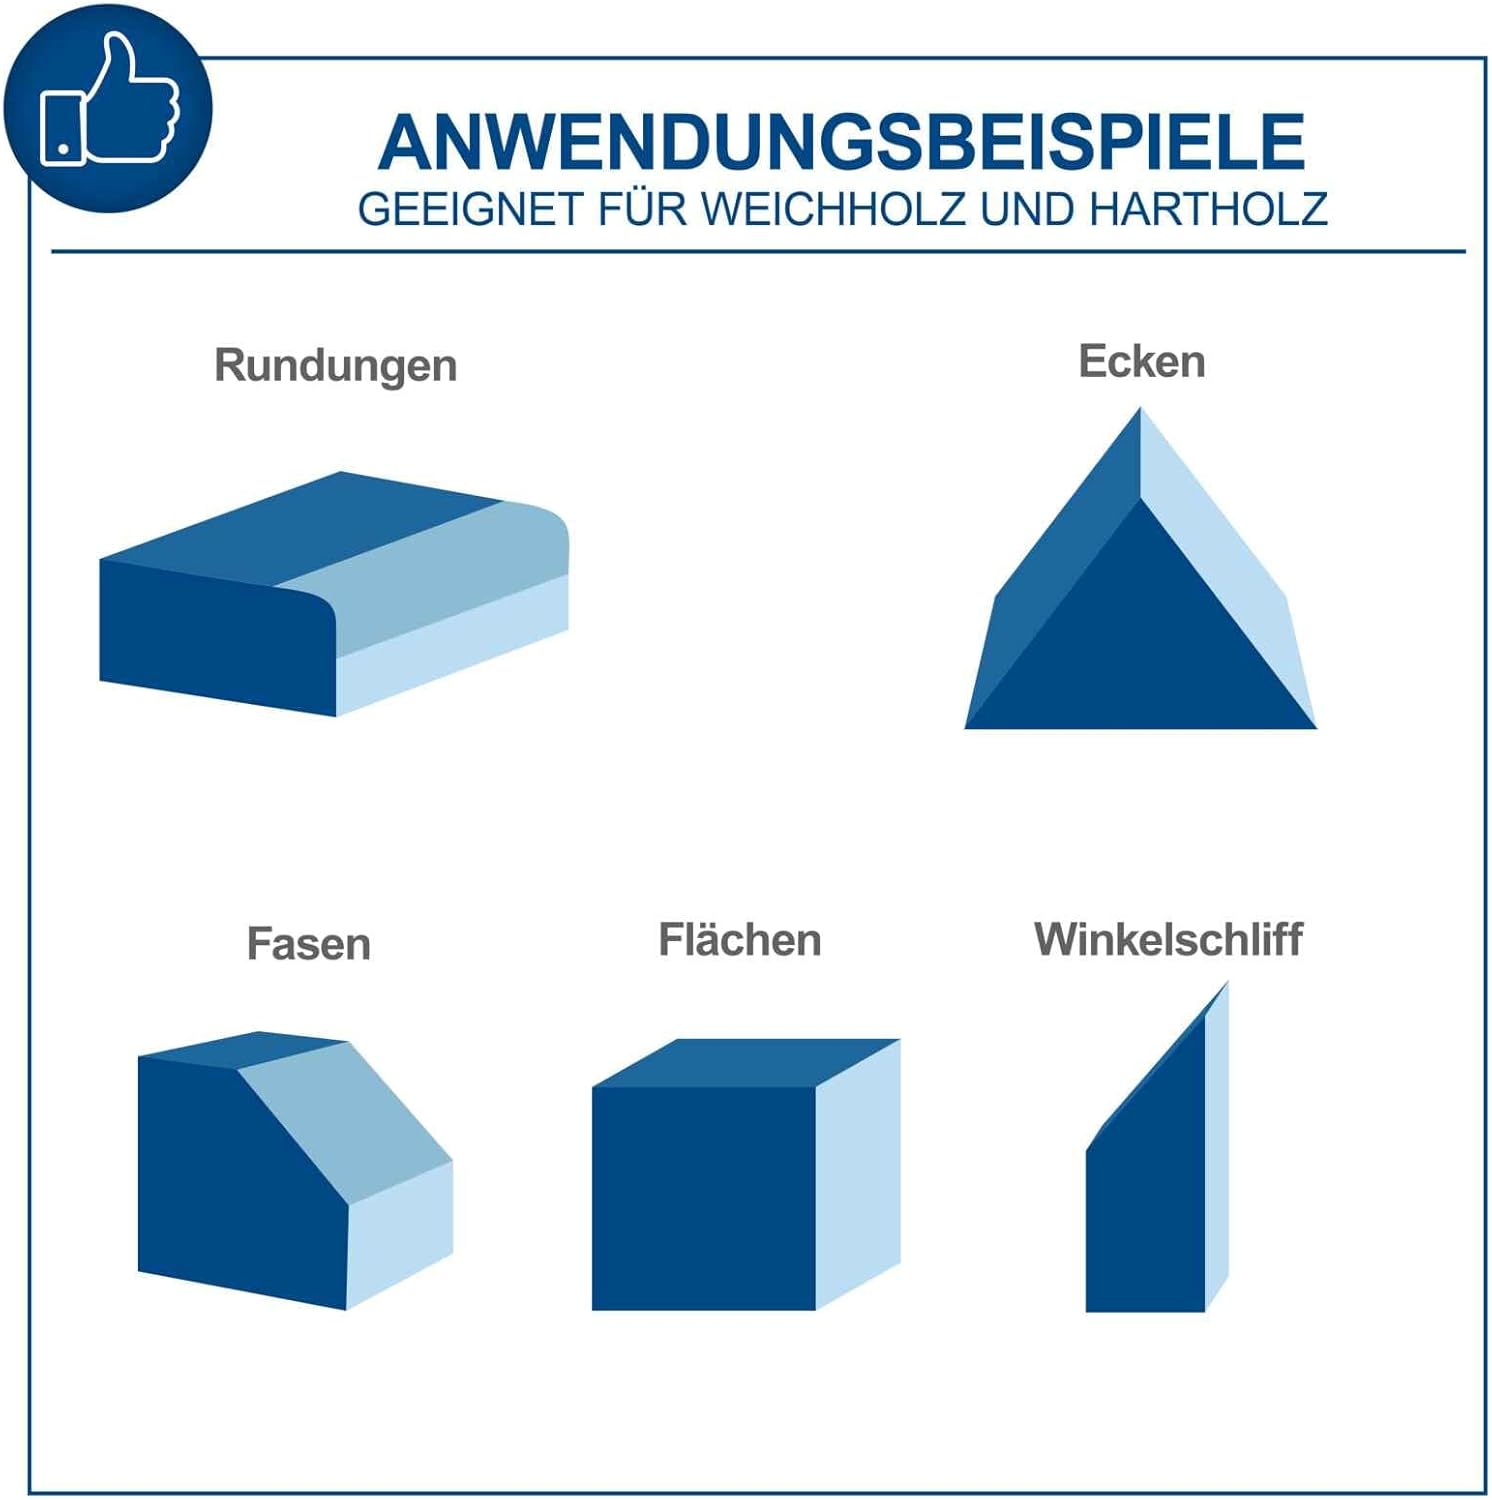
Figure 5.4: Provides visual examples of various sanding applications possible with the BTS800, including rounding, creating corners, chamfers, flat surfaces, and angled cuts, suitable for both soft and hard wood.
6. Vedligeholdelse
Regular maintenance ensures optimal performance and extends the life of your sander. Always disconnect power before performing any maintenance.
6.1. Rensning
- After each use, clear dust and debris from the machine, especially around the motor vents, belt, and disc areas. Use a brush or compressed air.
- Ensure the dust collection port is clear and unobstructed.
6.2. Changing Sanding Belt
- Afbryd strømmen.
- Locate the belt tension release lever and disengage it to loosen the belt.
- Slide the old belt off the rollers.
- Slide the new belt onto the rollers, ensuring the directional arrow on the belt matches the arrow on the machine.
- Re-engage the tension lever.
- Manually rotate the belt a few times to check tracking. Adjust the tracking knob if the belt drifts to one side.
6.3. Changing Sanding Disc
The sanding disc uses a hook and loop (Velcro) fastening system for quick changes.
- Afbryd strømmen.
- Simply peel the old sanding disc off the backing plate.
- Align the new sanding disc with the backing plate and press firmly to secure it.
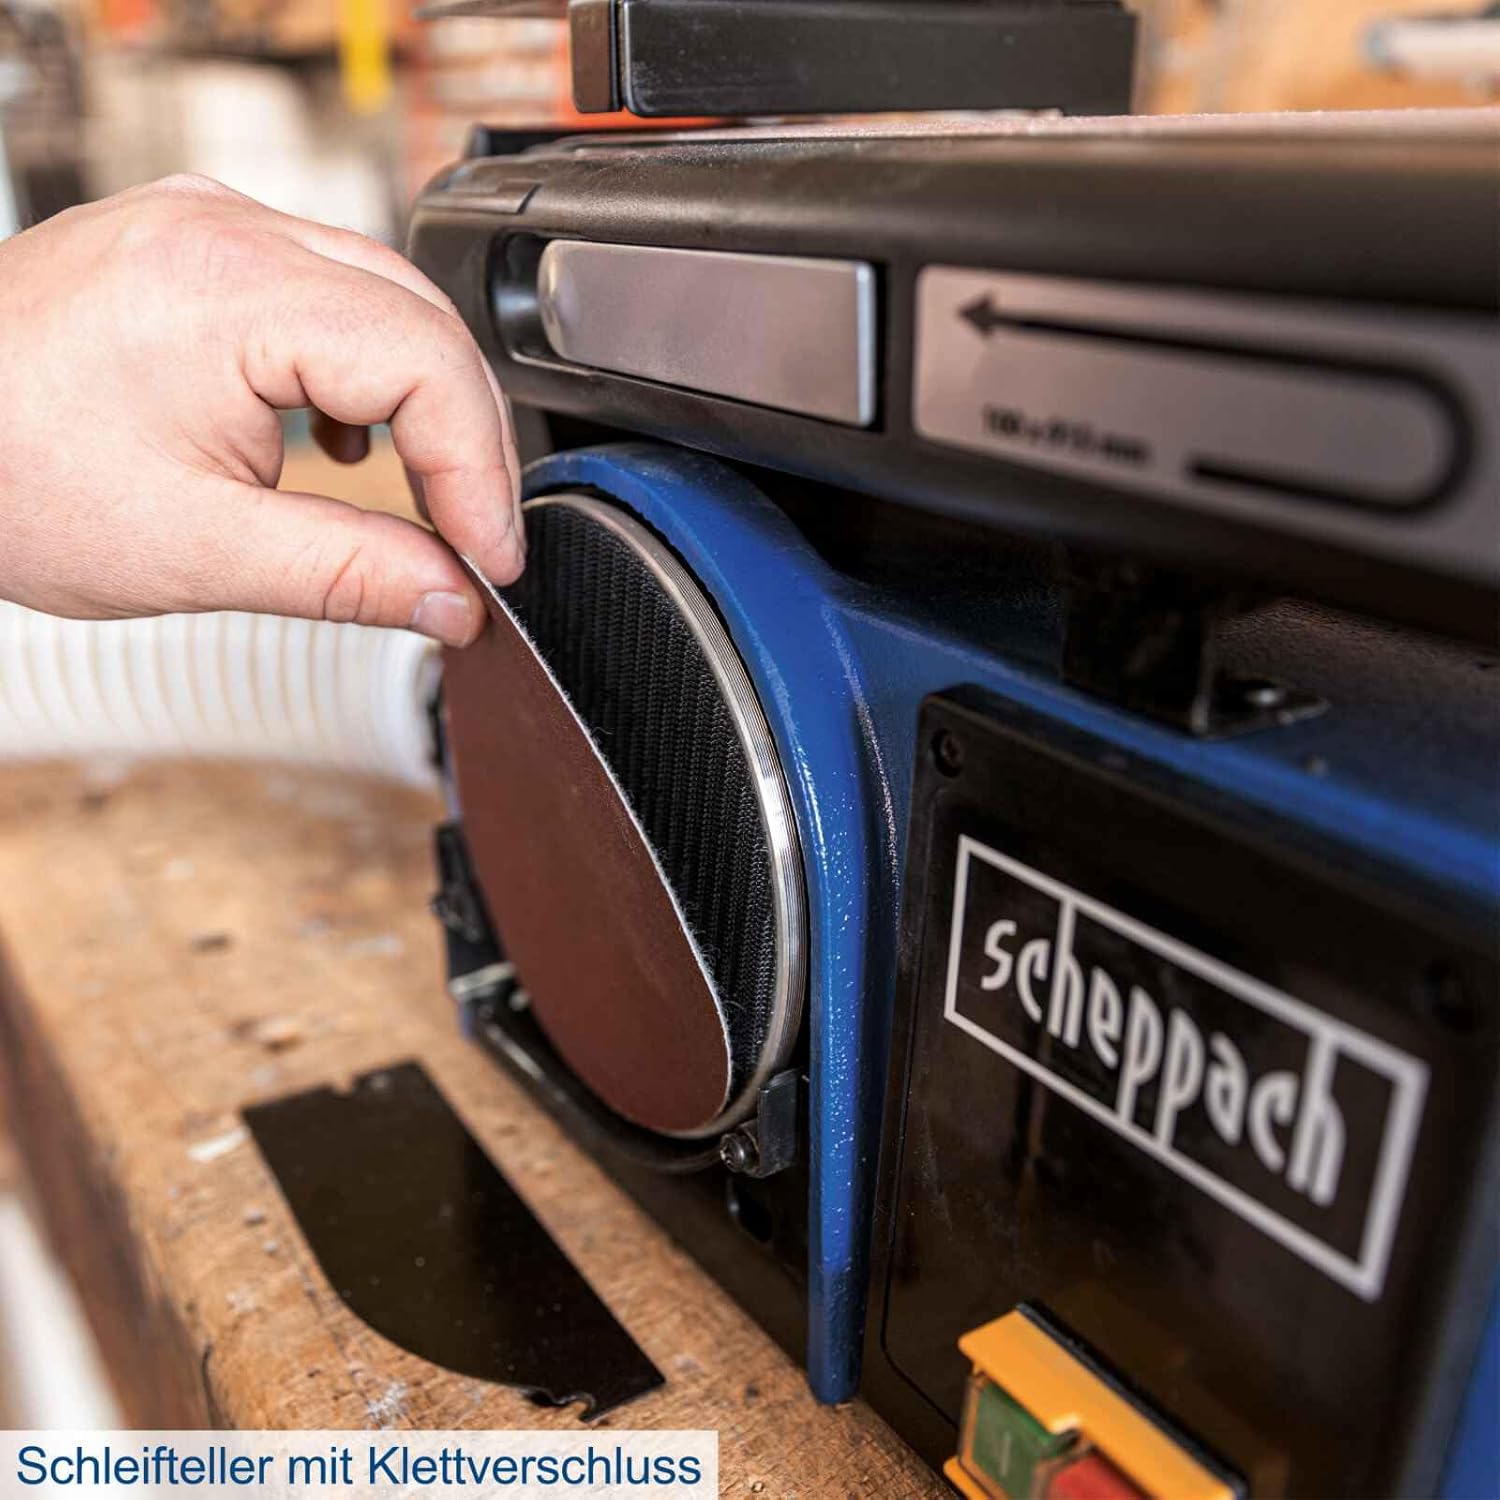
Figure 6.1: Illustrates the ease of changing the sanding disc due to its hook and loop (Velcro) fastening system, allowing for quick replacement of abrasive paper.
7. Fejlfinding
| Problem | Mulig årsag | Løsning |
|---|---|---|
| Sander starter ikke. | Ingen strømforsyning; defekt afbryder; motor overbelastet. | Check power cord and outlet. Ensure switch is fully engaged. Allow motor to cool if overloaded. Consult qualified technician if problem persists. |
| Overdreven vibration eller støj. | Loose components; worn belt/disc; unbalanced disc. | Check all fasteners. Replace worn abrasives. Ensure disc is properly seated. |
| Belt tracking issues (belt runs off). | Incorrect belt tension; misaligned tracking. | Adjust belt tension. Use the tracking adjustment knob to center the belt. |
| Poor sanding results / Slow material removal. | Worn abrasive; incorrect grit; excessive pressure. | Replace sanding belt/disc. Use appropriate grit for the task. Apply light, even pressure. |
| High dust accumulation. | Dust collection system not connected or clogged; inadequate suction. | Ensure dust collection is properly connected and clear. Check for blockages in hoses or ports. Use a more powerful dust extractor if needed. |
8. Specifikationer
| Feature | Detalje |
|---|---|
| Modelnummer | BTS800 |
| Mærke | Scheppach |
| Motorkraft | 370W (Induction Motor) |
| Sanding Belt Dimensions | (Specific dimensions not provided in input, typical for this model is 100 x 915 mm) |
| Slibeskive Diameter | (Specific diameter not provided in input, typical for this model is 150 mm) |
| Disc Table Tilt | 0° - 45° |
| Konstruktion | Massivt støbejern |
| Samlede dimensioner (ca.) | 470 x 365 x 295 mm (from image 61Rt79d7yhL) |
9. Garanti og support
For information regarding warranty coverage, technical support, or spare parts, please refer to the documentation provided with your purchase or contact Scheppach customer service directly. Contact details can typically be found on the manufacturer's official webwebstedet eller på produktemballagen.
Bemærk: Specifikke garantivilkår kan variere afhængigt af region og forhandler. Gem venligst din købsbevis til garantikrav.


