Indledning
This manual provides detailed instructions for the safe and effective use of your GROOVYPETS® 1-Dog Remote Dog Training Collar System. This system is designed to assist in training your dog through humane vibration and static correction, helping to reinforce desired behaviors and correct unwanted ones.
Please read this manual thoroughly before operating the device to ensure proper usage and to maximize the training effectiveness while ensuring your pet's safety and comfort.
Vigtige sikkerhedsoplysninger:
- This device is intended for dog training purposes only.
- Do not use this collar on aggressive dogs.
- Undgå at lade halsbåndet sidde på hunden i mere end 12 timer om dagen for at forhindre hudirritation.
- Regularly check the contact points and your dog's neck for signs of irritation or rash.
- The receiver is water-resistant, not waterproof. Do not submerge it in water.
Pakkens indhold
Bekræft, at alle nedenstående varer er inkluderet i din pakke:
- One rechargeable remote with lanyard and belt-clip
- One water-resistant rechargeable receiver with adjustable strap (6"-25" / 15-65cm)
- Wall charger with dual USB charging cable
- Metal prongs (short and long for different fur lengths)
- Shock test light
- Brugervejledning (dette dokument)

Produktegenskaber
- Rechargeable Remote: Compact (13cm length), lightweight (1.7oz/48g) design with lanyard and belt-clip for easy carrying.
- Genopladelig modtager: Water-resistant (not waterproof) with an adjustable strap fitting 6-25" (15cm-65cm) neck sizes.
- Træningstilstande: Strong humane vibration command and static correction (shock) with Low (L) and High (H) levels.
- Rækkevidde: Effective operating range of up to 600 feet.
- Power knap: Remote features a power button to lock buttons and prevent accidental activation.
- Responsive Corrections: Receiver delivers single corrections per button push (not multiple in a row).
Opsætning
1. Opladning af enhederne
Before first use, fully charge both the remote transmitter and the receiver collar. Use the provided wall charger and dual USB charging cable.
- Connect the charging cable to the charging ports on both the remote and the receiver.
- Sæt vægopladeren i en almindelig stikkontakt.
- Charging indicators (LEDs) will illuminate during charging and typically change color or turn off when fully charged. Refer to the specific LED behavior section for details.
2. Attaching the Collar Strap and Contact Points
- Thread the adjustable strap through the receiver unit.
- Select the appropriate metal prongs (contact points) based on your dog's fur length. Use shorter prongs for short-haired dogs and longer prongs for long-haired dogs to ensure proper skin contact.
- Screw the chosen prongs securely onto the receiver.
3. Sådan monterer du halsbåndet på din hund
- Placer modtagerhalsbåndet om din hunds hals, og sørg for, at kontaktpunkterne er placeret under halsen.
- Adjust the strap so that it is snug but not too tight. You should be able to fit one or two fingers comfortably between the strap and your dog's neck. Proper fit is crucial for consistent contact and effectiveness.
- Trim eventuelt overskydende remlængde, hvis det er nødvendigt.
4. Testing the Static Correction (Shock) Function
Use the provided test light to verify the static correction function before placing the collar on your dog.
- Sørg for, at modtageren er tændt.
- Hold the test light's metal wires across the receiver's contact points.
- Press the 'L' (Low shock) or 'H' (High shock) button on the remote. The test light should illuminate, indicating the static correction is working.
Betjeningsvejledning
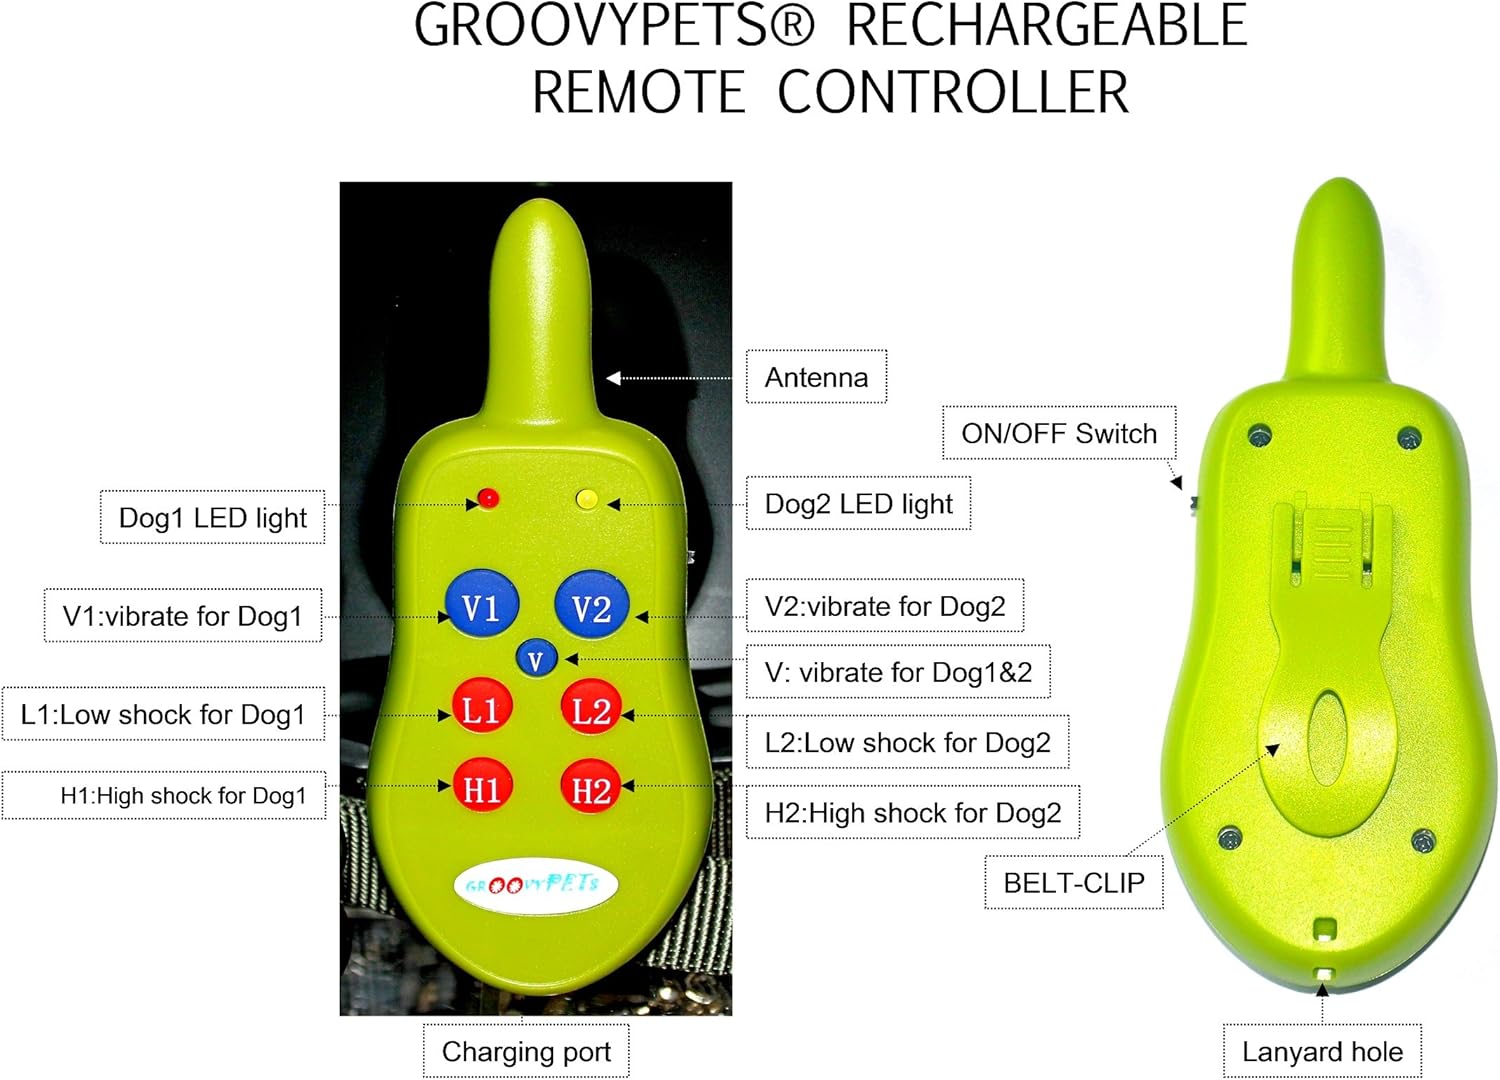
Fjernbetjening overview
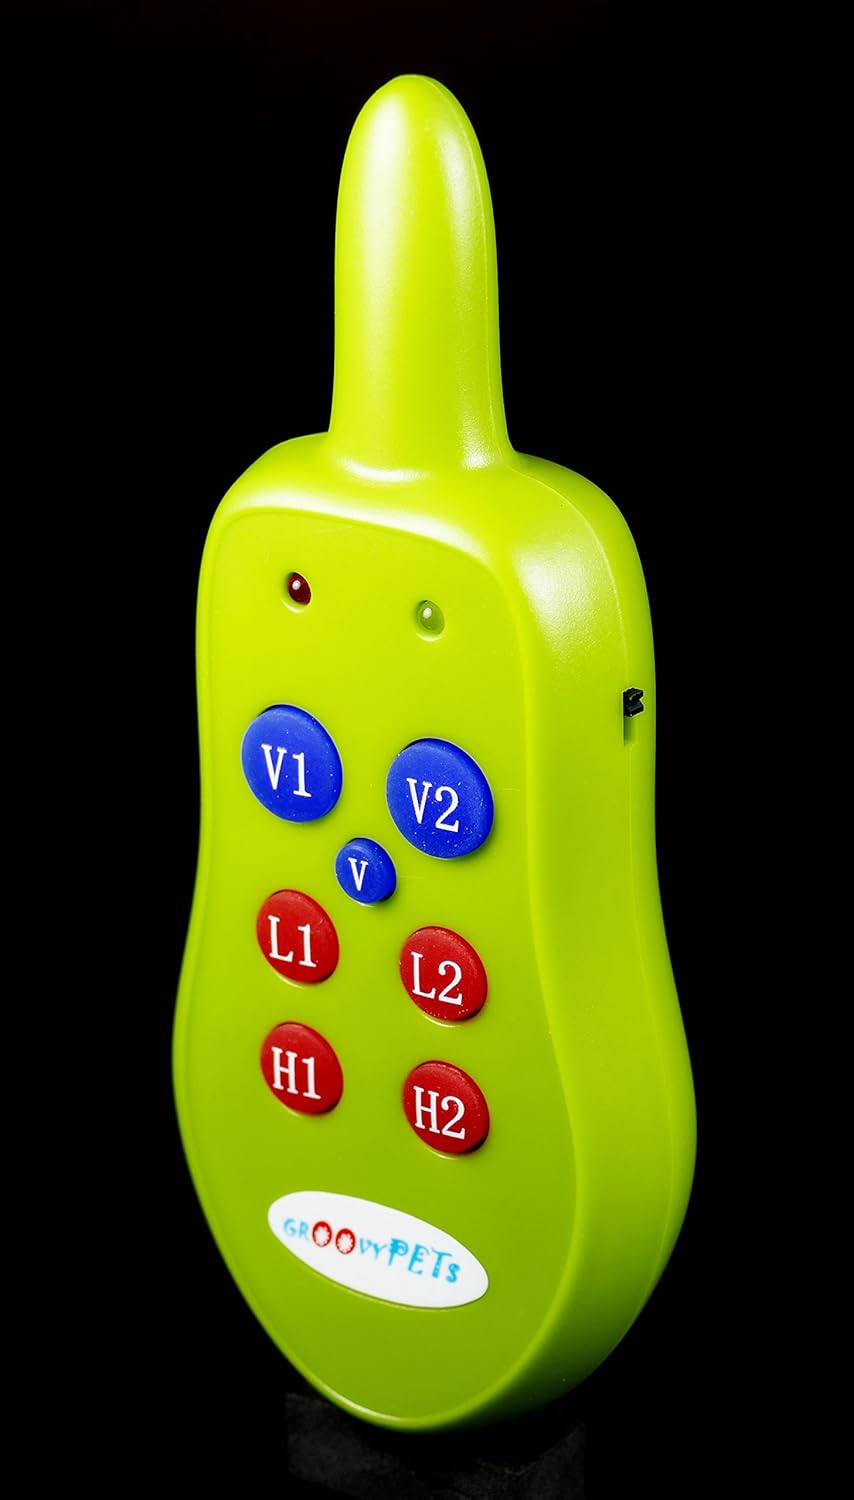
- TÆND/SLUK -kontakt: Located on the side of the remote. Use this to power on/off the remote and to lock the buttons to prevent accidental activation.
- V1 / V2 Buttons: Activate vibration for Dog 1 or Dog 2 (if using a second collar, not included in this 1-dog system).
- V Button (Center): Activates vibration for both Dog 1 and Dog 2 simultaneously.
- L1 / L2 Buttons: Activate Low static correction for Dog 1 or Dog 2.
- H1 / H2 Buttons: Activate High static correction for Dog 1 or Dog 2.
- LED lys: Indicate power status, battery level, and signal transmission.

Using the Training Modes
The system offers two primary training modes: Vibration and Static Correction (Shock).
- Vibrationstilstand: Press the 'V1' button (for Dog 1) to deliver a humane vibration. This is often used as an initial warning or for sensitive dogs.
- Static Correction (Shock) Mode:
- Press the 'L1' button for a Low level static correction. This is suitable for small or sensitive dogs.
- Press the 'H1' button for a High level static correction. This provides a more noticeable jolt for larger or more headstrong dogs.
Note: The receiver delivers a single correction per button press. Holding the button down will not result in continuous correction.
Effektiv rækkevidde: The remote operates effectively up to 600 feet. Environmental factors, such as terrain, weather, and electromagnetic interference, can affect the actual range.
Opretholdelse
- Rensning: Tør fjernbetjeningen og modtageren af med reklameamp klæde. Brug ikke skrappe kemikalier eller slibende rengøringsmidler.
- Batteripleje: Recharge the devices regularly, even if not in frequent use, to maintain battery health. Avoid fully depleting the battery for extended periods.
- Opbevaring: Opbevar systemet et køligt og tørt sted, når det ikke er i brug.
- Vandtæthed: The receiver is water-resistant, meaning it can withstand splashes or light rain. It is not designed for swimming or submersion. Ensure the charging port cover is securely closed to maintain water resistance.
Fejlfinding
| Problem | Mulig årsag | Løsning |
|---|---|---|
| Collar not activating/no response. | Low battery on remote or receiver; devices not paired; out of range; improper collar fit; contact points not touching skin. | Charge both devices; ensure devices are powered on and paired (refer to pairing instructions if available, though not explicitly detailed in product description); move closer to dog; adjust collar fit; ensure contact points are making good contact with dog's skin. |
| Static correction seems weak or ineffective. | Improper collar fit; long fur obstructing contact; low battery. | Adjust collar for snug fit; use longer contact points for long-haired dogs; ensure battery is fully charged. |
| Remote buttons are unresponsive. | Remote is off or locked. | Ensure the ON/OFF switch is in the 'ON' position and not in the locked position. |
Specifikationer
| Feature | Detalje |
|---|---|
| Modelnummer | GPR-1_A |
| Fjern rækkevidde | Op til 600 fod |
| Receiver Water Resistance | Vandtæt (ikke vandtæt) |
| Collar Strap Adjustment | 6-25 tommer (15-65 cm) |
| Fjerndimensioner | Approx. 13 cm (length) |
| Fjernbetjent vægt | 1.7 oz (48g) |
| Strømkilde | Rechargeable batteries (built-in) |
| Materiale | Metal (contact points) |
| ASIN | B005Z27X8K |
Garanti og support
This GROOVYPETS® product comes with a six-month free replacement warranty from the seller.
For any questions, troubleshooting assistance, or warranty claims, please contact the seller directly through your purchase platform. Provide your order details and a clear description of the issue for prompt support.
For additional resources and training tips, you may visit the official GROOVYPETS website or consult with a professional dog trainer.


