1. Introduktion
Thank you for choosing the lightmaXX DJ Scan LED. This professional LED scanner is designed to provide dynamic lighting effects for various applications, including DJ sets, clubs, and events. Featuring a powerful LED light source and precise scanning capabilities, it offers vibrant colors and versatile patterns to enhance any performance space.
This manual provides essential information for the safe and efficient operation of your lightmaXX DJ Scan LED. Please read it thoroughly before installation and use, and keep it for future reference.

Figur 1: Overview of the lightmaXX DJ Scan LED unit.
2. Sikkerhedsinstruktioner
For at sikre sikker drift skal du overholde følgende sikkerhedsforanstaltninger:
- Tilslut altid enheden til en jordforbundet stikkontakt.
- Udsæt ikke enheden for regn eller fugt.
- Sørg for tilstrækkelig ventilation omkring enheden for at forhindre overophedning.
- Undgå direkte øjeneksponering for lyskilden.
- Afbryd strømmen før rengøring eller service.
- Kun kvalificeret personale bør udføre reparationer.
- Holdes væk fra brændbare materialer.
3. Pakkens indhold
Bekræft at alle varer er til stede i pakken:
- lightmaXX DJ Scan LED unit
- Strømkabel
- Brugervejledning (dette dokument)
- Monteringsbeslag (hvis medfølger)
4. Funktioner
The lightmaXX DJ Scan LED offers a range of features for dynamic lighting:
- Lyskilde: Powerful LED technology for bright and efficient illumination.
- Farveblanding: RGBAW (Red, Green, Blue, Amber, White) color mixing for a wide spectrum of colors.
- Scannertype: Designed as a scanner for precise beam movement and pattern projection.
- Kontrollere: DMX control for integration into professional lighting setups.
- Vise: Digital display for easy navigation and setting adjustments.

Figur 2: Forside view showing the LED lens and light output.
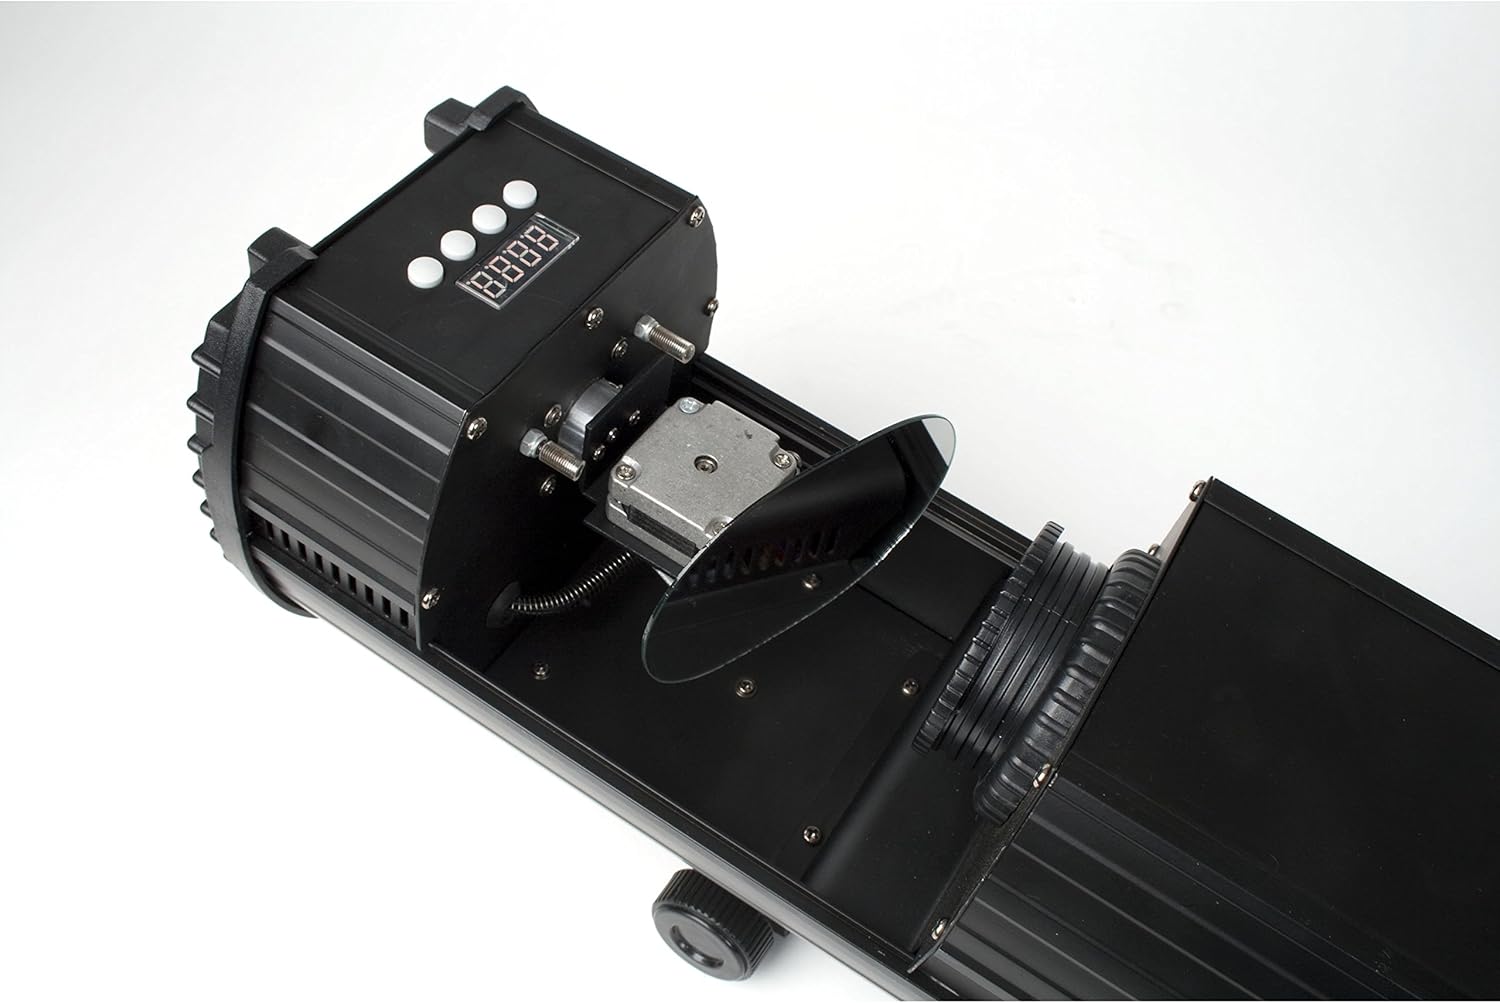
Figure 3: Internal mirror mechanism for dynamic scanning effects.
5. Opsætning
5.1 Montering
The lightmaXX DJ Scan LED can be mounted on a truss, stand, or placed on a flat surface. Ensure the mounting surface or structure can support the weight of the unit securely. Use appropriate clampog sikkerhedskabler ved montering over hovedhøjde.
5.2 Strømtilslutning
Connect the supplied power cable to the power input on the rear of the unit and then to a suitable grounded power outlet (230V AC, 50Hz). Ensure the power switch is in the OFF position before connecting.

Figure 4: Rear panel with power input and cooling fan.
5.3 DMX-tilslutning (valgfrit)
For DMX control, connect a standard 3-pin DMX cable from your DMX controller's output to the DMX IN port on the lightmaXX DJ Scan LED. If connecting multiple units, daisy-chain them by connecting the DMX OUT of the first unit to the DMX IN of the next.

Figure 5: Control panel and DMX input/output ports.
6. Betjening
6.1 Kontrolpanel
The control panel features a digital display and several buttons for navigating menus and adjusting settings. Refer to Figure 5 for the location of the control panel.
- MENU: Accesses the main menu or goes back to the previous menu.
- OP NED: Navigerer gennem menupunkter eller justerer værdier.
- GÅ IND: Bekræfter et valg eller gemmer en indstilling.
6.2 driftstilstande
The lightmaXX DJ Scan LED typically supports the following operating modes:
- DMX-tilstand: Allows full control over all functions via a DMX controller. Set the DMX address using the control panel.
- Lyd aktiv tilstand: The unit reacts to sound via a built-in microphone, creating dynamic light shows synchronized with music.
- Automatisk tilstand: Runs pre-programmed light sequences automatically.
- Master/Slave-tilstand: Connect multiple units where one acts as the master, controlling the others (slaves) for synchronized operation without a DMX controller.

Figur 6: Eksample of a green light beam projection.

Figur 7: Eksample of a red light beam projection.
7. Vedligeholdelse
7.1 Rengøring
Regular cleaning helps maintain optimal performance. Disconnect the unit from power before cleaning.
- Brug en blød, fnugfri klud til at tørre ydersiden af.
- For lenses and mirrors, use a specialized lens cleaning solution and cloth to avoid scratches.
- Rengør køleventilatoren og ventilationsåbningerne med jævne mellemrum for at sikre korrekt luftgennemstrømning.
7.2 Opbevaring
When not in use, store the unit in a dry, dust-free environment, preferably in its original packaging or a protective case.
8. Fejlfinding
Hvis du støder på problemer, kan du se tabellen nedenfor for almindelige problemer og løsninger:
| Problem | Mulig årsag | Løsning |
|---|---|---|
| Enheden tænder ikke. | No power connection; faulty cable; blown fuse. | Check power cable connection; try another outlet; replace fuse if necessary. |
| Ingen lysudgang. | Unit in standby; DMX signal issue; LED failure. | Check operating mode; verify DMX connection and address; contact support if LED is faulty. |
| Ingen DMX-styring. | Forkert DMX-adresse; defekt DMX-kabel; problem med DMX-controlleren. | Set correct DMX address; test DMX cable; check DMX controller settings. |
| Beam movement is erratic. | Obstruction; internal mechanism issue. | Ensure no physical obstructions; contact support if issue persists. |
9. Specifikationer
| Feature | Detalje |
|---|---|
| Modelnummer | LCD-502 |
| Lyskilde | LED |
| Lys type | Scanner |
| Farve blanding | RGBAW (Red, Green, Blue, Amber, White) |
| Strømforsyning | 230V AC, 50Hz (typical) |
| Kontroltilstande | DMX, Sound Active, Auto, Master/Slave |
| ASIN | B004CTLQXK |

Figure 8: Energy efficiency information for the LED light source.
10. Garanti og support
lightmaXX products are designed for reliability and performance. For warranty information and technical support, please refer to the warranty card included with your product or visit the official lightmaXX webwebsted. Gem din købsbevis i tilfælde af garantikrav.
For further assistance, please contact lightmaXX customer service.


