1. Introduktion
This manual provides essential instructions for the proper use, installation, maintenance, and care of your BESTRON DBM 2007 Dough Kneader. Please read this manual thoroughly before first use to ensure optimal performance and longevity of the product. This dough kneader is designed specifically for use with compatible bread maker models to facilitate the mixing and kneading of various dough types.
2. Produktet er slutview
The BESTRON DBM 2007 Dough Kneader is a replacement or spare part for your bread maker, crucial for the dough preparation process. Its robust design ensures efficient and consistent kneading.
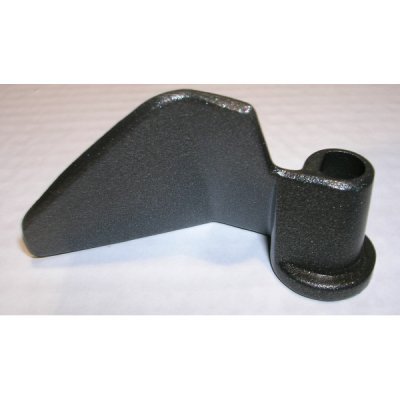
Figur 1: BESTRON DBM 2007 Dough Kneader paddle. This image displays the BESTRON DBM 2007 dough kneader paddle, a dark grey, robust metal component designed for mixing and kneading dough within a bread maker. It features a broad, angled blade on one side and a cylindrical shaft with a square opening on the other, which connects to the bread maker's drive mechanism.
3. Opsætning og installation
- Sørg for sikkerhed: Before installing or removing the dough kneader, always ensure your bread maker is unplugged from the power outlet and completely cooled.
- Prepare Bread Pan: Remove the bread pan from your bread maker.
- Install Kneader: Locate the drive shaft at the bottom of the bread pan. Align the square opening of the BESTRON DBM 2007 Dough Kneader with the drive shaft. Push the kneader firmly down onto the shaft until it is securely seated.
- Tjek stabilitet: Gently tug on the kneader to ensure it is properly attached and does not wobble excessively.
- Klar til brug: Once installed, the bread pan with the kneader can be placed back into the bread maker, ready for ingredients.
4. Betjeningsvejledning
The dough kneader operates automatically as part of your bread maker's programmed cycle. Follow your bread maker's specific instructions for adding ingredients and selecting programs.
- Ingrediensplacering: Add liquid ingredients first, followed by dry ingredients, and finally yeast, as per your recipe and bread maker's recommendations. Ensure the kneader is not obstructed by large clumps of ingredients.
- Kneading Cycle: The bread maker will automatically engage the kneader during the mixing and kneading phases of the selected program.
- Kneader Removal (Optional): Some recipes or bread makers suggest removing the kneader before the baking cycle to prevent a hole in the finished loaf. If you choose to do this, carefully remove the bread pan after the final kneading cycle (before baking begins), remove the dough, extract the kneader, and then reshape the dough before returning it to the pan for baking. Always use heat-resistant gloves if the pan is warm.
5. Vedligeholdelse og pleje
Proper cleaning and maintenance will extend the life of your dough kneader.
- Øjeblikkelig rengøring: After each use, and once the kneader has cooled, remove it from the bread pan.
- Rengøringsmetode: As per product specifications, tørres af med en tør klud. For stubborn dough residue, a slightly damp cloth can be used, followed immediately by thorough drying. Avoid abrasive cleaners or scouring pads, which can damage the surface.
- Opbevaring: Store the clean and dry kneader in a safe place, preferably with your bread maker accessories, to prevent loss or damage.
6. Fejlfinding
If you encounter issues with your dough kneader, consider the following:
- Kneader Not Turning:
- Ensure the kneader is correctly seated on the drive shaft.
- Check if the bread maker's drive mechanism is functioning correctly (refer to your bread maker's manual).
- Verify that the dough is not too stiff or overloaded, which can impede movement.
- Dough Sticking to Kneader:
- This is common. Ensure the kneader is thoroughly cleaned after each use.
- Lightly grease the kneader with a small amount of cooking oil before adding ingredients to help prevent sticking.
- Kneader Detaches During Operation:
- Ensure it was firmly pushed onto the drive shaft during installation.
- Check for wear on the kneader's opening or the bread maker's drive shaft. If significant wear is present, replacement may be necessary.
7. Specifikationer
| Produktnavn | Dejæltemaskine |
| Modelnummer | DBM 2007 |
| Mærke | Bestron |
| Fabrikant | BESTRON |
| Produktdimensioner | 4.96 x 2.68 x 0.63 tommer |
| Varens vægt | 0.64 ounce |
| Produktplejevejledning | Tør af med en tør klud |
8. Garanti og support
For warranty information and customer support, please refer to the documentation provided with your original bread maker or contact BESTRON customer service directly. Keep your purchase receipt as proof of purchase.
For further assistance, please visit the official Bestron webwebstedet eller kontakt deres kundesupportkanaler.


