Indledning
Welcome to the Greenlee DM-810A True RMS Digital Multimeter user manual. This document provides essential information for the safe and effective operation, maintenance, and troubleshooting of your device. The DM-810A is designed for accurate measurement of AC/DC voltage, AC/DC current, resistance, capacitance, frequency, and continuity, making it a versatile tool for electrical professionals.
Sikkerhedsoplysninger
For at sikre sikker betjening og service af måleren skal du følge disse instruktioner. Manglende overholdelse af disse advarsler kan resultere i alvorlig personskade eller død.
- Always read and understand the entire instruction manual before using the meter.
- Overskrid ikke de maksimale inputgrænser for nogen funktion.
- Vær forsigtig, når du arbejder med voltagover 30V AC RMS, 42V peak eller 60V DC. Disse voluminertages udgør en stødfare.
- Always use the proper terminals, function, and range for your measurements. The DM-810A features a Beep-Jack audible and visible warning to guard against improper A and mA terminal plug-in.
- Inspect test leads for damaged insulation or exposed metal before each use. Replace if damaged.
- Brug ikke måleren, hvis den ser beskadiget ud, eller hvis huset er åbent.
- Sørg for, at batteridækslet er forsvarligt lukket før brug.
- Adhere to local and national safety codes. Use personal protective equipment (PPE) such as approved safety glasses and electrically insulated gloves when necessary.
Produkt overview
This section identifies the key parts and controls of your Greenlee DM-810A multimeter.

Figur 1: Front view of the Greenlee DM-810A Digital Multimeter, showing the display, function selector dial, and input jacks.
- Vise: Large LCD for clear readings, often with dual display capability.
- Funktionsvælger: Used to select the desired measurement function (e.g., V~, V-, A~, A-, Ω, CAP, Hz, Continuity).
- Indgangsstik:
- COM: Fælles (negativ) indgang for alle målinger.
- VΩHz: Positiv indgang for volumentage, modstands-, frekvens- og kapacitansmålinger.
- mAμA: Positive input for milliampere og mikroamperestrømsmålinger.
- A: Positive input for amperestrømsmålinger.
- Knapper:
- VÆLGE: Toggles between functions on a single dial position (e.g., AC/DC voltage, diode/kontinuitet).
- RÆKKEVIDDE: Manually selects measurement range or returns to auto-ranging.
- △: Delta function for relative measurements.
- HOLDE: Fryser den aktuelle displayaflæsning.
Opsætning
Installation af batteri
The Greenlee DM-810A requires batteries for operation. Refer to the back of the meter for the battery compartment. Use a screwdriver to open the compartment, insert the specified batteries (typically AA or 9V, check the compartment label), observing correct polarity, and then securely close the cover.
Tilslutning af prøveledninger
Always ensure test leads are properly connected before taking measurements.
- Indsæt den sorte testledning i KOM (fælles) indgangsstik.
- Insert the red test lead into the appropriate positive input jack based on the measurement you intend to make:
- For bdtage, resistance, capacitance, or frequency, use the VΩHz stik.
- For milliampere or microampere current, use the mAμA stik.
- For ampere current, use the A stik.
- The meter's Beep-Jack feature will provide an audible and visible alert if the function selector is set to a current measurement (A or mA) but the test lead is incorrectly plugged into a voltage/resistance jack, or vice-versa. This helps prevent damage to the meter and ensures correct setup.
Betjeningsvejledning
This section details how to perform various measurements with your DM-810A multimeter.
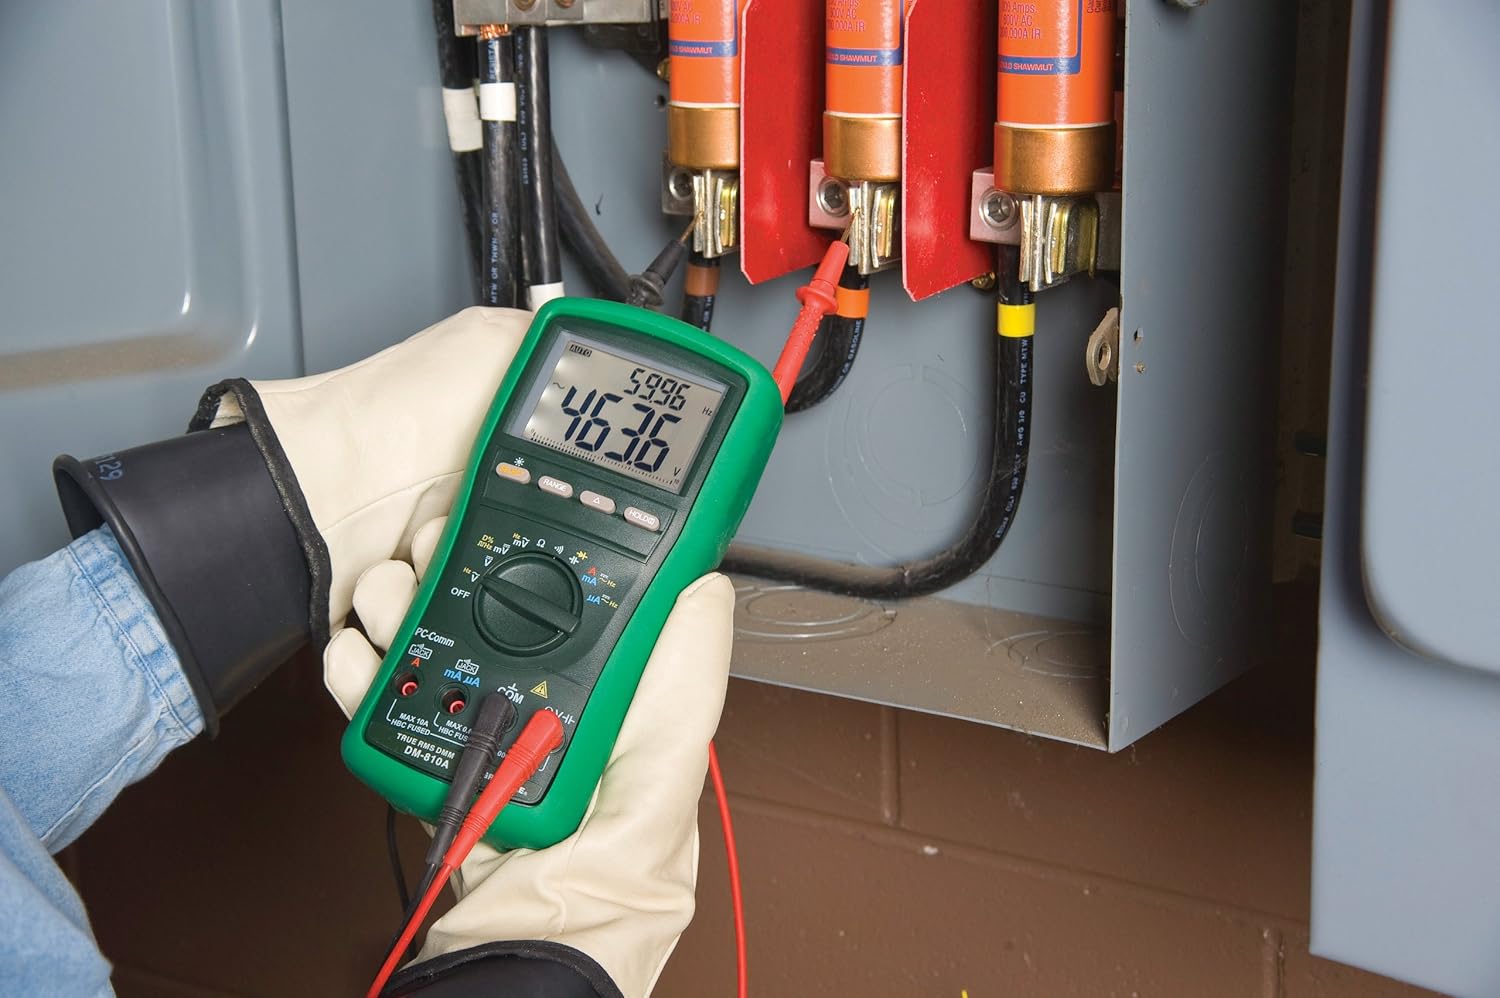
Figur 2: The Greenlee DM-810A Digital Multimeter being used to take measurements within an electrical panel, demonstrating practical application.
Måling AC/DC Voltage
- Set the function selector to V~ (AC Voltage) eller V- (DC-volumentage). Use the SELECT button to toggle if both are on one position.
- Tilslut den sorte testledning til KOM og den røde testledning til VΩHz.
- Connect the test probes in parallel across the circuit or component to be measured.
- Læs bindtage -værdi på displayet.
Måling af AC/DC-strøm
Vigtig: Current measurements require the meter to be connected in series with the circuit. Ensure the circuit is de-energized before connecting the meter.
- Sluk for kredsløbet.
- Set the function selector to A~ (AC Current) or A- (DC Current), or mA~ / mA-.
- Tilslut den sorte testledning til KOMTilslut den røde testledning til mAμA for small currents or A for larger currents (up to 10A). The Beep-Jack warning will activate if leads are in the wrong jacks for the selected function.
- Open the circuit where the current is to be measured and connect the meter in series.
- Genstart kredsløbet og aflæs strømværdien.
- De-energize the circuit before disconnecting the meter.
Measuring Resistance (Ω)
- De-energize the circuit or component.
- Set the function selector to Ω.
- Tilslut den sorte testledning til KOM og den røde testledning til VΩHz.
- Tilslut testproberne på tværs af komponenten.
- Read the resistance value.
Measuring Capacitance (CAP)
- Sørg for, at kondensatoren er helt afladet før måling.
- Set the function selector to CAP.
- Tilslut den sorte testledning til KOM og den røde testledning til VΩHz.
- Tilslut testproberne på tværs af kondensatorterminalerne.
- Aflæs kapacitansværdien.
Measuring Frequency (Hz)
- Set the function selector to Hz.
- Tilslut den sorte testledning til KOM og den røde testledning til VΩHz.
- Tilslut testproberne på tværs af signalkilden.
- Read the frequency value.
Kontinuitetstest
- De-energize the circuit or component.
- Set the function selector to the continuity symbol (often shared with diode test, use SELECT to toggle).
- Tilslut den sorte testledning til KOM og den røde testledning til VΩHz.
- Connect the test probes across the circuit path or component.
- En biplyd indikerer kontinuitet (lav modstand). Displayet viser modstandsværdien.
Opretholdelse
Rensning
Tør måleren af med reklameamp klud og mildt rengøringsmiddel. Brug ikke slibemidler eller opløsningsmidler. Sørg for, at måleren er helt tør før brug.
Udskiftning af batteri
When the battery indicator appears on the display, replace the batteries immediately to ensure accurate readings. Follow the battery installation steps outlined in the Setup section.
Udskiftning af sikring
If the current measurement functions cease to work, the internal fuses may need replacement. Refer to the meter's internal diagram (usually accessible by opening the battery compartment or back casing) for fuse specifications and replacement instructions. Always replace fuses with those of the specified type and rating to maintain safety and performance.
Fejlfinding
This section provides solutions for common issues encountered during the operation of your DM-810A multimeter.
| Problem | Mulig årsag | Løsning |
|---|---|---|
| Intet display eller svagt display | Døde eller lave batterier | Udskift batterierne. |
| Forkerte aflæsninger | Incorrect function/range selected; Damaged test leads; External interference | Verify function and range; Inspect and replace test leads; Move away from strong electromagnetic fields. |
| Strømmåling virker ikke | Blown fuse; Incorrect lead connection | Check and replace fuses; Ensure leads are in the correct A or mA jacks. |
| Beep-Jack warning active | Test leads connected to incorrect input jacks for the selected function | Adjust test lead connections to match the selected function on the dial. |
| Continuity test not beeping | Åbent kredsløb; Høj modstand | Ensure the circuit is closed; Check for breaks in the circuit or component. |
Tekniske specifikationer
The following table outlines the key technical specifications for the Greenlee DM-810A Digital Multimeter.
| Feature | Værdi |
|---|---|
| Mærke | Greenlee |
| Model | DM-810A |
| Måletype | Ægte RMS digitalt multimeter |
| Strømkilde | Batteridrevet |
| Stil | Digital |
| Varens vægt | 16 ounce (1 pund) |
| Produktmål (L x B x H) | 10 x 10 x 12 tommer |
| Certificeringer | CE, CSA, UL |
| UPC | 783310087434 |
Garanti og support
Garantioplysninger
The Greenlee DM-810A Digital Multimeter comes with a 1 års producentgarantiDenne garanti dækker materiale- og fabrikationsfejl ved normal brug. Gem venligst din købsbevis i tilfælde af garantikrav.
Kundesupport
For technical assistance, warranty service, or to inquire about replacement parts, please contact Greenlee customer support. Refer to the official Greenlee webwebstedet eller produktemballagen for de mest aktuelle kontaktoplysninger.


