1. Introduktion
The Ortofon 2M Red is a high-quality moving magnet phono cartridge designed to deliver open, dynamic sound with a touch of warmth. It features an elliptical diamond stylus, making it an excellent choice for upgrading from standard cartridges or for new turntable setups. This manual provides essential information for the proper installation, operation, and maintenance of your 2M Red cartridge.

Image 1.1: The Ortofon 2M Red Moving Magnet Phono Cartridge.
2. Hvad er der i æsken
Upon unboxing your Ortofon 2M Red cartridge, please ensure all components are present:
- Ortofon 2M Red phono cartridge
- Mounting screws (various lengths)
- Stylus vagt
- Small screwdriver (for mounting)
- Stylus børste
3. Opsætning og installation
Proper installation is crucial for optimal performance. Handle the cartridge with care, avoiding contact with the stylus.
3.1. Mounting the Cartridge
- Carefully attach the cartridge to your turntable's headshell using the provided screws. Ensure the cartridge is securely fastened but do not overtighten.
- Connect the four color-coded wires from the tonearm to the corresponding pins on the cartridge. Typically:
- Red: Right channel signal (R+)
- Green: Right channel ground (RG)
- White: Left channel signal (L+)
- Blue: Left channel ground (LG)
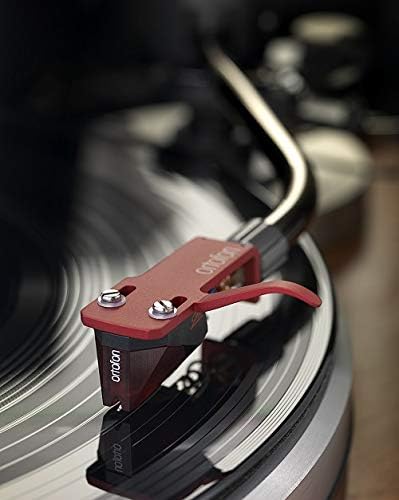
Image 3.1: The Ortofon 2M Red cartridge mounted on a turntable's headshell.
3.2. Cartridge Alignment
Accurate alignment minimizes tracking errors and stylus wear. Use an alignment protractor (often included with your turntable or available separately) to ensure the stylus is correctly positioned in the record groove. Follow the specific instructions provided with your protractor.

Billede 3.2: Nærbillede view of the Ortofon 2M Red cartridge on a turntable, illustrating proper alignment.
3.3. Setting Tracking Force
The recommended tracking force for the Ortofon 2M Red is 1.8 grams (18 mN). Refer to your turntable's manual for instructions on balancing the tonearm and setting the tracking force accurately. Incorrect tracking force can lead to poor sound quality and accelerated stylus wear.
3.4. Setting Anti-Skating
Set the anti-skating force to match the tracking force (1.8 grams). This helps prevent the tonearm from being pulled towards the center or outside of the record, ensuring even wear on the stylus and balanced channel output.
4. Betjeningsvejledning
Once installed and properly adjusted, your Ortofon 2M Red cartridge is ready for use.
- Ensure your turntable is connected to a phono preamplifier eller en amplifier with a dedicated phono input.
- Place a clean record on the platter.
- Gently lower the tonearm onto the record's lead-in groove using the cueing lever. Avoid dropping the tonearm directly onto the record.
- After playback, use the cueing lever to lift the tonearm and return it to its rest. Always engage the stylus guard when the turntable is not in use.

Image 4.1: The elliptical diamond stylus of the Ortofon 2M Red tracking a record groove.
5. Vedligeholdelse
Regular maintenance ensures the longevity and performance of your cartridge.
5.1. Stylus Cleaning
Clean the stylus regularly using the provided stylus brush. Brush gently from back to front (from the pivot point towards the stylus tip). Do not brush from side to side or front to back, as this can damage the cantilever.

Billede 5.1: Forside view of the Ortofon 2M Red stylus, highlighting the elliptical diamond tip.
5.2. Stylus Replacement
The stylus is a consumable part and will wear out over time, typically after 500-1000 hours of playback, depending on record condition and cleaning habits. A worn stylus can damage your records and degrade sound quality. The 2M Red stylus is user-replaceable. Replacement styli (e.g., Ortofon Stylus 2M Red or an upgrade like Stylus 2M Blue) can be purchased separately. To replace, gently pull the old stylus assembly forward and off the cartridge body, then carefully push the new stylus assembly onto the body until it clicks into place.
5.3. Cartridge Body Cleaning
Wipe the cartridge body with a soft, dry, lint-free cloth. Avoid using cleaning fluids on the cartridge body or stylus, unless specifically designed for phono cartridges.
6. Fejlfinding
If you encounter issues, review følgende almindelige problemer og løsninger:
- Ingen lyd eller lav lydstyrke:
- Check all cable connections from the cartridge to the amplivligere.
- Sørg for din amplifier is set to the correct phono input.
- Verify the phono preamplifier is powered on (if external).
- Forvrænget lyd:
- Re-check tracking force and anti-skating settings.
- Verify cartridge alignment.
- Rengør pennen.
- Inspect the stylus for wear or damage. A worn stylus requires replacement.
- Summende eller summende støj:
- Ensure the turntable's ground wire is properly connected to your amplifier's ground terminal.
- Move the turntable away from other electronic devices that may cause interference.
- Check for loose connections in the tonearm wiring or cartridge pins.
- Skipping or Jumping:
- Check tracking force; it might be too low.
- Ensure the record is clean and free of debris.
- Verify the turntable is level.
7. Specifikationer
Key technical specifications for the Ortofon 2M Red Moving Magnet Phono Cartridge:
| Varens vægt | 0.254 ounce |
| Produktdimensioner | 1.1 x 0.75 x 0.71 tommer |
| Varemodelnummer | 2M rød |
| Stylus type | Elliptical Diamond |
| Udgang Voltage at 1000 Hz, 5cm/sec. | 5.5 mV |
| Channel Balance at 1 kHz | 1.5 dB |
| Channel Separation at 1 kHz | 22 dB |
| Channel Separation at 15 kHz | 15 dB |
| Frekvensrespons | 20-20,000 Hz +3/-1 dB |
| Tracking Ability at 315Hz at recommended tracking force | 70 µm |
| Overholdelse, dynamisk, lateral | 20 µm/mN |
| Stylus Tip Radius | r/R 8/18 µm |
| Sporingskraftområde | 1.6-2.0 g (16-20 mN) |
| Anbefalet sporingskraft | 1.8 g (18 mN) |
| Tracking Angle | 20° |
| Internal Impedance, DC Resistance | 1.3 kOhm |
| Internal Inductance | 700 mH |
| Anbefalet belastningsmodstand | 47 kOhm |
| Anbefalet belastningskapacitans | 150-300 pF |
| Patronvægt | 7.2 g |
8. Garanti og support
Ortofon products are manufactured to high standards. For warranty information and technical support, please refer to the official Ortofon webwebstedet eller kontakt din autoriserede forhandler. Gem din købsbevis til garantikrav.


