1. Introduktion
This manual provides detailed instructions for the installation, operation, and maintenance of your Samsung SyncMaster 740N 17-inch LCD Monitor. Please read this manual thoroughly before using your monitor to ensure proper functionality and to prevent damage. Keep this manual for future reference.
2. Sikkerhedsoplysninger
Observe the following safety precautions to ensure the safe and efficient operation of your monitor:
- Placer ikke skærmen på et ustabilt sted.
- Undgå at udsætte skærmen for direkte sollys, varmekilder eller ekstreme temperaturer.
- Hold skærmen væk fra vand eller overdreven fugt.
- Sørg for tilstrækkelig ventilation; bloker ikke ventilationsåbningerne.
- Brug kun den netledning og adapter, der følger med skærmen.
- Forsøg ikke selv at udføre service på skærmen. Overlad al service til kvalificeret personale.
- Tag stikket til skærmen ud af stikkontakten under tordenvejr eller når den ikke bruges i længere perioder.
3. Pakkens indhold
Bekræft, at alle varer er til stede i din produktpakke:
- Samsung SyncMaster 740N LCD Monitor
- Strømledning
- VGA Cable (D-Sub)
- Brugervejledning (dette dokument)
- Installation CD (may include drivers and software like MagicTune)
4. Opsætning
4.1 Udpakning og placering
Carefully remove the monitor and all accessories from the packaging. Place the monitor on a stable, flat surface, ensuring adequate space for ventilation around the unit.
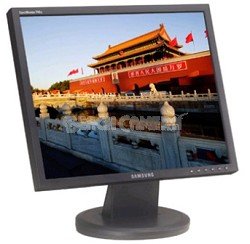
Figur 1: The Samsung SyncMaster 740N 17-inch LCD Monitor. This image shows the front view of the monitor with its stand, illustrating its compact design suitable for various desktop environments.
4.2 Tilslutning af skærmen
- Strømtilslutning: Tilslut netledningen til skærmens strømindgang, og sæt derefter den anden ende i en jordet stikkontakt.
- Videoforbindelse (VGA): Connect the VGA cable (D-Sub) to the VGA port on the back of the monitor and to the VGA output port on your computer's graphics card. Tighten the screws on the VGA connector to secure the connection.
- Tænd: Press the power button on the front of the monitor. Then, power on your computer. The monitor should automatically detect the input signal.
5. Betjening af monitoren
5.1 Grundlæggende kontroller
The control buttons are typically located on the front or bottom bezel of the monitor. These buttons allow you to access the On-Screen Display (OSD) menu to adjust various settings.
- Power knap: Tænder eller slukker for skærmen.
- Menu-knap: Åbner OSD-menuen.
- Up/Down or Left/Right Buttons: Naviger gennem OSD-menupunkterne og juster værdier.
- Enter/Source Button: Confirms selections or switches input sources.
5.2 OSD-menu navigation
Tryk på Menu button to open the OSD. Use the navigation buttons to select categories like Billede, Farve, OSD, og Opsætning. Trykke Indtast to access sub-menus or confirm changes. Press Menu igen for at afslutte OSD-menuen.
5.3 Særlige funktioner
- MagicBright II™: This feature provides various preset brightness modes (e.g., Text, Internet, Game, Sport, Movie, Custom) to optimize the display for different content types. Access it via the OSD menu.
- MagicColor™: Enhances color saturation and brightness, making images appear more vivid. This can be toggled on/off in the OSD.
- MagicTune™: A software utility that allows you to control monitor settings directly from your computer using a mouse and keyboard, providing a more convenient way to adjust brightness, contrast, and other parameters. Install from the provided CD or Samsung's webwebsted.
5.4 Optimal Resolution
For the best display quality, set your computer's display resolution to the monitor's native resolution of 1280 x 1024. This can be adjusted through your operating system's display settings.
6. Vedligeholdelse
6.1 Rengøring af monitoren
- Tag altid stikket ud af skærmen før rengøring.
- Brug en blød, fnugfri klud lidt damprengøres med vand eller en specialiseret skærmrenser.
- Do not use abrasive cleaners, waxes, or solvents as they can damage the screen or casing.
- Spray cleaner onto the cloth, not directly onto the screen.
6.2 Generel pleje
- Undgå at berøre skærmen med skarpe genstande.
- Placer ikke tunge genstande på skærmen eller dens kabler.
- If moving the monitor, ensure it is powered off and disconnected from all cables.
7. Fejlfinding
Hvis du støder på problemer med din skærm, kan du se følgende almindelige problemer og løsninger:
| Problem | Mulig løsning |
|---|---|
| Ingen strøm |
|
| No Signal / "Check Signal Cable" Message |
|
| Billedet er sløret eller forvrænget |
|
| Colors are incorrect or faded |
|
| Døde pixels | A small number of defective pixels is inherent in LCD technology. If the number of dead pixels exceeds manufacturer specifications, contact Samsung support. |
8. Specifikationer
Key technical specifications for the Samsung SyncMaster 740N monitor:
| Feature | Detalje |
|---|---|
| Modelnavn | SyncMaster 740N |
| Skærmstørrelse | 17 tommer |
| Display Type | TFT-LCD |
| Indfødt opløsning | 1280 x 1024 |
| Aspektforhold | 5:4 |
| Lysstyrke (typisk) | 300 cd/m² |
| Kontrastforhold (typisk) | 600:1 |
| Viewing-vinkel (H/V) | 160°/160° |
| Svartid | 8 ms |
| Input | Analog (VGA D-Sub) |
| Strømforbrug | (Specific value not provided, typical for 17" LCDs of this era) |
| Dimensioner (LxBxH) | 17.4 x 17.1 x 5 tommer |
| Vægt | 9.8 pund |
9. Garanti og support
For garantioplysninger, teknisk support eller serviceforespørgsler henvises til garantikortet, der følger med dit produkt, eller besøg den officielle Samsung-supportside. website. You may also find updated drivers and software, including MagicTune, on their support pages.
Samsungs officielle support: https://www.samsung.com/us/support/


