Indledning
This manual provides comprehensive instructions for the safe and efficient operation, setup, and maintenance of your Reflecta Diamator 1800AF Slide Projector. Please read this manual thoroughly before using the device to ensure proper functionality and to prevent damage.
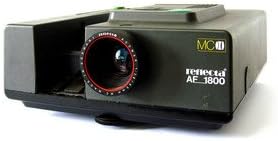
The Reflecta Diamator 1800AF is a high-quality slide projector designed for clear and bright image projection. It features automatic focus, a powerful 24V 150W lamp, and a multi-coated (MC) lens for enhanced sharpness and light efficiency. It supports standard CS and LKM slide magazines, as well as round magazines with appropriate adapters.
Sikkerhedsinstruktioner
- Always ensure the projector is placed on a stable, level surface to prevent tipping.
- Do not block ventilation openings. Overheating can damage the device.
- Disconnect the power cord from the outlet before cleaning or performing any maintenance.
- Do not expose the projector to moisture or extreme temperatures.
- Lamp operates at high temperatures. Allow the projector to cool down before handling the lamp or opening the lamp rum.
- Use only the specified lamp type (24V 150W) for replacement.
- This device is equipped with a thermal circuit breaker for safety. If the projector shuts off unexpectedly, allow it to cool down before attempting to restart.
- Opbevares utilgængeligt for børn.
Komponenter og funktioner
Familiarize yourself with the main components of your Reflecta Diamator 1800AF Slide Projector:
- Projektionsobjektiv: Multi-coated (MC) for optimal image sharpness and light transmission.
- Slide Magazine Slot: Accepts standard CS and LKM magazines, and round magazines with an adapter.
- Automatisk fokus: Automatically adjusts for sharp image projection.
- Lamp: 24V 150W halogen lamp for lys belysning.
- Wired Remote Control Port: For connecting the included remote control.
- Termisk afbryder: Sikkerhedsfunktion for at forhindre overophedning.
- Unique Diaphragm: Contributes to image quality.
- Bærehåndtag: Integreret for nem transport.
- Timer Port: For connecting an external timer accessory.
Opsætning
- Udpakning: Carefully remove the projector and all accessories from the packaging. Retain the packaging for future storage or transport.
- Placering: Place the projector on a stable, flat surface at the desired distance from the projection screen or wall. Ensure adequate ventilation around the unit.
- Strømtilslutning: Connect the power cord to the projector's power input, then plug the other end into a suitable electrical outlet (220-240V AC, 50/60Hz).
- Fjernbetjeningsforbindelse: Plug the wired remote control into its designated port on the projector.
- Loading Slides:
- Insert your prepared slide magazine (CS, LKM, or round with adapter) into the slide magazine slot until it clicks into place.
- Ensure slides are correctly oriented for projection.
Betjeningsvejledning
- Tænd: Turn on the projector using the main power switch, usually located on the control panel or rear of the unit. The lamp vil lyse.
- Automatisk fokus: The projector will automatically adjust the focus for the first slide. If needed, a manual focus override may be available (refer to specific controls on your unit).
- Advancing Slides: Use the forward/backward buttons on the projector's control panel or the wired remote control to advance or reverse slides in the magazine.
- Projection Adjustment:
- Adjust the projector's tilt or height using the adjustable feet to align the image with the screen.
- Move the projector closer or further from the screen to adjust the image size.
- Sluk: After use, turn off the projector using the main power switch. Allow the cooling fan to run for a few minutes (if applicable) before disconnecting power.
- Removing Slides: Once the projector has cooled, carefully remove the slide magazine.
Opretholdelse
- Rengøring af linsen: Use a soft, lint-free cloth specifically designed for optical lenses to gently wipe the projection lens. Do not use abrasive cleaners.
- Rengøring af ydersiden: Tør projektorens yderside af med en blød, tør klud.amp klæde. Undgå at bruge skrappe kemikalier eller opløsningsmidler.
- Lamp Udskiftning:
- Sørg for, at projektoren er frakoblet og helt afkølet.
- Find lamp access panel (refer to your projector's diagram if unsure).
- Carefully open the panel and remove the old lamp, often by releasing a retaining clip or screw. Avoid touching the new lamp's glass with bare hands.
- Insert the new 24V 150W lamp, ensuring it is seated correctly.
- Luk lamp access panel securely.
- Opbevaring: When not in use, store the projector in a dry, dust-free environment, preferably in its original packaging or a protective case.
Fejlfinding
| Problem | Mulig årsag | Løsning |
|---|---|---|
| Projektoren tænder ikke. | Ingen strømforsyning; Løst strømkabel; Hovedafbryder slukket. | Kontroller stikkontakten; Sørg for, at netledningen er korrekt tilsluttet; Tænd for hovedafbryderen. |
| Intet billede projiceret. | Lamp burnt out; Slide magazine not inserted correctly; Lens cap on. | Udskift lamp; Reinsert magazine; Remove lens cap. |
| Billedet er sløret. | Automatic focus issue; Lens dirty; Projector too far/close. | Allow auto-focus to adjust; Clean lens; Adjust projector distance. |
| Projector shuts off unexpectedly. | Overheating (thermal circuit breaker activated); Power surge. | Allow to cool down; Ensure ventilation is not blocked; Use a surge protector. |
Specifikationer
| Feature | Detalje |
|---|---|
| Mærke | Reflecta |
| Model | Diamator 1800AF |
| Lamp Type | 24V 150W |
| Fokus | Automatisk fokus |
| Linse | Multi-Coated (MC) |
| Fjernbetjening | Kabelforbundet fjernbetjening |
| Sikkerhedsfunktioner | Termisk afbryder |
| Dimensioner (L x B x H) | 37 x 36.2 x 15.6 cm (ca. 14.57 x 14.25 x 6.14 tommer) |
| Vægt | 4.62 kg (ca. 10.19 lbs) |
| Supported Magazines | Standard CS, LKM, and round magazines (with adapter) |
Garanti og support
Specific warranty information for the Reflecta Diamator 1800AF Slide Projector is not available in this document. Please refer to the warranty card included with your product or contact Reflecta customer support for details regarding warranty coverage and service.
For technical support, spare parts, or service inquiries, please visit the official Reflecta website or contact their authorized service centers. Keep your purchase receipt as proof of purchase.
Note: Information regarding software updates is not available for this product.


