1. Introduktion
The DYMO LabelMANAGER 300 (LM300) is an electronic labelmaker designed for various labeling applications, including industrial and professional use. It features a QWERTY keyboard and a 15-character LCD display for easy label creation and previewing. This device supports printing on multiple D1 tape widths and offers advanced features such as barcode printing and various text formatting options.
Produkt overview

Image 1.1: The DYMO LabelMANAGER 300 in an open position, revealing its QWERTY keyboard and LCD screen. The device is dark blue with light blue and green function keys.
Key features of the LabelMANAGER 300 include:
- Designed for engineering and shop floor applications.
- 15-character LCD display for easy editing and previewing.
- Prints on D1 tape widths: 0.25, 0.325, 0.5, and 0.75 inches.
- Features a QWERTY keyboard with profiled keys for efficient input.
- Capable of printing electrical symbols and various barcode types.
2. Opsætning
Udpakning af enheden
Carefully remove all components from the packaging. Ensure all items are present before proceeding with setup.

Image 2.1: The DYMO LabelMANAGER 300 shown with its standard accessories, including a D1 tape cassette and the product documentation.
Pakken skal indeholde:
- DYMO LabelMANAGER 300 Printer
- D1 Label Tape Cassette (starter roll)
- Brugervejledning (dette dokument)
- 2 AA batterier (medfølger)
Installation af batteri
- Locate the battery compartment on the underside of the labelmaker.
- Skub batterirummets dæksel åbent.
- Isæt 2 AA-batterier, og sørg for at polerne (+/-) vender korrekt som angivet inde i batterirummet.
- Sæt batteridækslet på plads, indtil det klikker sikkert på plads.
Montering af tapekassette
- Open the labelmaker cover by gently lifting it from the front.
- Locate the tape cassette compartment.
- Insert a DYMO D1 label tape cassette into the compartment, ensuring the tape feeds correctly into the print head mechanism.
- Close the labelmaker cover until it latches securely.
3. Betjeningsvejledning
Tænd/sluk
- For at tænde: Tryk på Magt button. The LCD display will illuminate.
- For at slukke: Tryk og hold nede Magt button until the display turns off. The device also features an automatic shut-off to conserve battery power after a period of inactivity.
Basic Label Creation
- Sørg for, at enheden er tændt.
- Use the QWERTY keyboard to type your desired text. The text will appear on the 15-character, two-line LCD display.
- Review the text on the display for accuracy. Use the arrow keys to navigate and edit if necessary.
- Tryk på Trykke button to print the label.
- Once printed, use the integrated cutter to cut the label.
Tekstformatering
The LabelMANAGER 300 offers various text formatting options:
- Udskriftsstile: Select from normal, narrow, bold, vertical, outline, shadow, mirror, and boxed styles. Refer to the device's menu for specific style selection.
- Text Effects: Apply underline, shadow, or box effects to your text.
- Begrundelse: Labels can be printed with left, center, or right justification.
- Multi-line Printing: Print one, two, three, or four lines on a single label, depending on the tape width.
Avancerede funktioner
- Incremental Numbering: Automatically print a series of labels with sequential numbers.
- Repeat Printing: Print multiple copies of the same label.
- Barcode Printing: The LM300 supports printing various barcode types, including UPC-A, UPC-E, EAN-8, EAN-13, Code-39, and Code-128. Access this feature through the device's menu.
- Elektriske symboler: Embed common electrical symbols into your labels for specialized applications.
- Last-Label Memory: The device retains the last printed label in memory for quick reprinting.
4. Vedligeholdelse
Rengøring af enheden
- Ensure the labelmaker is powered off before cleaning.
- Tør ydersiden af enheden af med en blød, damp klæde. Brug ikke slibende rengøringsmidler eller opløsningsmidler.
- To clean the print head, open the cover and gently wipe the print head with a cotton swab lightly dampmed isopropylalkohol. Lad det tørre helt, før du lukker låget.
Opbevaring
When not in use, store the DYMO LabelMANAGER 300 in a cool, dry place away from direct sunlight and extreme temperatures. If storing for an extended period, it is recommended to remove the batteries to prevent leakage.
5. Fejlfinding
If you encounter issues with your LabelMANAGER 300, refer to the following common problems and solutions:
- Ingen strøm:
- Check if batteries are inserted correctly with proper polarity.
- Replace old or depleted batteries with new AA batteries. - Dårlig udskriftskvalitet:
- Ensure the tape cassette is installed correctly.
- Clean the print head as described in the Maintenance section.
- Try a new tape cassette, as old tape may affect print quality. - Tape Jams:
- Open the cover and carefully remove any jammed tape. Ensure no adhesive residue is left in the mechanism.
- Make sure the tape cassette is seated properly. - Skærm virker ikke:
- Check battery power. If the display is dim or blank, replace batteries.
- Power cycle the device (turn off, then on again). - Enheden reagerer ikke:
- Remove and reinsert batteries to perform a soft reset.
- If the issue persists, contact customer support.
6. Specifikationer
| Feature | Detalje |
|---|---|
| Modelnavn | LM300 |
| Mærke | DYMO |
| Udskrivningsteknologi | Termisk |
| Vise | 15-character, 2-line LCD |
| Tastaturlayout | QWERTY |
| Supported Tape Widths | 0.25, 0.325, 0.5, 0.75 inches (D1 tapes) |
| Print Styles | Normal, Narrow, Bold, Vertical, Outline, Shadow, Mirror, Boxed |
| Teksteffekter | Underline, Shadow, Box |
| Stregkode support | UPC-A, UPC-E, EAN-8, EAN-13, Code-39, Code-128 |
| Strømkilde | 2 AA batterier (medfølger) |
| Varens vægt | 2.3 pund |
| Pakkedimensioner | 11.1 x 8 x 4.4 tommer |
| Max Copy Resolution (B&W) | 300 dpi |
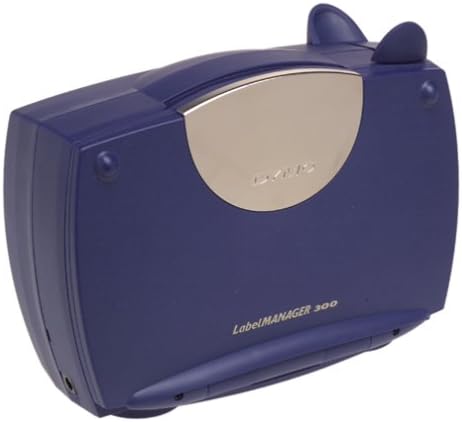
Image 6.1: The DYMO LabelMANAGER 300 in its closed position, showcasing dens kompakte og bærbare design.
7. Garanti og support
Garantioplysninger
The DYMO LabelMANAGER 300 comes with a limited warranty. Please refer to the warranty card included with your product for specific terms and conditions, or visit the official DYMO webwebstedet for detaljerede garantioplysninger.
Kundesupport
For further assistance, technical support, or to purchase accessories and replacement tape, please visit the official DYMO website or contact their customer service department. Contact information can typically be found on the DYMO webwebsted eller i produktemballagen.


