1. Introduktion
Tak for købetasing the AIWA BBTC-550 Portable Radio Cassette Player. This versatile device combines classic audio formats with modern connectivity, allowing you to enjoy your music from various sources. Please read this manual carefully before using the unit to ensure proper operation and to maximize your listening experience. Keep this manual for future reference.
Nøglefunktioner:
- Portable Radio Cassette with CD reader, USB, and Bluetooth 5.0 connection.
- Cassette player and recorder with Auto-Stop function.
- USB port for MP3 music playback.
- AUX IN input (3.5mm) for connecting external audio devices.
- Headphone socket (3.5mm).
- Compatible with CD/CD-R/MP3 discs with 20 programmable memories.
- FM PLL Radio with 40 programmable station presets.
- Digital clock with 24-hour display.
- High-frequency range dynamic speakers with super bass and amplified treble.
- Panoramic LCD screen with soft tonality backlight.
2. Produktet er slutview
The AIWA BBTC-550 is designed for ease of use and portability. Below are images illustrating the device's main components and features.

Figur 2.1: Forside view of the AIWA BBTC-550, showing the display, control buttons, and speakers.

Figur 2.2: Top-down view of the AIWA BBTC-550 with the CD compartment lid open.

Figur 2.3: Side view of the AIWA BBTC-550 with the cassette compartment door open and the telescopic antenna extended.

Figure 2.4: Close-up of the side panel showing the 3.5mm headphone jack, 3.5mm AUX IN port, and USB/MP3 port.
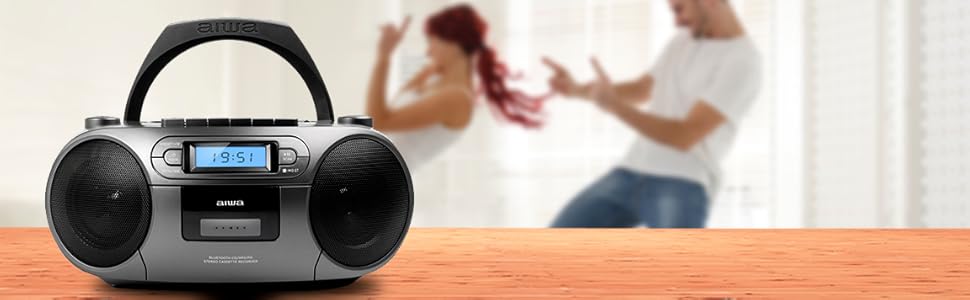
Figure 2.5: Promotional image highlighting the multi-functionality of the AIWA BBTC-550.
3. Opsætning
3.1 Strømforsyning
The AIWA BBTC-550 can be powered by either AC mains electricity or batteries for portable use.
- AC strøm: Connect the provided AC power cord to the AC IN socket on the unit and then to a standard 230V/50Hz wall outlet.
- Batteristrøm: For portable use, insert 6 x 1.5V LR14/UM2/C batteries into the battery compartment located on the bottom of the unit. Ensure correct polarity (+/-) when inserting batteries.
3.2 Justering af antenne
For optimal FM radio reception, fully extend the telescopic antenna. Adjust its position and angle to achieve the clearest signal.
4. Betjeningsvejledning
4.1 Generelle kontroller
- POWER -knap: Tryk for at tænde eller slukke enheden.
- MODE knap: Press to switch between CD, USB, Bluetooth, Radio, and Cassette modes.
- VOLUME knap: Rotate to adjust the sound level.
- LCD-skærm: Viser aktuel tilstand, spornummer, frekvens og tid.
4.2 CD-afspilning
- Tryk på MODE knappen for at vælge CD -tilstand.
- Open the CD compartment lid and place a CD (CD/CD-R/MP3 compatible) with the label side facing up. Close the lid securely.
- The unit will read the disc, and the total number of tracks will appear on the display.
- Tryk på AFSPIL/PAUSE (►/❚❚) knappen for at starte afspilning.
- Trykke AFSPIL/PAUSE (►/❚❚) again to pause, and press once more to resume.
- Tryk på SPRING OVER (►►| / |◄◄) knapper for at springe til næste eller forrige spor.
- Tryk på STOP (■) for at stoppe afspilning.
- Programafspilning: Tryk på knappen i stoptilstand PROG/TID knap. Brug SPRINGE buttons to select a track, then press PROG/TID again to add it to the program list. Repeat for up to 20 tracks. Press SPIL for at starte programmeret afspilning.
4.3 Kassettebetjening
- Tryk på MODE -knappen for at vælge kassettetilstand.
- Open the cassette compartment door and insert a cassette tape. Close the door.
- Afspilning: Tryk på SPIL (►) button to start playing the tape.
- Hurtigt frem/tilbage: Tryk på FF (►►) or REW (◄◄) knapper. Trykke STOP (■) to stop winding.
- Stop: Tryk på STOP (■) button to stop playback or winding. The unit features an Auto-Stop function at the end of the tape.
- Indspilning: Insert a blank cassette. Select the desired audio source (CD, USB, Bluetooth, Radio, or AUX IN). Press the REKORD (●) button on the cassette deck. The unit will start recording from the selected source. Press STOP (■) for at afslutte optagelsen.
4.4 USB-afspilning
- Tryk på MODE knappen for at vælge USB-tilstand.
- Indsæt et USB-flashdrev med MP3-lyd files i USB-porten.
- The unit will automatically detect and start playing the MP3 files.
- Brug AFSPIL/PAUSE (►/❚❚) og SPRING OVER (►►| / |◄◄) buttons for control, similar to CD playback.
4.5 Bluetooth-forbindelse
- Tryk på MODE button to select Bluetooth mode. The display will show 'BT' and start flashing, indicating it's in pairing mode.
- Aktiver Bluetooth på din Bluetooth-aktiverede enhed (smartphone, tablet osv.) og søg efter tilgængelige enheder.
- Select 'AIWA BBTC-550' from the list of devices.
- Once paired, the unit will emit a confirmation sound, and 'BT' on the display will stop flashing.
- You can now play audio from your connected device through the AIWA BBTC-550. Use your device or the unit's controls for playback.
4.6 FM radio
- Tryk på MODE -knappen for at vælge FM-radiotilstand.
- Træk teleskopantennen ud for bedre modtagelse.
- Automatisk scanning: Tryk og hold på SCAN button to automatically scan and save available FM stations. The unit can store up to 40 presets.
- Manuel indstilling: Tryk kort på SCAN button to manually tune up or down the frequency.
- Vælg forudindstillinger: Brug PRESET (+10) knappen for at bladre gennem gemte stationer.
4.7 AUX IN
- Tryk på MODE knappen for at vælge AUX IN-tilstand.
- Connect an external audio device (e.g., MP3 player, smartphone) to the 3.5mm AUX IN port using a 3.5mm audio cable (not included).
- Play audio from your external device. The sound will be output through the AIWA BBTC-550 speakers.
- Adjust the volume using the unit's VOLUME knob and/or your external device's volume control.
4.8 Brug af hovedtelefoner
To listen privately, plug 3.5mm stereo headphones into the HEADPHONES socket. The speakers will automatically mute when headphones are connected.
4.9 Indstilling af uret
The unit features a digital clock with a 24-hour display.
- I standbytilstand skal du trykke på og holde nede PROG/TID knap.
- Brug SPRING OVER (►►| / |◄◄) knapperne for at justere timetallet. Tryk på PROG/TID for at bekræfte.
- Brug SPRING OVER (►►| / |◄◄) knapperne for at justere minuttallet. Tryk på PROG/TID to confirm and exit clock setting mode.
5. Specifikationer
| Feature | Specifikation |
|---|---|
| Mærkenavn | AIWA |
| Modelnummer | BBTC-550 |
| Type | AM / FM Radio Cassette Player |
| Stil | Bordplade / Bærbar |
| Kropsmateriale | Plast |
| Dimensioner (BxHxD) | 38 x 38 x 26 cm |
| Vægt (produkt) | Ca. 2.04 kg |
| Bluetooth | Ja (version 5.0) |
| WIFI | Ingen |
| Skærm | Yes (Panoramic LCD with backlight) |
| CD-kompatibilitet | CD/CD-R/MP3 |
| USB-afspilning | MP3 files |
| AUX IN | 3.5 mm jack |
| Hovedtelefonudgang | 3.5 mm jack |
| Radioforudindstillinger | 40 (FM PLL) |
| Strømforsyning (AC) | 230V/50Hz |
| Strømforsyning (DC) | 6 x 1.5V LR14/UM2/C batteries |
| Certificering | CE, RoHS |
| Oprindelse | Kina |
| Pakkedimensioner | 36.7 x 29 x 17.7 cm |
| Pakkevægt | 2.5 kg |
6. Vedligeholdelse
6.1 Rengøring af enheden
- Afbryd altid enheden fra strømkilden før rengøring.
- Brug en blød, tør klud til at rengøre de udvendige overflader.
- For genstridige mærker, gnid letampRengør kluden med vand og et mildt rengøringsmiddel, og tør derefter straks efter.
- Brug ikke slibende rengøringsmidler, voks eller opløsningsmidler, da de kan beskadige finishen.
6.2 CD-linsepleje
- Never touch the CD lens.
- If the CD lens gets dirty, use a commercially available CD lens cleaner to clean it.
6.3 Cassette Deck Care
- Regularly clean the tape heads, capstan, and pinch roller with a cotton swab lightly moistened with tape head cleaner or isopropyl alcohol.
- Demagnetize the tape heads periodically to prevent sound degradation.
6.4 Udskiftning af batteri
- When the unit's performance diminishes or the display dims, it's time to replace the batteries.
- Open the battery compartment, remove old batteries, and insert new ones, ensuring correct polarity.
- Bortskaf gamle batterier ansvarligt i henhold til lokale regler.
- Fjern batterierne, hvis enheden ikke skal bruges i længere tid, for at forhindre lækage.
7. Fejlfinding
If you encounter any issues with your AIWA BBTC-550, please refer to the following common problems and solutions:
| Problem | Mulig årsag | Løsning |
|---|---|---|
| Ingen strøm | AC cord not properly connected; Batteries depleted or incorrectly inserted. | Kontroller netledningens tilslutning; Udskift batterierne, og sørg for at polariteten vender korrekt. |
| Ingen lyd | Lydstyrken er for lav; Hovedtelefoner er tilsluttet; Forkert tilstand valgt. | Increase volume; Disconnect headphones; Select the correct mode (CD, USB, BT, Radio, AUX). |
| CD springer over eller afspiller ikke | CD is dirty or scratched; CD inserted incorrectly; Lens is dirty. | Clean or replace CD; Insert CD with label side up; Clean CD lens. |
| Kassettebåndet afspiller/optager ikke | Tape heads/capstan dirty; Cassette damaged; Incorrect mode. | Clean tape heads/capstan; Try a different cassette; Ensure Cassette mode is selected. |
| Bluetooth forbinder ikke | Unit not in pairing mode; Bluetooth disabled on external device; Device too far. | Ensure unit is in Bluetooth pairing mode; Enable Bluetooth on your device; Move device closer (within 10m). |
| Dårlig FM-radiomodtagelse | Antennen ikke trukket ud/justeret; Område med svagt signal. | Træk den teleskopiske antenne helt ud og juster den; Prøv at flytte enheden til et andet sted. |
| USB ikke genkendt | USB drive formatted incorrectly; Files not MP3; USB drive damaged. | Ensure USB is FAT32 format; Check files are MP3; Try a different USB drive. |
8. Garanti og support
The AIWA BBTC-550 comes with a standard manufacturer's warranty. Please refer to the warranty card included in your product packaging for specific terms and conditions, including the warranty period and coverage details.
Kundesupport:
If you experience any problems with your unit that are not covered in the troubleshooting section, or if you require further assistance, please contact your retailer or the AIWA customer support service in your region. Keep your purchase receipt as proof of purchase for warranty claims.
For the latest information and support, you may also visit the official AIWA webwebsted.


