
1. Produktet er slutview
The Acegeek Ori Rainbow Gaming Case (Model: AG-ORI-BK-3F) is a Mid-Tower chassis designed for compact and stylish PC builds. It features a tempered glass side panel to showcase internal components and comes with three pre-installed Rainbow fans for enhanced aesthetics and airflow. The case is engineered for optimized space utilization and efficient heat dissipation, ensuring stable performance during extended use.
Nøglefunktioner:
- Compact Mid-Tower design with a tempered glass side panel.
- Includes 3 pre-installed Rainbow fans for improved airflow and visual appeal.
- Optimized internal layout for easy component installation and cable management.
- Supports Micro-ATX and Mini-ITX motherboards.
- Ventilated side panel for enhanced internal airflow and thermal control.
- Convenient top-mounted I/O panel for easy access to ports and controls.
2. Opsætning og installation
This section provides general guidelines for installing components into your Acegeek Ori Rainbow Gaming Case. Always refer to the specific manuals for your motherboard, power supply, and other components for detailed installation instructions.
2.1 Forberedelse af sagen
- Pak etuiet ud: Tag forsigtigt etuiet ud af emballagen. Undersøg for eventuelle forsendelsesskader.
- Fjern sidepaneler: Locate and remove the screws securing the tempered glass side panel and the opposite metal side panel. Carefully set them aside in a safe place to prevent scratches or damage.
- Identificer komponenter: Familiarize yourself with the internal layout, including motherboard standoffs, drive bays, and fan mounting points.

Figur 2.1: Intern view of the Acegeek Ori Rainbow Gaming Case, showing the pre-installed RGB fan and internal layout.
2.2 Installation af bundkort
- Installer I/O-skjold: If your motherboard came with a separate I/O shield, install it into the rear opening of the case.
- Placering af bundkort: Align your Micro-ATX or Mini-ITX motherboard with the standoffs inside the case. Ensure all screw holes on the motherboard align with the standoffs.
- Sikkert bundkort: Use the provided screws to secure the motherboard to the standoffs. Do not overtighten.
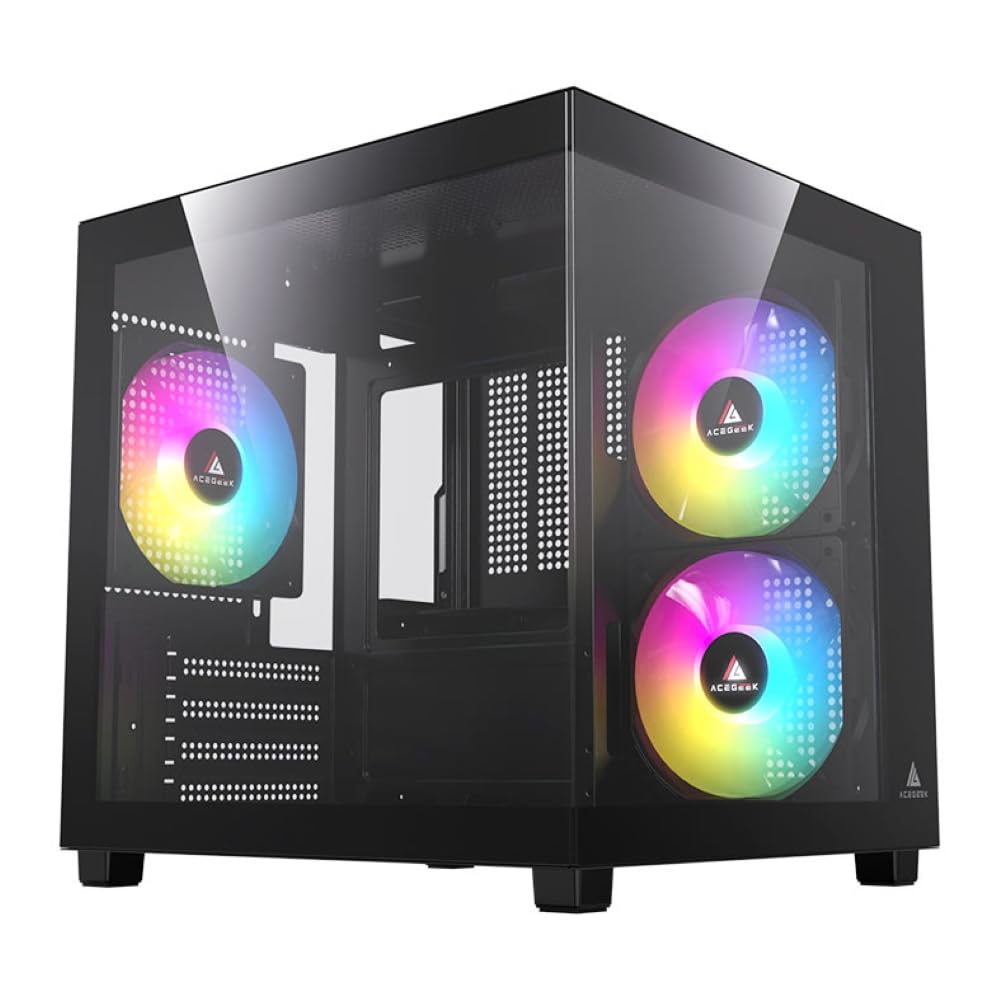
Figur 2.2: Intern view of the case, highlighting the motherboard mounting area and rear fan position.
2.3 Installation af strømforsyning
- Locate PSU Bay: The power supply unit (PSU) bay is located at the bottom rear of the case.
- Insert PSU: Slide your PSU into the bay, ensuring the fan faces the correct direction (usually downwards for cases with a bottom vent, or upwards if no bottom vent).
- Sikker strømforsyning: Fastgør strømforsyningen til kabinettet med skruer bagfra.
2.4 Installation af lagerdrev (HDD/SSD)
The case supports 1 x HDD and 2 x SSDs.
- Locate Drive Bays: Identify the designated mounting points for 3.5" HDDs and 2.5" SSDs.
- Installer drev: Secure your HDD(s) and SSD(s) using the provided screws or tool-less mechanisms, if available.
2.5 Grafikkort og Udvidelseskort
- Fjern dæksler til slots: Fjern de nødvendige dæksler til udvidelsespladserne fra bagsiden af kabinettet.
- Indsæt kort: Carefully insert your graphics card or other expansion cards into the appropriate PCIe slots on your motherboard.
- Sikkert kort: Fastgør kortet med skruer.
2.6 Kabelstyring
Utilize the 20mm cable management space behind the motherboard tray to route and tie down cables. This improves airflow and aesthetics.
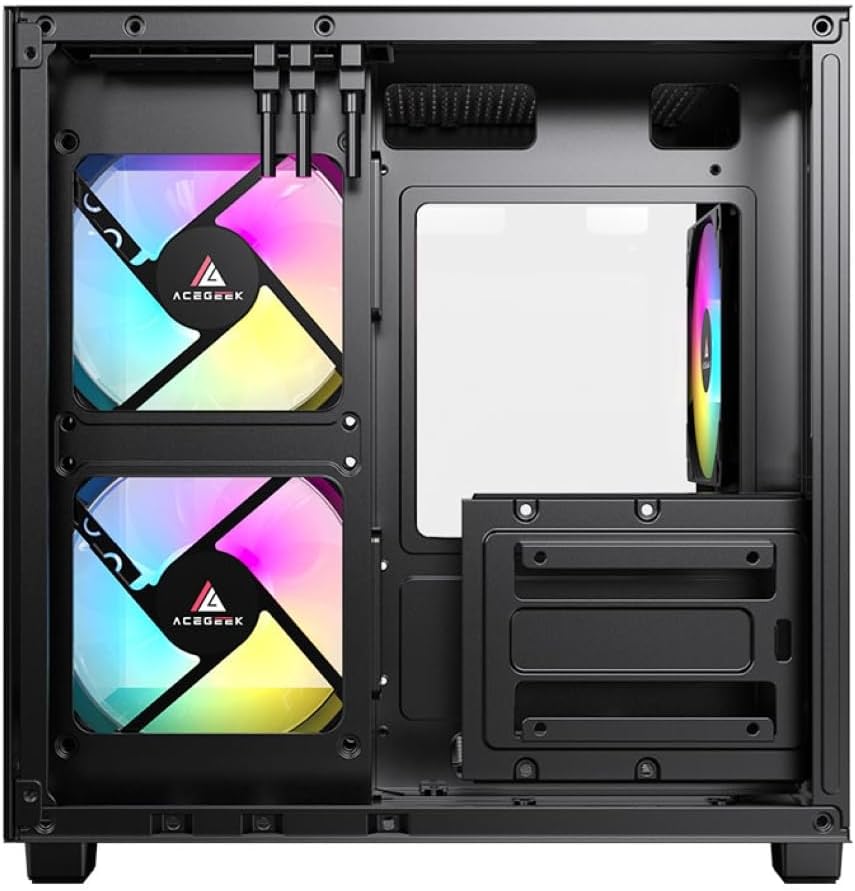
Figur 2.3: Bageste indvendige view of the case, illustrating the cable management area behind the motherboard tray.
2.7 Reinstall Side Panels
Once all components are installed and cables are managed, carefully reattach the metal and tempered glass side panels. Secure them with their respective screws.
3. Betjening
The Acegeek Ori Rainbow Gaming Case is designed to house your PC components. Its operation is primarily controlled by the installed components (motherboard, power supply, etc.).
3.1 Tænd
After connecting all necessary external cables (power, monitor, peripherals), press the power button located on the top I/O panel of the case to start your computer.

Figur 3.1: Top-front view of the case, showing the location of the I/O panel with power button and ports.
3.2 Fan Operation and RGB Lighting
The three pre-installed Rainbow fans will illuminate and spin upon system startup, providing airflow and aesthetic lighting. Fan speed and RGB lighting effects are typically controlled via your motherboard's BIOS/UEFI settings or dedicated software, depending on how the fans are connected.

Figur 3.2: Vinklet view af sagen, visasing the illuminated Rainbow fans through the tempered glass panel.
4. Vedligeholdelse
Regelmæssig vedligeholdelse er med til at sikre optimal ydeevne og levetid for dine pc-komponenter.
4.1 Støvrensning
- Frekvens: Clean your case every 3-6 months, or more frequently if in a dusty environment.
- Procedure:
- Sluk din computer, og tag stikket ud af stikkontakten.
- Fjern sidepanelerne.
- Use compressed air to blow dust out of the case, especially from fans, heatsinks, and dust filters. Hold fans gently to prevent over-spinning.
- Tør de udvendige overflader af med en blød,amp cloth. For the tempered glass panel, use a glass cleaner and a microfiber cloth.
- Reattach side panels.

Figur 4.1: Bagside view of the case, showing the ventilation grilles and expansion slots, areas where dust can accumulate.
4.2 Fan Inspection
Periodically check the fans for any obstructions or unusual noises. Ensure they are spinning freely.
5. Fejlfinding
This section addresses common issues you might encounter with your PC case. Note that many issues related to PC operation are component-specific and not directly related to the case itself.
5.1 Systemet tænder ikke
- Tjek strømforbindelser: Ensure the power supply is properly connected to the wall outlet and the motherboard (24-pin and CPU power).
- Frontpanelstik: Verify that the front panel power switch connector is correctly attached to the motherboard's front panel header. Refer to your motherboard manual.
- Strømforsyningskontakt: Ensure the switch on the back of the power supply is in the "ON" position.
5.2 Ventilatorer drejer ikke, eller RGB lyser ikke
- Ventilatortilslutninger: Check that the fan power cables and RGB cables are securely connected to the motherboard or a fan controller.
- Motherboard Settings: Consult your motherboard manual for fan control and RGB lighting settings in the BIOS/UEFI or through dedicated software.
- Strømforsyning: Ensure the power supply is providing adequate power to all components.
5.3 Overophedningsproblemer
- Airflow Obstructions: Ensure no cables or components are blocking airflow paths.
- Støvopbygning: Clean dust from fans, radiators, and filters as described in the Maintenance section.
- Ventilatorretning: Verify that fans are installed with the correct intake/exhaust orientation for optimal airflow.
6. Specifikationer
| Mærke | Acegeek |
| Modelnavn | Ori |
| Modelnummer | AG-ORI-BK-3F |
| Sagstype | Mid-Tower |
| Farve | Sort |
| Materiale | ABS (Acrylonitrile Butadiene Styrene), Steel Alloy, Tempered Glass |
| Bundkort kompatibilitet | Micro-ATX, Mini-ITX |
| Mål (D x B x H) | 30 cm x 27.5 cm x 29.8 cm |
| Drive Bays | 1 x HDD, 2 x SSD |
| Udvidelsesslots | 5 |
| Inkluderet fans | 3 x Rainbow Fans |
| Supported Fans (Max) |
|
| Vandkølerstøtte | Top: Op til 240 mm |
| Max CPU kølerhøjde | 150 mm |
| Max GPU-længde | 290 mm |
| Kabelstyringsplads | 20 mm |
| Max PSU-længde | 190 mm |
7. Garantioplysninger
The Acegeek Ori Rainbow Gaming Case comes with a 12 måneders garanti fra købsdatoen. Denne garanti dækker fabrikationsfejl og materialefejl ved normal brug. Den dækker ikke skader forårsaget af misbrug, ulykker, uautoriserede ændringer eller forkert installation.
Gem venligst dit købsbevis for garantikrav.
8. Kundesupport
For technical assistance, troubleshooting, or warranty inquiries, please contact Acegeek customer support through their official webwebstedet eller den forhandler, hvor du købte produktet.
When contacting support, please have your product model number (AG-ORI-BK-3F) and proof of purchase readily available.